


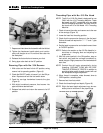

1210 Oil-less Threading Machine
Ridge Tool Company6
ing, misaligned or binding parts as well as any other
conditions which may affect the safe and normal op-
eration of the machine. If any of these conditions
are present, do not use the Threading Machine until
any problem has been repaired.
7. Use tools and accessories that are specifically de-
signed for your Threading Machine and meet the
needs of your application. The correct tools and ac-
cessories allow you to do the job successfully and
safely. Accessories suitable for use with other equip-
ment may be hazardous when used with this
Threading Machine.
8. Clean any oil, grease or dirt from all handles and
controls. This reduces the risk of injury due to a tool
or control slipping from your grip.
9. Inspect the cutting edges of your tools and dies. If
necessary, have them replaced prior to using the
Threading Machine.
NOTE! Use sharp dies at all times. Dull dies require
more power from the motor and produce poor
quality threads.
10. Clean metal shavings and other debris from the chip
tray.
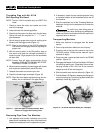
Machine and Work Area Set-Up
WARNING
To prevent serious injury, proper set-up of the
machine and work area is required. The following
procedures should be followed to set-up the ma-
chine:
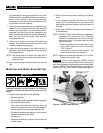
1. Locate a work area that has the following:
• Adequate lighting
• No flammable liquids, vapors or dust that may ignite.
• Grounded electrical outlet
• Clear path to the electrical outlet that does not
contain any sources of heat or oil, sharp edges or
moving parts that may damage electrical cord.
• Dry place for machine and operator. Do not use the
machine while standing in water.
• Level ground
• Adequate ventilation to prevent accumulation of
coolant vapors
2. Clean up the work area prior to setting up any equip-
ment.
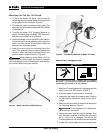
3. If the workpiece extends more than four (4) feet
beyond the Threading Machine, use one or more
pipe stands to prevent tipping and the oscillation of
the pipe.
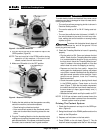
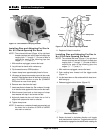
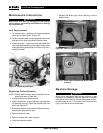
4. Check level of RIDGID Threading Cutting Coolant and
fill as necessary.
NOTE! RIDGID Thread Cutting Coolant is engineered
specifically for use with the 1210 Threading
Machine. It is designed to quickly cool the pipe
and leave a clean, dry thread ready for imme-
diate installation.
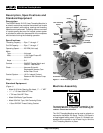
• Observe coolant level in the reservoir by view-
ing the sight glass at the rear of the Model
1210 (Figure 4).
• Unscrew the reservoir cap and pour the
coolant into the reservoir (Figure 4).
NOTE! Reservoir will hold approximately 16 oz. of fluid.
• Replace the reservoir cap.
Use of fluids other than RIDGID Thread
Cutting Coolant will void the RIDGID 1210 warranty and
may cause damage to the threading machine and thread-
ing dies. RIDGID Thread Cutting Coolant should NOT be
used in or with any other RIDGID threading equipment.
CAUTION
Figure 4 – Filling Coolant Reservoir
Sight
Glass