SECTION D: Start up
42
of the control system and any gas control which has
been under water.
• Check around unit for debris and remove combusti-
ble products, i.e. gasoline, etc.
Pre Start-up Check
1. Verify heater is filled with water.
2. Check system piping for leaks. If found, repair
immediately.
3. Vent air from system. Air in system can interfere
with water circulation. If the heater is equipped
with the optional air vent, ensure that it is adjusted
before firing the heater to make sure all air is
vented prior to start-up.
4. Purge air from gas line up to heater.
Initial Start-up
Tools Needed
• (1) 12-0-12, 24” scale U-tube manometer
• (2) 6-0-6, 12” scale U-tube manometer
• (1) Phillips screwdriver
• (1) Crescent wrench
• (1) Multi-meter
• (1) Amp probe
NOTICE: Digital manometers are not recommended.
Preparation
WARNING: Do not turn on gas at this time.
Check Power Supply
With multi-meter at incoming power, check voltage
between:
Hot - Common (≈120 VAC)
Hot - Ground (≈120 VAC)
Common - Ground (< 1 VAC)
WARNING: If Common - Ground is > 1 VAC, STOP:
Contact electrician to correct ground failure. Failure to
do this may burn out 120V-24V transformer, or may
cause other safety control damage or failure.
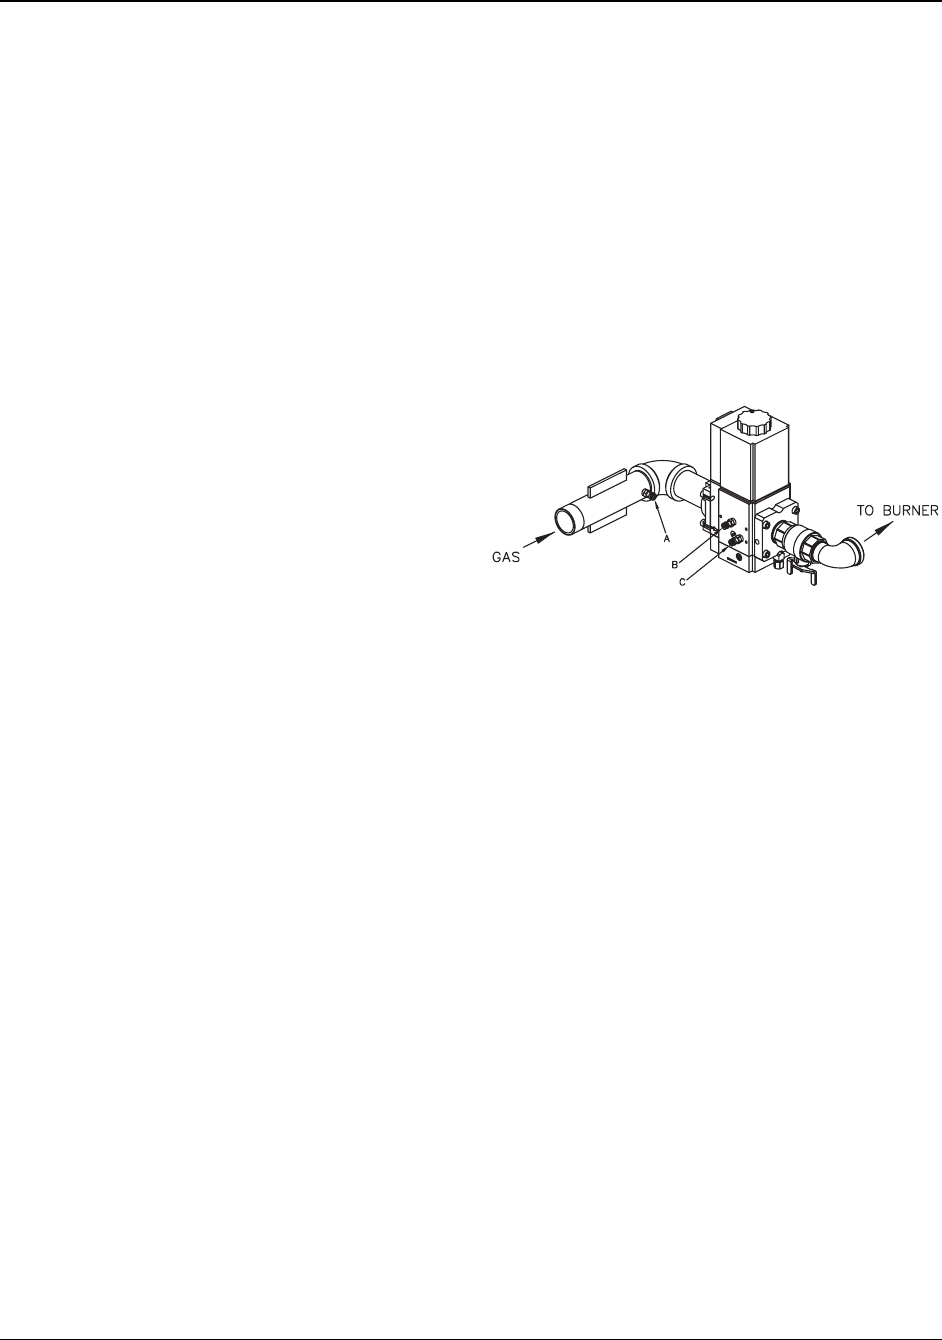
Attach Manometers to Measure Pressures
1. Turn off main gas valve.
2. Attach (1) 12” scale manometer to an upstream
bleedle valve on the gas supply pipe to the heater
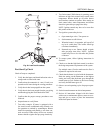
(Measure point “A” in Fig. 39).
3. Attach (1) 24” scale manometer to the manifold
pressure tap located on the valve (Measure point
“C” in Fig. 39).
4. Attach (1) 12” scale manometer near the fan-
proving switch. Pull black cap from air pressure
switch tee and connect the manometer. NOTE: Re-
tain caps for reinstallation later.
Fig. 39: Gas Pressure Measurement Location
Check Gas Supply Pressure
1. Slowly turn on main gas shut-off valve.
2. Read the gas supply pressure from the manometer;
minimum supply pressure for natural gas is 4.0 in.
WC, recommended supply is 7.0 in. WC, mini-
mum supply pressure for propane gas is 4.0 in.
WC, recommended supply is 11.0” WC (dynamic
readings, full fire input).
3. If the pressure is > 14.0 in. WC, turn off the valve.
4. Check if the service regulator is installed and/or
adjust the service regulator.
Start-Up
Blower Adjustment
1. Turn off power.
2. Unplug cap at pressure switch and connect ma-
nometer to the tee.
3. Close manual firing valve.
4. Turn power on.


