


9
Beyond the Basics
registering your Door/Window Sensors with
the console
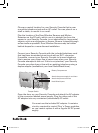
Press either of the Menu / buttons. The display shows
“ENTER PIN” in the top line. When you enter your PIN,
*
displays for each number entered.
Press ok when you see “INSTALL” on the display.
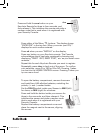
Move the magnet away from your Door/Window Sensor. Your
Security Console acknowledges that it has been registered with
a chime and displays “ZONE 1 SET.”
Repeat this for other Door/Window Sensors you want to
register. The display increments to ZONE 2 SET, etc., as you
install more Door/Window Sensors. If you connected a second
magnetic switch to the contacts on the sensor, move its magnet
away to install the second magnetic switch as a separate zone.
If desired, you can specify the zone for which you want the Door/
Window Sensor to be registered. Simply press the number of the
zone you want on your Security Console’s keypad after Step 2
above.
Repeatedly press clear to back out of the menu. After a short delay,
the display shows “HOME CONTROL” and the time of day.
When you replace the batteries, place the magnet next to the
sensor, and then move it away. If your system does not chime,
you must register the sensor again.
de-registering your Door/Window Sensors
Repeat Steps 1 and 2 above for Registering Door/Window
Sensors.
Press the number of the zone you desire, and then press clear.
The display asks you to confirm the deletion
by pressing 1
for YES or 2 for NO.
Pressing 1 displays the zone number you
removed. Pressing 2 takes you back to the “INSTALL ZONE”
screen.
Repeatedly press clear to back out of the menu. To confirm
your selection, press 1 for YES or 2 for NO. Pressing 1 takes
you back to the “HOME CONTROL” screen. Pressing 2 takes
you up one menu level.
Note
49-1000 UG.indd 9 7/27/2004 6:49:25 PM