


10
Beyond the Basics
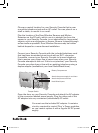
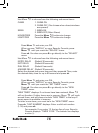
mounting your Door/Window Sensors
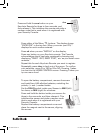
Attach the Door/Window Sensor to the wall using the mounting
screws provided.
Place the Door/Window Sensor as high as possible at the top
of the door/window, aligning the arrows on the magnet and
Door/Window sensor.
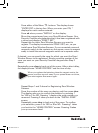
Make sure the arrows on the magnet and the Door/
Window Sensor are facing each other and that they
separate cleanly when the door or window is opened.
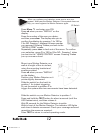
To protect two doors or windows close to each other,
use the Door/Window Sensor with an additional set of
magnetic switch contacts as shown in the diagram above.
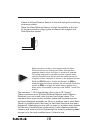
Slide the DELAY switch (inside the Sensor) to MIN to
always trigger the alarm instantly (for windows). Slide the
switch to MAX to trigger the alarm after a preset entry
delay when the system is armed in the “AWAY” mode (for
doors).
The numbers 1 –32 in the display refer to up to 32 “zones.”
These represent up to 30 Door/Window Sensors and/or Motion
Detectors you can install, plus the two hard-wired zones. The
numbers show open zones, problem zones and bypassed zones
by being displayed as steady on (door or window open), slow flash
(there’s a problem with that zone) or fast flash (that zone has been
bypassed). Attempting to arm with an open or problem zone makes
the Security Console beep continuously. It also displays what the
cause is one zone at a time. Bypassing that zone (by pressing clear)
moves on to the next problem zone, if there is one.
Notes