


6
Beyond the Basics
Setting Up Your Security System
reviewing your menu options
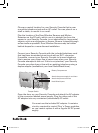
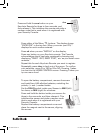
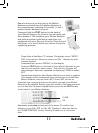
After you’ve connected power to your Security Console, the
display shows the time of day on the bottom left line, and “HOME
CONTROL” in the top line.
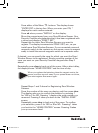
All features (except Home Control) require access to the Menu
mode. To do this, press either of the Menu
/ buttons. The display
then shows “ENTER PIN” (Personal Identification Number) in the
top line.
Enter the default PIN (0000). This clears the top line and shows
*
for each number entered. See page 15 for instructions on how you
can change your PIN. After you enter the PIN, the display shows the
first menu level.
first menu level
To select a menu option, repeatedly press Menu / to scroll
through menu items 1 through 9. Or, you can press number button
1 through 9 on the control panel to go directly to that menu item.
Once you arrive at the menu item you desire, press ok to select it.
1. INSTALL Allows installation/removal of sensors, and/
or remotes.
2. SET CLOCK Enter time followed by am or pm.
3. PHONE NUMS Store up to six (16 digit) phone numbers.
4. MESSAGE RECORD (This is your own alarm message)
REPLAY (Replays your message).
5. NEW PIN Enter new 4 digit PIN.
6. MEMORY CLEAR Clear all Sensors, Remotes, Timers, or
Master Clear.
7. OPTIONS Set Chime On/Off, Siren On/Off, Set
Housecode or Light Code.
8. DELAYS Set Exit, Entry, Dial, and Answer Delays.
9. SET TIMER Enter unit code, then On and Off time, then
Daily, Once or Random.
To leave the first menu level, press
clear. If you are entering
numbers (for the time, etc.), the clear button will clear all numbers
entered. Otherwise, clear gives the option of leaving the menu
completely and going back to the “HOME CONTROL” mode, or
staying in the “INSTALL” mode.
49-1000 UG.indd 6 7/27/2004 6:49:20 PM