Page 38
FIRST FIRE
NOTE: Never operate this stove with the door open.
Before first firing the stove, read the owner’s manual to familiarize yourself with the stove’s features,
controls, and cautions for operation.
Remove all labels from glass before operating this stove for the first time.
Plug power cord into a properly installed outlet for blower operation.
During your first fire in the stove, you may notice an odor and steam coming from the stove. This is
normal, it is the high temperature paint finishing the curing process. Open doors and windows in your
home or structure for ventilation.
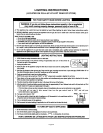
1. Follow the procedure under lighting instructions on page 39 of this manual (also located on the back
of the stove).
2. After a flame has been established for 2 minutes, turn off the burner switch located at the top right of
appliance. Turn this switch on and off while watching the flame area of stove to verify correct lighting
through the nugget bed. If ignition is noisy or is delayed momentarily, the nuggets in that area may
need to be rearranged.
3. Allow flame to burn for at least 20 minutes or until orange halo in the flame disapears.
It is recommended that the stove be cycled by turning stove on for twenty minutes, and then turned off to
cool for five minutes. Then turn the stove back on and burn until the steam and/or odor are no longer
present.
If odor persists, turn the gas supply to the stove off and call your local dealer or authorized service agent.
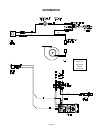
The blower system has an on/off thermally operated snap disc that will turn the blower on automatically
when the proper temperature is reached and turns the blower off when the temperature cools. You may
also turn the blower on or off manually and adjust the volume. It will still be necessary for the snap disc to
be up to temp. The blower controls are located on a box at the right rear top of stove.
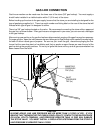
SHUTTER ADJUSTMENT
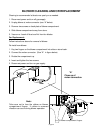
1. Remove left side panel prior to lighting stove.
2. Light stove and let unit burn for approximately 20 minutes to allow logs to cure. While logs are
curing you may notice a bright orange flame, this is normal. When this flame turns to yellow or
disappears, the shutter adjustment can take place.
3. The shutter is pre-set at the factory so shutter adjustment may not be necessary. If flame height
adjustment is required, turn the adjustment screw clockwise to close shutter and obtain a yellow
flame. For a blue flame with more glow, turn the adjustment screw counter-clockwise to open the
shutter.
4. Wait five minutes to allow for flame to settle. If the flame is not satisfactory, repeat the procedure in
step #3.
5. When the desired flame is acquired, replace the side panel.
CAUTION: DO NOT CLOSE THE SHUTTER TO THE POINT THAT THE FLAMES ARE TALL AND
STRINGY. THIS COULD RESULT IN THE FORMATION OF SOOT BOTH INSIDE THE FIREBOX
AND ON THE OUTSIDE OF YOUR HOME.


