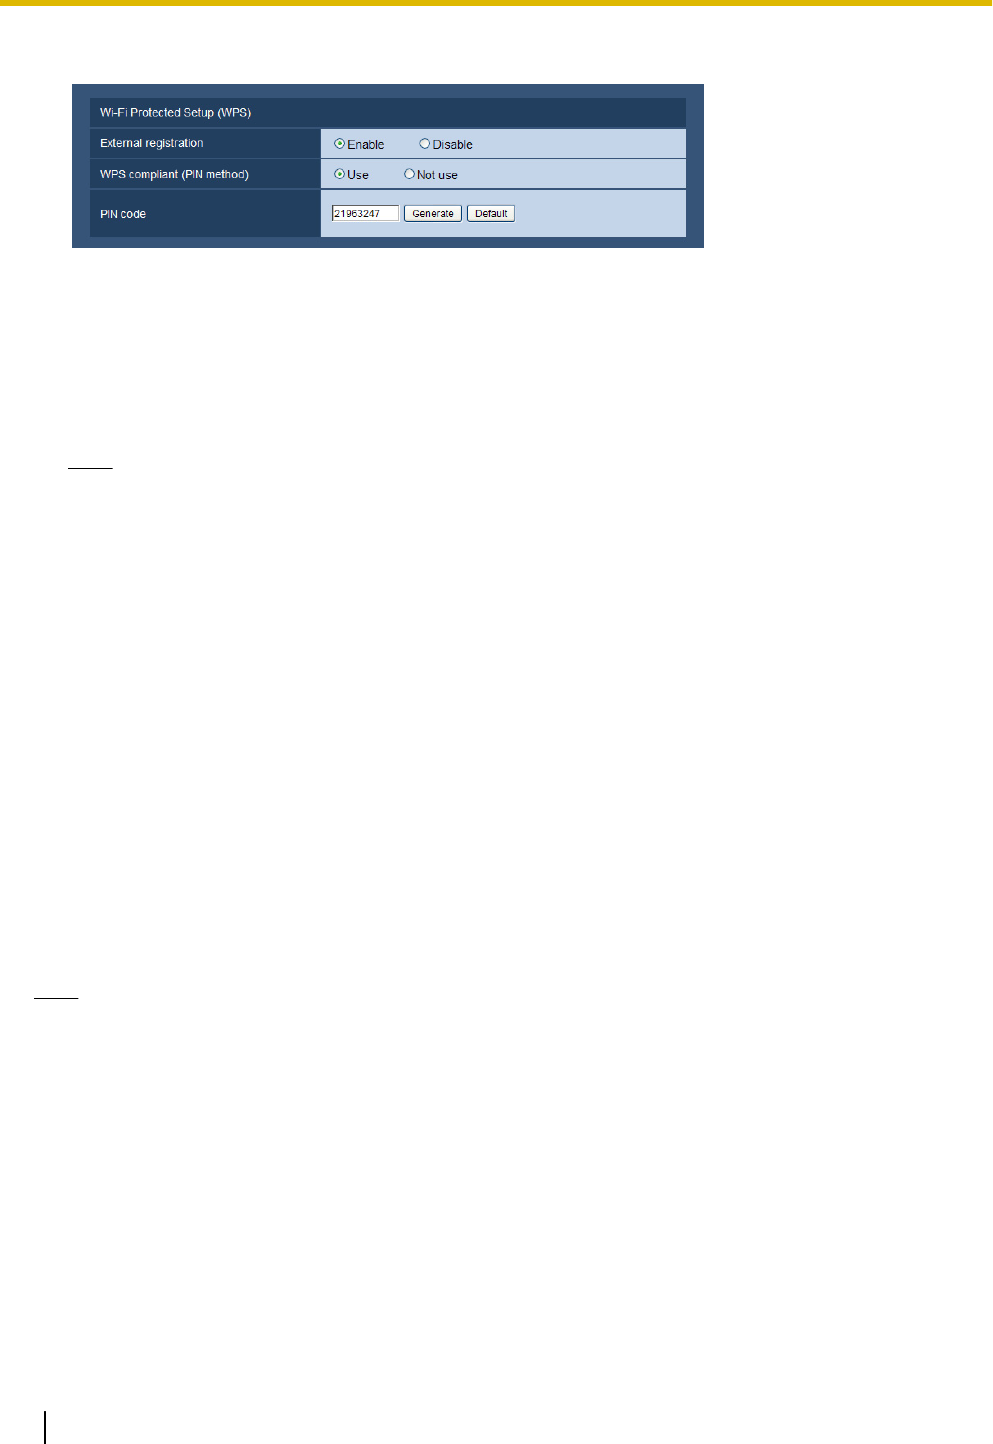
3. Configure [Wi-Fi Protected Setup (WPS)].
– Select “Enable” for “External registration”. (Default: Enable)
– Select “Use” for “WPS compliant (PIN method)”. (Default: Not use)
– Enter the wireless router's 8 digit PIN code in the “PIN code” field.
• Available number of characters: 8 characters
• Available characters: Numbers
• Default: None (blank)
Note
• When “Use” is selected for “WPS compliant (PIN method)”, settings cannot be performed
automatically using the WIRELESS button during start up for the PIN method.
4. Click the [Set] button.
→ A message asking you if you want to restart the camera is displayed. Click [OK]. Wait about 2 minutes
until the camera restarts.
5. Disconnect the LAN cable from the camera and reconnect the camera to the power outlet.
→ The camera will start about 90 seconds after connecting the power.
• After the camera is started, the WPS settings are only active for about 2 minutes. Therefore, perform
the settings in step 6 as quickly as possible (within 2 minutes).
6. Select ON for the WPS function (PIN code method) on the wireless router. (For more information, refer to
the operating instructions included with your wireless router.)
→ Settings between the wireless router and the camera will automatically start.
→ The WIRELESS indicator stops blinking orange and lights green. When the POWER indicator lights
green, the wireless settings have been successfully completed.
7. After the WIRELESS indicator lights green, start the “IP Setting Software” on the PC and access the
camera.
• See page 161 for information on accessing the camera with the “IP Setting Software”.
• Confirm the status of the wireless connection on the [Status] tab of the “Wireless” page.
(®page 148)
Note
• If about 2 minutes pass after the WIRELESS indicator starts blinking and the wireless connection is
not completed, the WIRELESS indicator will blink red for about 10 seconds and then go off. If this
happens the wireless settings have failed. Check the wireless router's settings and connection
procedures, and then try performing the settings again.
• If the WPS settings fail to automatically configure, check the settings of the wireless router and the
camera.
• If you want to turn off the WIRELESS indicator’s and POWER indicator's green light, change the
“Indicator” settings on the “Basic” page. (®page 41)
• When the WPS settings have successfully been automatically configured, “External registration” is
changed to “Disable” from “Enable”.
Using a selected PIN code set to the camera
1. Connect the PC to the camera with a wired LAN connection and click the [Basic] tab on the “Wireless”
page.
146 Operating Instructions
16 Use the camera on a wireless LAN [Wireless] (BL-VT164W/BL-VP104W)


