


6. Remove snap-fit red cap from coil assembly and
slide coil off the actuator.
7. Loosen actuator with wrench and unscrew from
plastic valve body.
8. Clean the exposed core and spring and plastic
drain valve port.
9. Important: Tapered end of spring must be
installed toward the solenoid. Reassemble,
tighten actuator 1/4-turn past hand-tight.
10. Clean out the end of the hose, then reconnect it to
the drain valve body with the clamp.
11. Fit mounting screws through drain valve body, one
through ring terminal on green ground wire.
12. WARNING: To prevent the possibility of electrical
shock the green ground wire must be reinstalled
before power is restored.
13. Push the two slip-on terminals back onto the two
tabs on the coil. The terminals, although not
identical, are reversible.
HOW TO INSTALL THE REPLACEMENT
CYLINDER
1. Reverse procedure should be followed to install
new cylinder. Main disconnect is to be left open
until cylinder is completely installed and
reconnected.
2. Ensure that cylinder is secured properly by the
re-usable tie wrap and mounting brackets within
the unit.
3. The cylinder plug wires are color-coded in
accordance with colored dots beside the electrode
pins on top of the cylinder.
4. This color-coding must be adhered to when
replacing cylinder plugs on pins.
5. With cylinders having six primary voltage
cylinder
plugs
, it should be noted that there are two of each
color.
6. Care must be taken so that cylinder leads of the
same color
are always directly opposite each other
as indicated by the dot formation on the top of the
cylinder.
7. The white cylinder plug on all units is for the
sensor electrode which always goes on the single
pin surrounded by a plastic shoulder.
8. Ensure that cylinder plugs fit snugly on the pins.
9. If cylinder plugs become loose, it is best to obtain
a new replacement plug. Consult factory.
EXTENDED SHUTDOWN
Before disconnecting power to the humidifier for a
period of extended shutdown, ALWAYS DRAIN the
cylinder first. Otherwise, the electrodes are subject to
harmful corrosion which drastically shortens cylinder
life. Do NOT leave the switch in the DRAIN position
indefinitely as the drain coil could burn out. Leave the
switch in the OFF position and “open” the main
external fused disconnect to stop power to the
humidifier. Close the shut off valve in the water supply
line feeding the humidifier. Lock the cabinet door(s) to
prevent unauthorized tampering. All doors are factory
supplied with keyed locks. DO NOT LEAVE KEY IN
LOCK. ACCESS SHOULD BE LIMITED TO
AUTHORIZED PERSONNEL ONLY.
As long as the NHMC is powered, it will
automatically drain the cylinder when there has not
been a call for humidity for an extended period of time.
The cylinder will remain empty until there is a call for
humidity at which time the fill valve will open and refill
the cylinder. The unit will go through its normal
stabilization process for optimum operation.
-14-
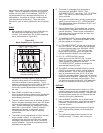
0.50
10 ga Wire
Cylinder plug
Hex (Allen)
5/64 (2mm)
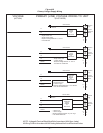
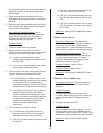
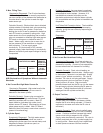
Cylinder Plug Installation Instruction
for Part # 135-4012 (R,Yor B)
12/08/94
Cylinder Plug
Cylinder Plug Installation Instruction
For Part # 135-4012 (R, Y, or B)
0.50"
10 GA Wire
Hex (Allen)
5/64" (2 mm)
Figure #16
Cylinder Plug Installation
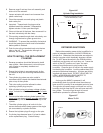
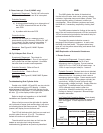
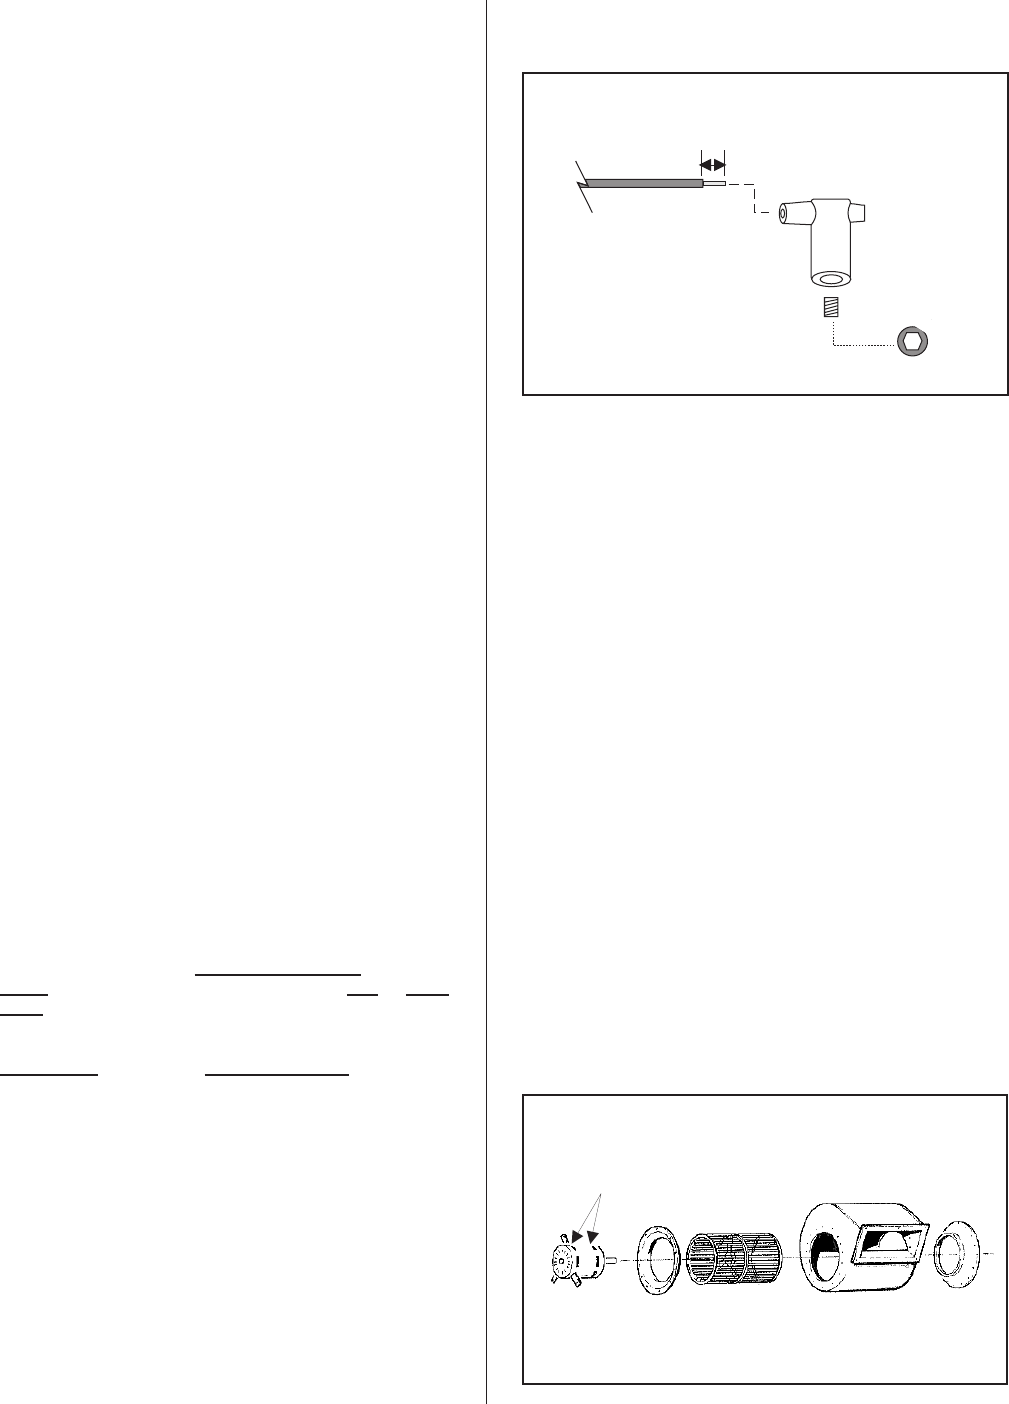
Oil Here
Figure #17
Where To Oil