[ VIII Test Run Mode ]
- 123 -
HWE09120 GB
VIII Test Run Mode
[1] Items to be checked before a Test Run
(1) Check for refrigerant leak and loose cables and connectors.
(2) Measure the insulation resistance between the power supply terminal block and the ground with a 500V megger and
make sure it reads at least 1.0Mohm.
Do not operate the unit if the insulation resistance is below 1.0Mohm.
Do not apply megger voltage to the terminal block for transmission line. Doing so will damage the controller board.
The insulation resistance between the power supply terminal block and the ground could go down to close to 1Mohm imme-
diately after installation or when the power is kept off for an extended period of time because of the accumulation of refrigerant
in the compressor.
If insulation resistance reads at least 1Mohm, by turning on the main power and powering the belt heater for at least 12 hours,
the refrigerant in the compressor will evaporate and the insulation resistance will go up.
Do not measure the insulation resistance of the terminal block for transmission line for the unit remote controller.
(3) Check that the valve on the gas pipe and liquid pipe are fully open.
Securely tighten the cap.
(4) Check the phase sequence and the voltage of the power supply.
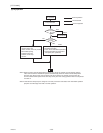
(5) [When a transmission booster is connected]
Turn on the transmission booster before turning on the outdoor units.
If the outdoor units are turned on first, the connection information for the refrigerant circuit may not be properly recognized.
In case the outdoor units are turned on before the transmission booster is turned on, perform a power reset on the outdoor
units after turning on the power booster.
(6) Turn on the main power to the unit at least 12 hours before test run to power the belt heater.
Insufficient powering time may result in compressor damage.
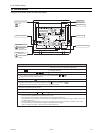
(7) When a power supply unit is connected to the transmission line for centralized control, perform a test run with the
power supply unit being energized. Leave the power jumper connector on CN41 as it is (factory setting).


