


8
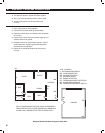
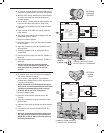
CONSOLE LOCATION
✎ NOTE: Wireless sensor signals must be able to
reach the Console.
✔ Try to centrally locate the Console.
✔ Keep Console away from large metal
appliances.
✔ Maximum recommended sensor range is 400
feet (system tested at 1000 feet).
✎ NOTE: If you don't use the Wireless Keypad, the
Console should be easily accessible to the usual
entrance.
✔ When the Console is set in the Away Mode,
the user has 30 seconds to switch to Off Mode
before the burglary siren sounds.
✎ NOTE: Make sure the Console is in a place where
the alarm can be heard during the night hours.
✔ Optional remote external sirens (up to 150 feet
from the Console) can be used to make alarms
louder and remote the sound location.
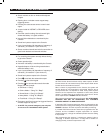
1. Locate the Console near a 115 VAC outlet that's not
controlled by a light switch.
2. Locate the Console near a telephone outlet (if using
the digital communicator).
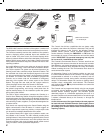
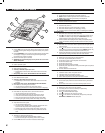
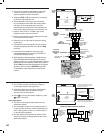
CASE LOCKING SCREW
✦ To access the Console’s internal components or
to prepare the Console for wall mounting, the case
locking screw needs removing.
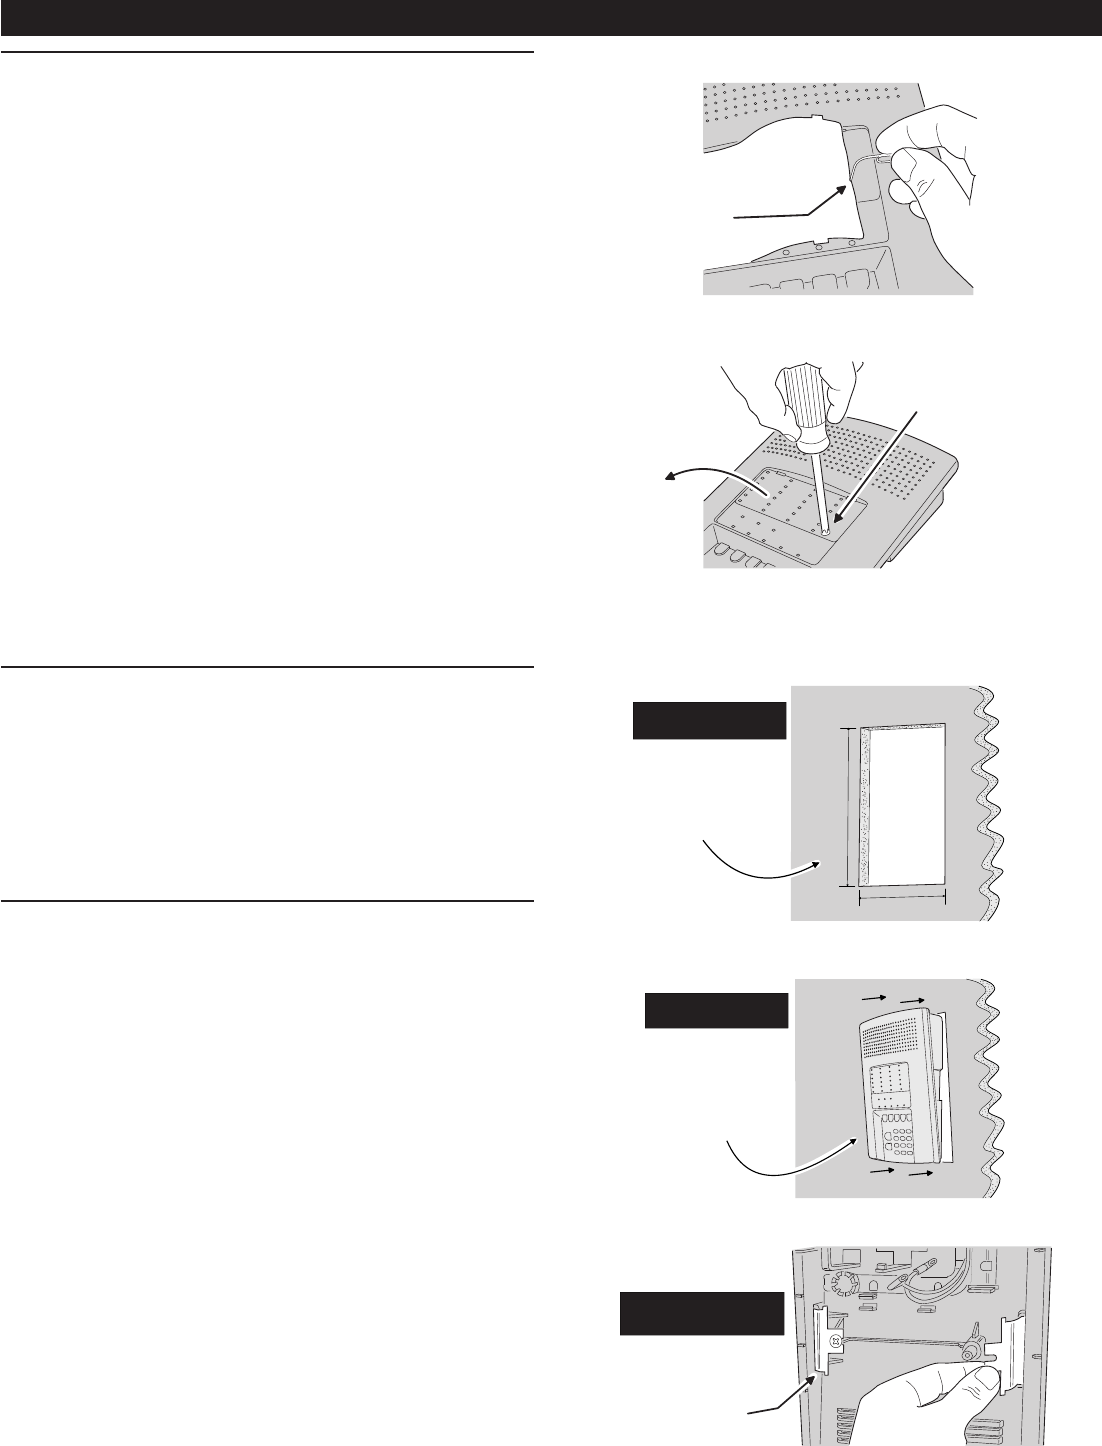
1. Use a paper clip to remove the clear plastic display
window.
2. Remove the sensor number nameplate.
3. Remove the case locking screw.
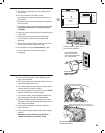
WALL MOUNTING
✦ If desired, the Console can be surface mounted or
recessed into the wall.
Surface Mounting
1. For surface mounting, use the Console’s case
bottom as a template and mark the locations for the
four mounting screws.
2. Use four screws and appropriate screw anchors
to temporarily mount the unit to the wall (the unit
will need to be removed to complete the recessed
wiring hook up).
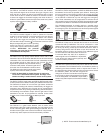
Recessed Mounting
1. For recessed wall mounting, cut a 10” by 6-3/4”
hole, centered between studs, in the mounting wall
at a convenient height.
2. Slide the unit into the mounting hole and
temporarily secure it with the two retaining clamps
and screws provided (the unit will need to be
removed to complete the recessed wiring hook up).
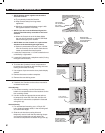
5. CONSOLE INSTALLATION
USE A PAPER
CLIP TO REMOVE
THE CLEAR
DISPLAY WINDOW
REMOVE SENSOR
NAMEPLATE TO
ACCESS CASE
SCREW
REMOVE CASE
LOCKING SCREW TO
ACCESS INTERNAL
COMPONENTS
6 3/4"
10"
CUT A 10" x 6 3/4"
HOLE CENTERED
BETWEEN STUDS
IN MOUNTING WALL
AT A CONVENIENT
HEIGHT
FOR RECESSED
WALL MOUNTING ONLY
SLIDE CONSOLE
INTO WALL OPENING
FOR RECESSED
WALL MOUNTING ONLY
SECURE CONSOLE
TO WALL USING THE
TWO CLAMPS AND
SCREWS PROVIDED
FOR RECESSED
WALL MOUNTING ONLY