


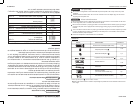
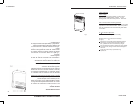

6
AIR CONDITIONER FE ATURES
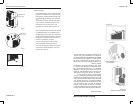
Before you begin, familiarize yourself with the control panel and remote controller
and all its functions, then follow the symbol for the functions you desire.
The unit can be controlled by the unit control panel alone or with the remote controller .
ELECTRONIC CONTROL OPERATING INSTRUCTIONS
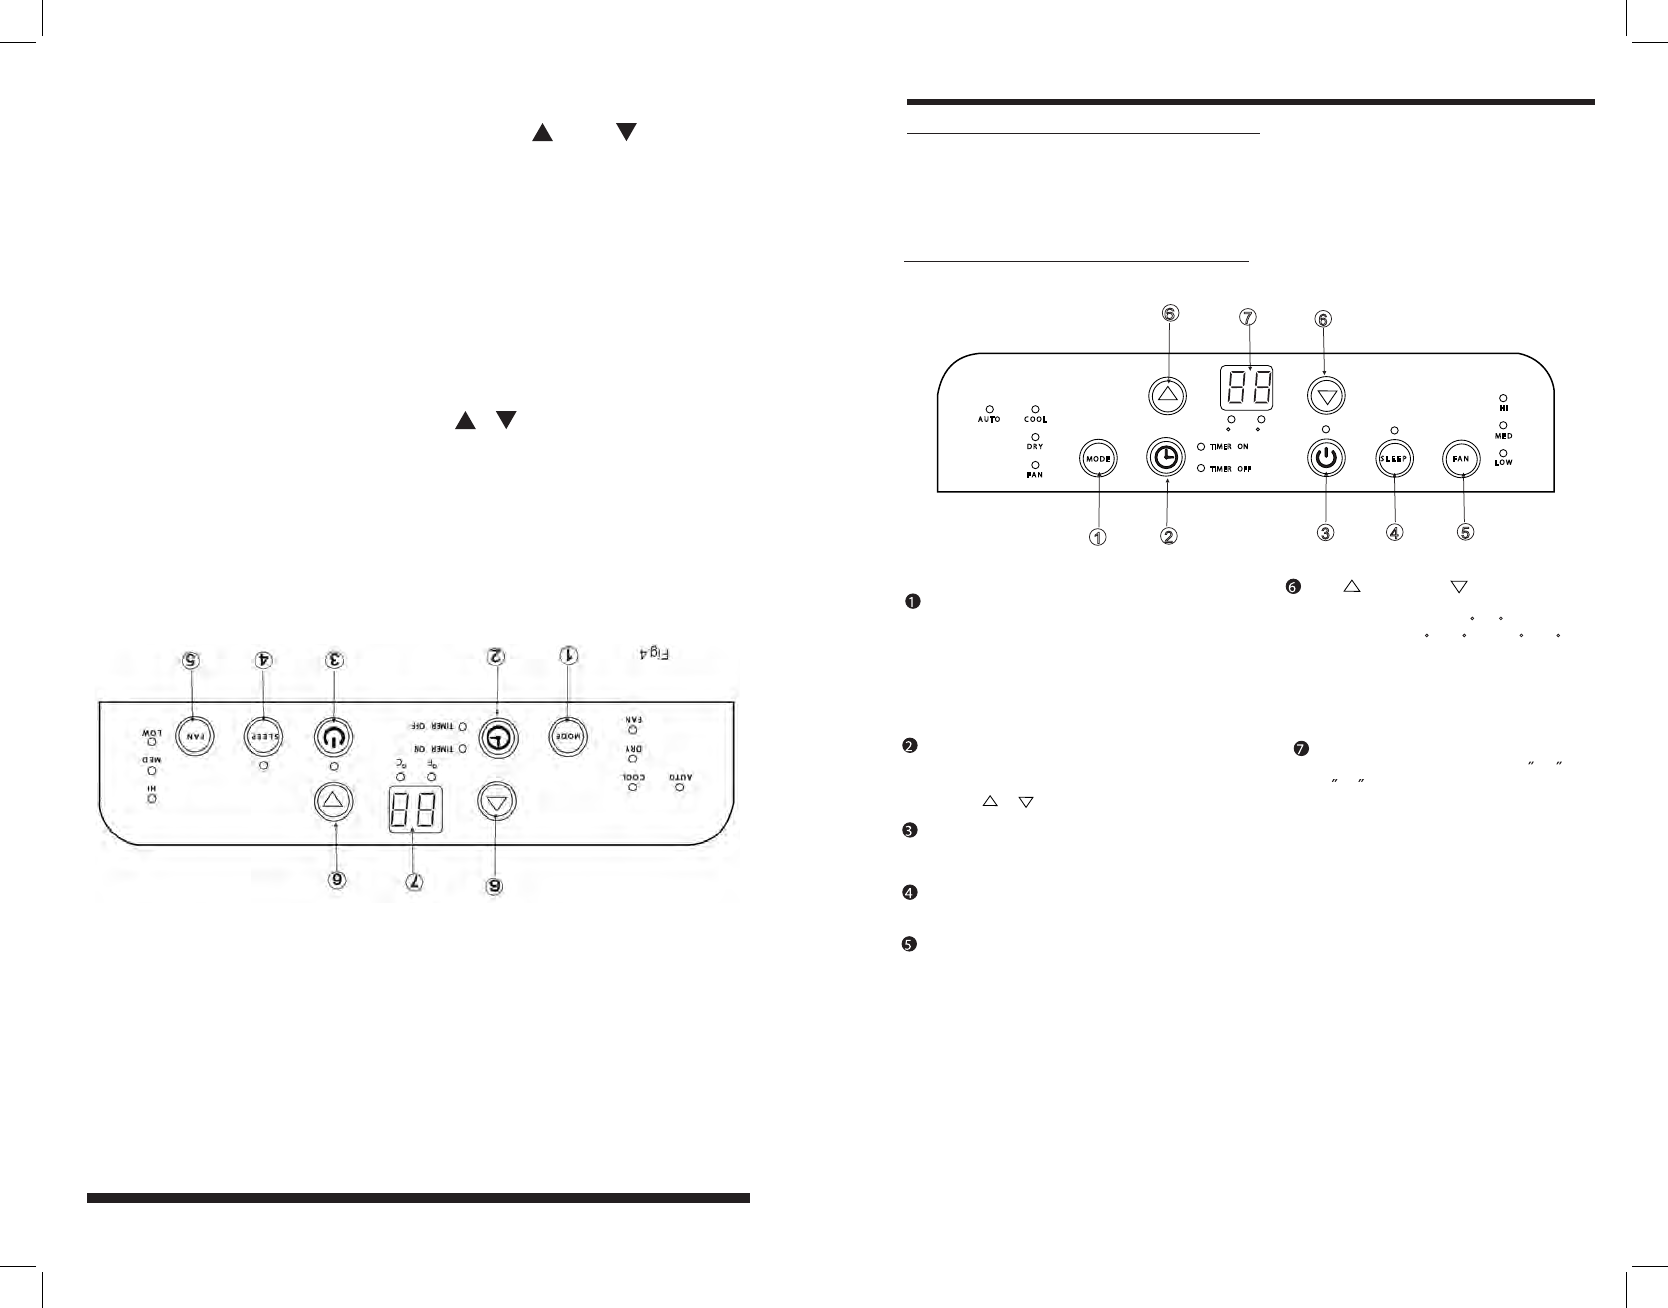
Fig.4
NOTE: This manual d oes not include Remote Controller Operations, see the <<Remote
Controller Instruction>> packed with the unit for details.
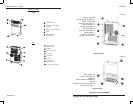
OPERATION PANEL OF THE AIR CONDITIONER
6
2
3
4
5
7
1
Selects the appropriate operating mode.
Each time you press the button, a mode
is selected in a sequence that goes from
AUTO, COOL, DRY and, FAN .
The mode indicator light
illuminates under the different mode settings
Fig.4.
MODE select button
1
Used to adjust (increase/decrease)
temperature settings(1 C/2 F increments)
in a range of 17 C(62 F) to 30 C(88 F) or
the TIMER setting in a range of 0~24hrs..
6
UP ( ) and DOWN( ) button
NOTE: The control is capable of displaying
temperature in degrees Fahrenheit or degrees
Celsius. To convert from one to the other, press
and hold the Up and Down buttons at the same
time, for 3 seconds.
3
Used to initiate the AUTO ON start time and
AUTO OFF stop time program, in conjuction
with the & buttons.
TIMER button
4
Used to initiate the SLEEP operation.
SLEEP button
6
2
Power switch on/off.
POWER button
AUTO COOL
DRY
FAN
MODE
SLEEP FAN
HI
MED
LOW
TIMER ON
TIMER OFF
F
C
5
FAN button
7
Shows the set temperature in C
O
or
F and the Auto-timer settings.
While on DRY and FAN modes, it shows
the room temperature.
O
LED Display
Control the fan speed. Press to select the fan
speed in four steps-LOW, MED, HI and AUTO.
The fan speed indicator light illuminates under
different fan settings except AUTO speed. When
select AUTO fan speed, all the fan indicator lights
turn dark.
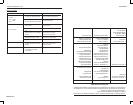
Error codes:
E1-
E2-
E4-
P1-
Room temperature sensor error-
Unplug the unit and plug it back in.
If error repeats, call for service.
Evaporator temperature sensor error-
Unplug the unit and plug it back in.
If error repeats, call for service.
error-
Unplug the unit and plug it back in.
If error repeats, call for service.
Bottom tray is full - Connect the
drain hose and drain the collected
water away. If error repeats, call
for service.
Display panel communication
CARACTERÍSTICAS DEL EQUIPO DE AIRE ACONDICIONADO
Instrucciones de funcionamiento del control eléctrico
Antes de comenzar, familiarícese completamente con el panel de control y el
control remoto y todas sus funciones y luego siga los símbolos según las fun-
ciones necesarias.
Este equipo puede controlarse a través del panel de control solamente o a
través del control remoto.
NOTA: Este manual no incluye las instrucciones para el control remoto. Véase
el Manual de Instrucciones del Control Remoto dentro del empaque del equipo
para más detalles.
FUNCIONAMIENTO DEL PANEL DEL EQUIPO DE AIRE ACONDICIONADO
1. Botón de selección de funciones MODE
Sirve para seleccionar la opción de funciona-
miento adecuada. Cada vez que se presio-
ne este botón, se seleccionará una función
de manera secuencial que pasa por AUTO,
COOL (enfriamiento), DRY (deshumedece-
dor) y FAN (ventilador). La luz indicadora de
función se iluminará debajo de la opción se-
leccionada. Figura 4.
2. Botón del temporizador TIMER
Utilice este botón para iniciar el programa de
hora de encendido automático “AUTO ON” y
de hora de apagado automático “AUTO OFF”
en combinación con los botones y .
3. Botón de encendido POWER
Botón para encender y apagar.
4. Botón SLEEP
Utilizado para activar la función SLEEP
(apagado automático después de cierto peri-
odo de tiempo).
5. Botón del ventilador FAN
Sirve para controlar la velocidad del venti-
lador. Presione para seleccionar la veloci-
dad del ventilador en cuatro opciones: LOW
(baja), MED (media), HI (alta) y AUTO (au-
tomática). Las luces indicadoras de velocidad
de ventilador se iluminarán debajo de la op-
ción seleccionada excepto bajo la velocidad
AUTO. Si se selecciona la velocidad de ven-
tilador AUTO, todas las luces indicadoras del
ventilador quedarán desactivadas.
6. Botón Arriba / Abajo
Utilice este botón para regular (aumentar /
disminuir) los niveles de temperatura (en in-
crementos de 1°C / 2°F) dentro de un rango de
17°C (62°F) hasta 30°C (88°F) o en el caso de
usarse con el temporizador (TIMER), el rango
es de 0 a 24 horas.
NOTA: El panel de control puede mostrar la
temperatura en grados Fahrenheit o en gra-
dos Celsius. Para pasar de un sistema a otro,
presione y mantenga presionado los botones
Arriba (gura) / Abajo (gura) al mismo tiempo
durante 3 segundos
7. Pantalla LED
Muestra la temperatura seleccionada en gra-
dos “°C” o “°F” y las opciones del temporizador.
Bajo las opciones de DRY (deshumedecedor)
y FAN (ventilador), muestra la temperatura de
ambiente.
Códigos de error:
E1 – Error de sensor de temperatura de am-
biente.
Desenchufe el equipo y vuélvalo a enchufar. Si
el error persiste, póngase en contacto con el
servicio técnico.
E2 – Error de sensor de temperatura del evapo-
rador. Desenchufe el equipo y
vuélvalo a enchufar. Si el error persiste, pón-
gase en contacto con el servicio técnico.
E4 – Error de comunicación del panel. Desen-
chufe el equipo y
vuélvalo a enchufar. Si el error persiste, pón-
gase en contacto con el servicio técnico.
P1 – La bandeja inferior se encuentra llena. Co-
necte la manguera de drenaje y desagüe toda
el agua acumulada. Si el error persiste, pón-
gase en contacto con el servicio técnico.
ESPAÑOL 6
ENGLISH 6