


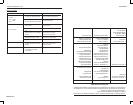
CARE AN D MAINTENANCE
CARE AND MAINTENANCE
1) Be sure to unplug the unit before cleaning or servicing.
2) Do not use gasoline, thinner or other chemicals to clean
the unit.
3) Do not wash the unit directly under a tap or using a hose.
It may cause electrical danger.
4) If the power cord is damaged, it should be repaired by
a qualified repair man.
IMPORTANT:
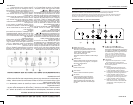
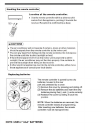
1. Air
- Clean the air filter at least once every two weeks to prevent
inferior fan operation because of dust.
-
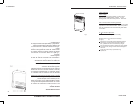
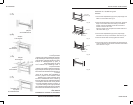
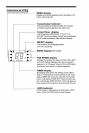
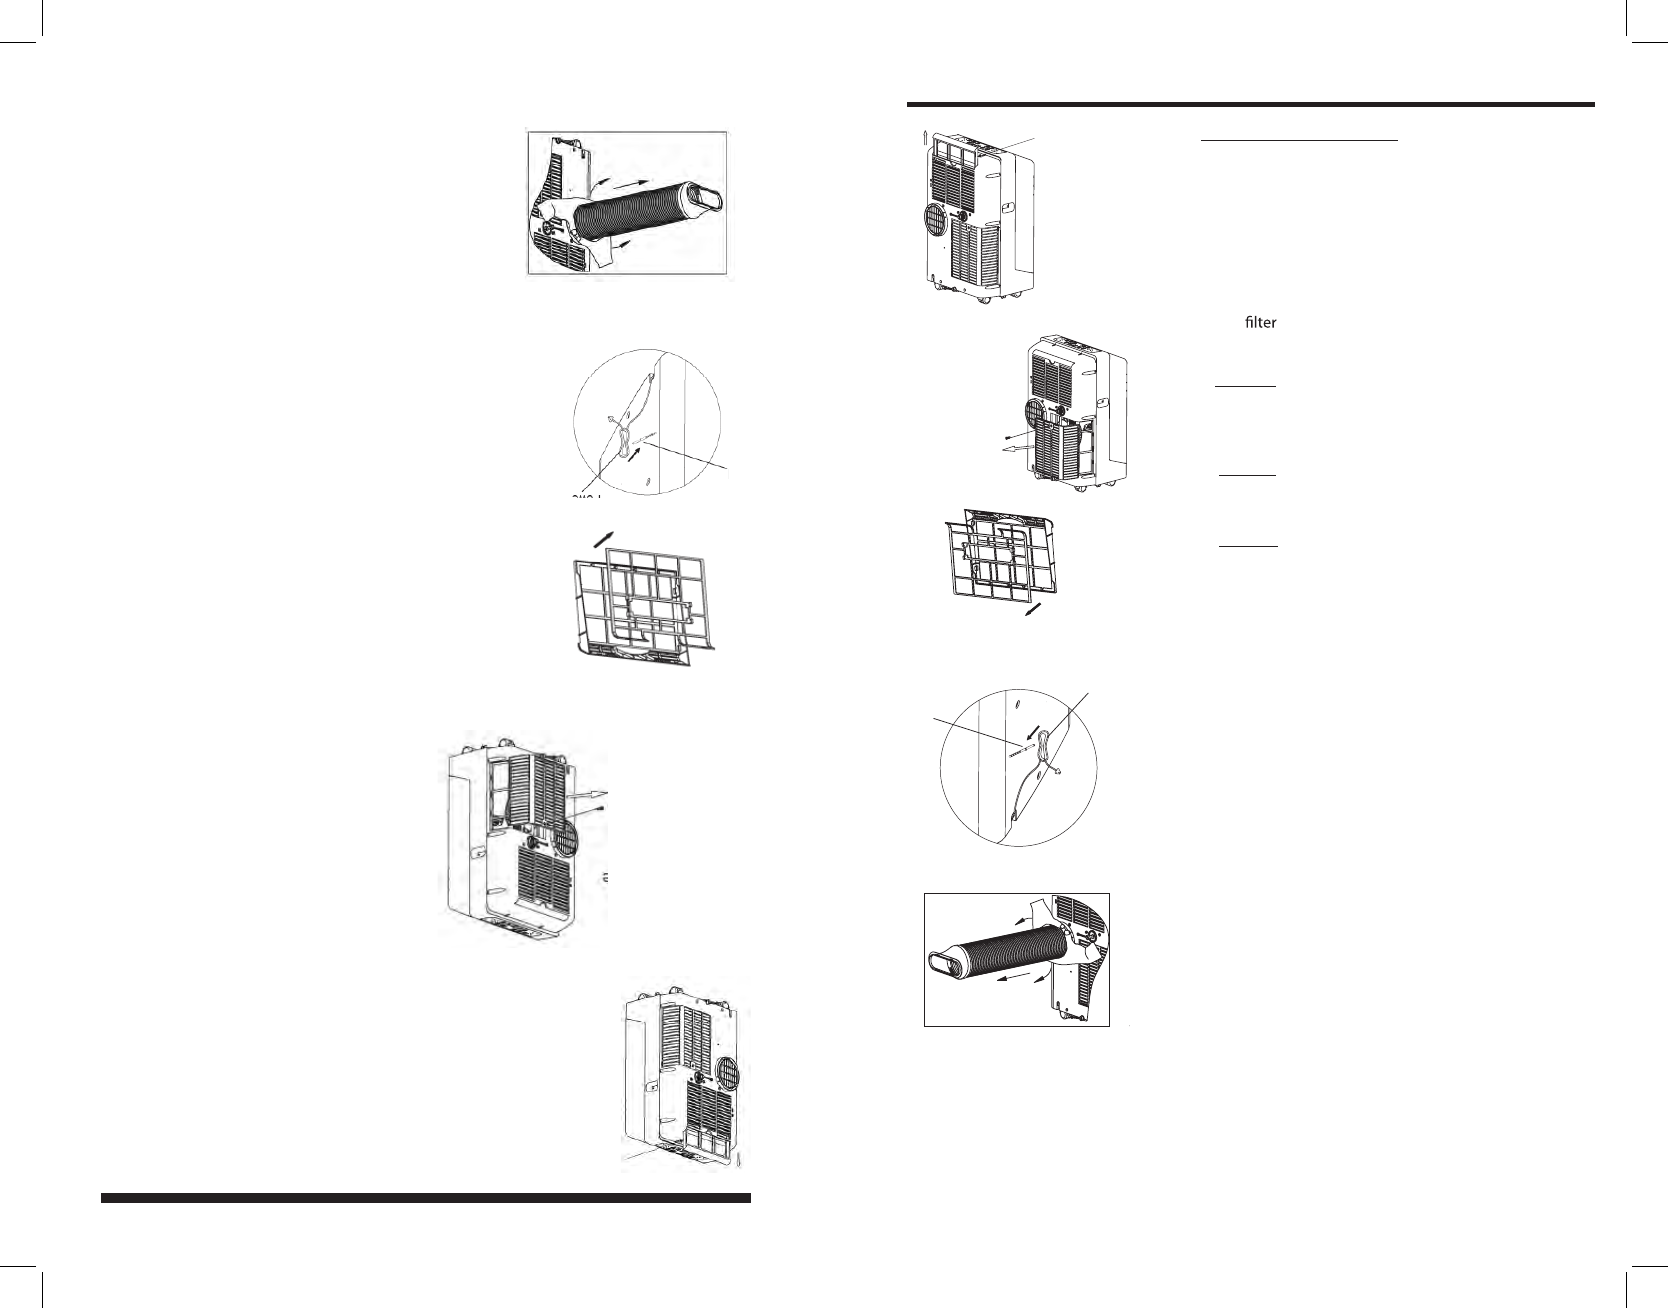
This unit has two filters. Grasp the upper filter tab(Fig.26),
pull the filter out then up . Remove the lower filter by
loosening the screw, taking down the air inlet grille, then
removing the air filter as shown in Fig.27 & 28.
-
Wash the air filter by immersing it gently in warm water
(about 40 C/104 F) with a neutral detergent. Rinse the filter
and dry it.
-
Insert the upper air filter from top after cleaning, attach
the lower air filter on the air inlet grille, then install the grille
by using the screw.
Removal
Cleaning
Mounting
, , , ,
O O
2. Unit enclosure
- Use a lint-free cloth soaked with neutral detergent to clean
the unit enclosure. Finished by a dry clean cloth.
Fig.26
3. Unit idle for a long time
14
, ,
, ,
Air filter
(slide out)
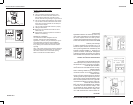
- Remove the rubber plug at the back of the unit and attach
a hose to drain outlet
(See Fig.23 & 24).
- Remove the plug from the bottom drain outlet, all the water
in the bottom tray would drain out (See Fig.25).
- Keep the appliance running on FAN mode for half a day in
a warm room to dry the appliance inside and prevent mold
forming.
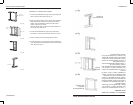
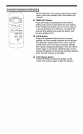
- Stop the appliance and unplug it, wrap the cord and
bundle it with the tape(Fig.29). Remove the batteries from
the remote controller.
- Clean the air filter and reinstall it.
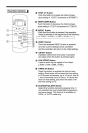
- Unscrew the exhaust hose to the right or left and pull out
for uninstallation(Fig.30), keep it safely, and cover the
window(wall) hole with the adaptor cap.
. Place the open end of the hose
directly over the drain area in your basement floor
Fig.27
Fig.29
Remove the
screw and
take the air
inlet grille
down
Remove the air filter
out from the grille
Fig.28
Band
Power cord
Fig.30
Filtro de aire
(Deslice hacia afuera)
Figura 26
Retire los tres tornillos
y saque y retire la re-
jilla de ingreso de aire
Figura 27
Retire el ltro de
aire de la rejilla
Figura 28
Cordón de
alimentación
CUIDADO Y MANTENIMIENTO
IMPORTANTE:
1)Asegúrese de desenchufar el aparato antes
de proceder con la limpieza o efectuar cu-
alquier tipo de mantenimiento.
2) No utilice gasolina, diluyente u otros quími-
cos para limpiar el equipo.
3) No lave el equipo directamente bajo el agua
o utilizando una manguera. Esto puede cau-
sar eventualidades eléctricas.
4) Si el cordón se dañara, éste debe ser repa-
rado por parte de un técnico calicado.
1. Filtro de aire
- Limpie el ltro de aire por lo menos una
vez cada dos semanas para evitar el funcio-
namiento indeciente del ventilador debido al
polvo.
- Cómo retirar el ltro
Este equipo cuenta con dos ltros. Sujete la
lengüeta del ltro superior (gura 26) y tire del
ltro hacia afuera y hacia arriba para sacarlo.
Retire el ltro inferior soltando los tornillos,
retirando la rejilla de ingreso de aire y luego
sacando el ltro de aire como se muestra en
las guras 27 y 28.
- Limpieza
Lave el ltro sumergiéndolo con cuidado en
agua tibia (aproximadamente
40°C / 104ºF) utilizando
detergente neutral. Enjuague el ltro y déjelo
secar.
- Cómo volver a colocar los ltros
Inserte el ltro superior desde arriba después
de limpiarlo. Acople el ltro inferior de aire a
la rejilla de ingreso de aire y luego instale la
rejilla utilizando los tornillos.
2. Cómo limpiar el exterior del equipo
- Utilice un paño libre de pelusas humedecido
con detergente neutral para limpiar el exterior
del equipo. Termine utilizando un paño limpio
y seco.
3. Equipo sin uso durante un periodo pro-
longado
- Retire el tapón de jebe en la parte posterior
del equipo y coloque la manguera a la salida
de drenaje. Coloque la parte abierta de la
manguera directamente sobre la zona de dre-
naje o un sumidero en el piso (véase las gu-
ras 23 y 24).
- Retire el tapón de la salida de drenaje inferior
para permitir el desagüe de toda el agua acu-
mulada en la bandeja inferior (véase la gura
25).
- Mantenga el equipo funcionando bajo la fun-
ción FAN durante mediodía en un ambiente
tibio para permitir que el electrodoméstico
se seque por dentro y evitar la formación de
moho.
Figura 29
Figura 30
ESPAÑOL 14
ENGLISH 14