T7350 COMMERCIAL PROGRAMMABLE THERMOSTAT
33 63-2605—5
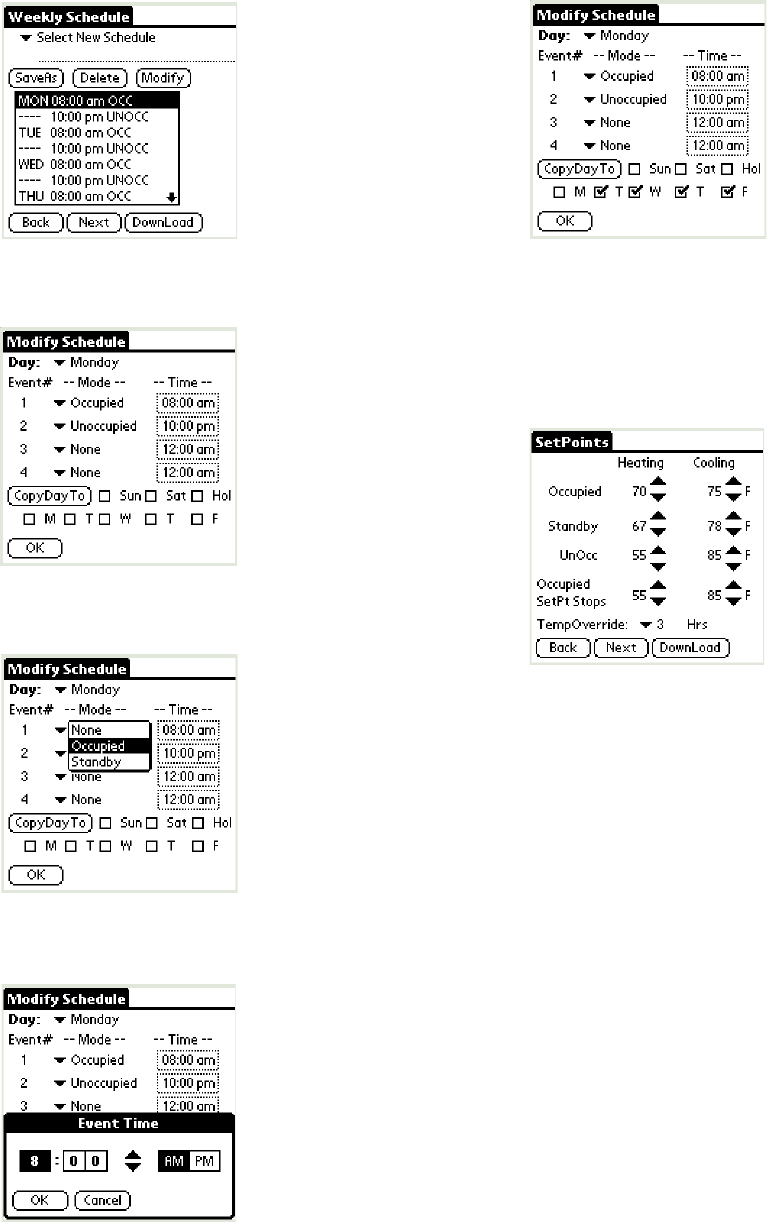
Fig. 36. Weekly Schedule screen.
Fig. 37. Weekly Schedule modification screen.
Fig. 38. Weekly Schedule Mode modification.
Fig. 39. Weekly Schedule Time modification.
Fig. 40. Weekly Schedule Mode CopyDayTo.
20. Tap “Next” to proceed to the SetPoints screen.
21. The SetPoints screen facilitates changes to the:
a. Default setpoints.
b. Occupied Setpoint stops.
c. Temporary Override duration.
Fig. 41. SetPoints screen.
22. Make changes and tap “Next” to return to the Summary
screen.
23. Tap “Save” to save changes under the existing name.
24. Tap “DownLd” to download changes to a connected
T7350.
25. Tap “CnfgID” to have the device calculate configuration
number(s).
26. The configuration numbers represent the C numbers
(C1.C2.C3.C4.C5.C6.C7.C8) that can be input using
the T7350 keypad.
NOTE: The configuration numbers determine all but
the schedule and setpoints.
27. To return to the Home Screen, tap the Menu icon (lower
left hand corner silk screen) and tap Set / Home.


