


– 21 –
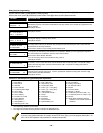
4. Accept the word.
To accept the word, press [6], which switches back to the alphabet list for the next word, or press [8] to store the
complete descriptor and then exit.
5. Select the next word.
For selection of the next word (DOOR), repeat step 3a (word #057) or 3b, but selecting the word "DOOR.”
To accept the word, press [6], which again switches back to alphabet list.
6. Store the descriptor.
When all desired words have been entered, press [8] to store the description in memory.
To review the zone descriptors, key [#] plus zone number (e.g., #01).
To edit zone descriptors, key [✱] plus zone number (e.g., ✱01)
7. Exit Zone Description Mode: enter 00.
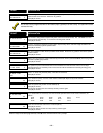
Default Screen (Custom Message Display)
Normally, when the system is in the disarmed state, the following display is present on the keypad.
****DISARMED****
READY TO ARM
Part or all of the above message can be modified to create a custom installer message for each partition. For example,
“****DISARMED****” on the first line or “READY TO ARM” on the second line could be replaced by the installation company
name or phone number for service.
Note: There are only 16 character spaces on each of the two lines.
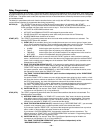
To create a custom display message, proceed as follows:
1. Select Default Screen mode.
The keypad asks for the partition number for this message.
Enter the partition number. Press [✱] to accept entry.
The following display appears:
****DISARMED****
READY TO ARM
A cursor is present at the extreme left of the first line (over the first "star"). Press [6] to move the cursor to the right and [4]
to move the cursor to the left. Press [7] to insert spaces or erase existing characters.
2. Create the message.
For example, to replace “READY TO ARM” with the message “SERVICE 424-0177,” proceed as follows:
Press [6] to move the cursor to the right, and continue until the cursor is positioned over the first location on the second
line.
Press [3] to advance through the alphabet to the first desired character (in this case, "S"). Press [1] to go backward, when
necessary. When the desired character is reached, press [6].
The cursor then moves to the next position, ready for entry of the next character (in this example, "E"). When the cursor
reaches a position over an existing character, press [3] or [1] to advance or back up from that character in the alphabet.
Proceed in this manner until all characters in the message have been entered.
3. Save the message.
Store the new display message in memory by pressing [8].
4. The system asks for a new partition number.
Enter 0 to quit or 1-8 for a new partition number.
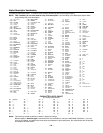
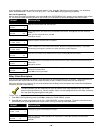
Custom Words
Up to 20 installer-defined words can be added to the built-in vocabulary. Each of the 20 "words" can actually consist of several
words, but bear in mind that a maximum of 10 characters can be used for each word string.
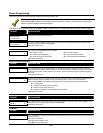
1. Select CUSTOM WORD Mode.
The keys perform the following functions:
[3] Advances through alphabet in ascending order.
[1] Advances through alphabet in descending order.
[6] Selects desired letter; moves the cursor 1 space to the right.
[4] Moves the cursor one space to the left.
[7] Inserts a space at the cursor location, erasing any character at that location.
[8] Saves the new word in the system's memory.
[✱] Returns to Description Entry Mode.