


33606 Rev D 22 01-03
BUILDER'S CHOICE SERIES INSTALLATION INSTRUCTIONS
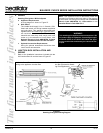
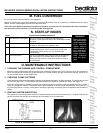
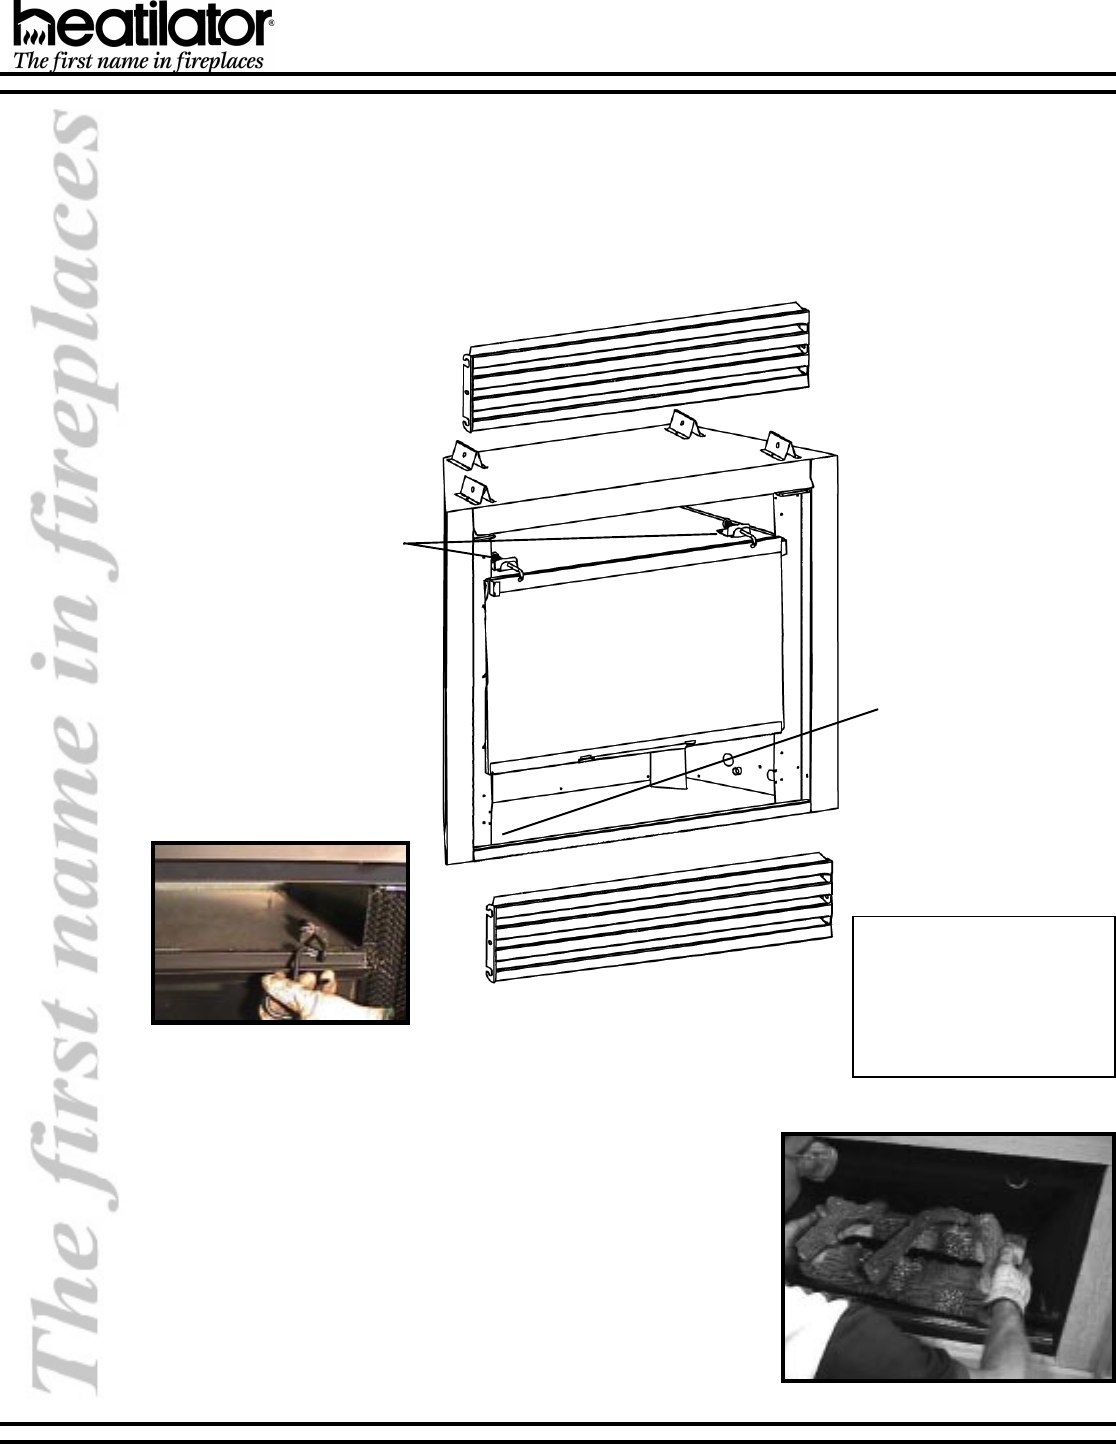
5. LOG REMOVAL/REPLACEMENT
If removal of the logs becomes necessary, remove the two screws at
each side of the front log. Grasp the front log. Pull the log toward the
front and up, off the burner. See Figure 35.
To replace the logs, grasp the front log. Lower the log set so that the
back log rests on the shelf in the back of the appliance and the two
tabs behind the back log are inserted into the slots in the back of the
firebox. Replace the two screws removed earlier at each end of the
front log.
Figure 35 - Log Removal
Figure 34
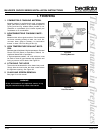
Glass Cleaning
Safety Note:
Handle glass with care to avoid
striking, scratching or slam-
ming shut. Never clean glass
when hot. Keep children and
pets a safe distance away.
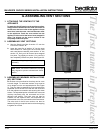
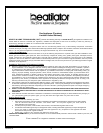
4. CLEANING THE GLASS
See Figure 34. Never operate this appliance without the glass properly secured in place or if the glass is broken or
chipped.
In the event of glass breakage, carefully remove the glass frame. This will allow the removal of all glass fragments and
sheet metal edge protection strips. Vacuum all remaining glass pieces with a shop vac. DO NOT VACUUM IF PIECES
ARE HOT! Replace glass only with a Heatilator glass panel assembly through your local distributor. Never use
substitute material. Only fully tempered soda lime safety glass or ceramic glass may be used on this appliance.
1. Lift and pull out upper grille
and control access panel.
2. Lift and pull out the bottom
of the screen, then pull down
out of top corner retainers.
3. Pull and release the two
Quick Access Latches
using handle provided and
stored in valve compart-
ment.
4. Angle top of glass out and
remove from the lower re-
tainer.
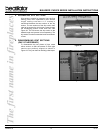
5. Set the glass safely on a
nonabrasive surface. Clean
using a mild, nonabrasive
cleaning solution (i.e.
Brasso).
6. To replace the glass, ensure
the glass bottom is set com-
pletely down in the bottom re-
tainer and replace the two
Quick Access Latches to
the secure position.
7. To replace the screen, place
the top of the screen in the
two corner catches. Raise
the screen until it clears the
bottom retainer, then lower
into position.
8. Replace Quick Access
Latch handle in its clips on
the lower corner behind the
grille.
9. Replace the upper grille and
control access panel.
Quick Access Latch