Heat & Glo • LUX60 • 4062-116 • Rev. G • 4/1114
Glass Cleaning
Frequency: Seasonally
By: Homeowner
Tools Needed: Protective gloves, glass cleaner, drop
cloth and a stable work surface.
CAUTION! Handle fi xed glass assembly with care.
Glass is breakable.
• Avoid striking, scratching or slamming glass
• Avoid abrasive cleaners
• DO NOT clean glass while it is hot
• Prepare a work area large enough to accommodate fi xed
glass assembly and door frame by placing a drop cloth
on a fl at, stable surface.
Note: Fixed glass assembly and gasketing may have
residue that can stain carpeting or fl oor surfaces.
3
3
Maintenance and Service
A. Maintenance Tasks-Homeowner
The following tasks may be performed annually by the
homeowner. If you are uncomfortable performing any of
the listed tasks, please call your dealer for a service ap-
pointment.
More frequent cleaning may be required due to lint from
carpeting or other factors. Control compartment, burner
and circulating air passageway of the fi replace must be
kept clean.
CAUTION! Risk of Burns! The fi replace should be
turned off and cooled before servicing.
When properly maintained, your fi replace will give you
many years of trouble-free service. We recommend an-
nual service by a qualifi ed service technician.
Any safety screen or guard removed for servicing must be
replaced prior to operating the fi replace.
Installation and repair should be done by a qualifi ed
service technician only. The fi replace should be inspect-
ed before use and at least annually by a professional
service person.
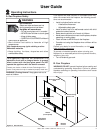
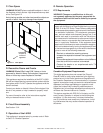
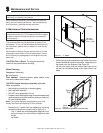
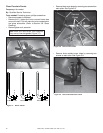
• Remove the “L” plates from the fi replace by removing
the bolts holding them in place (refer to Figure 3.1).
- The “L” plates are interchangeable diagonally from
corner to corner, but not from top to bottom or side
to side.
- Lay aside.
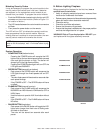
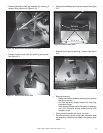
• Pull the spring clips (located at the top inside of the inner
frame) towards the center of the frame, rotate the top of
the frame out of the fi replace. See Figure 3.2.
• Lift the inner frame until the bottom tabs come out of
the slots on the bottom fl ange of the outer frame. Lay
aside.
Spring
Clip
Inner
Frame
Figure 3.2 Inner Frame (shown from the back side)
“L” Plates
Bolts
(4 holding
each “L” plate)
Figure 3.1 “L” Plates


