10
Assembly
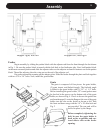
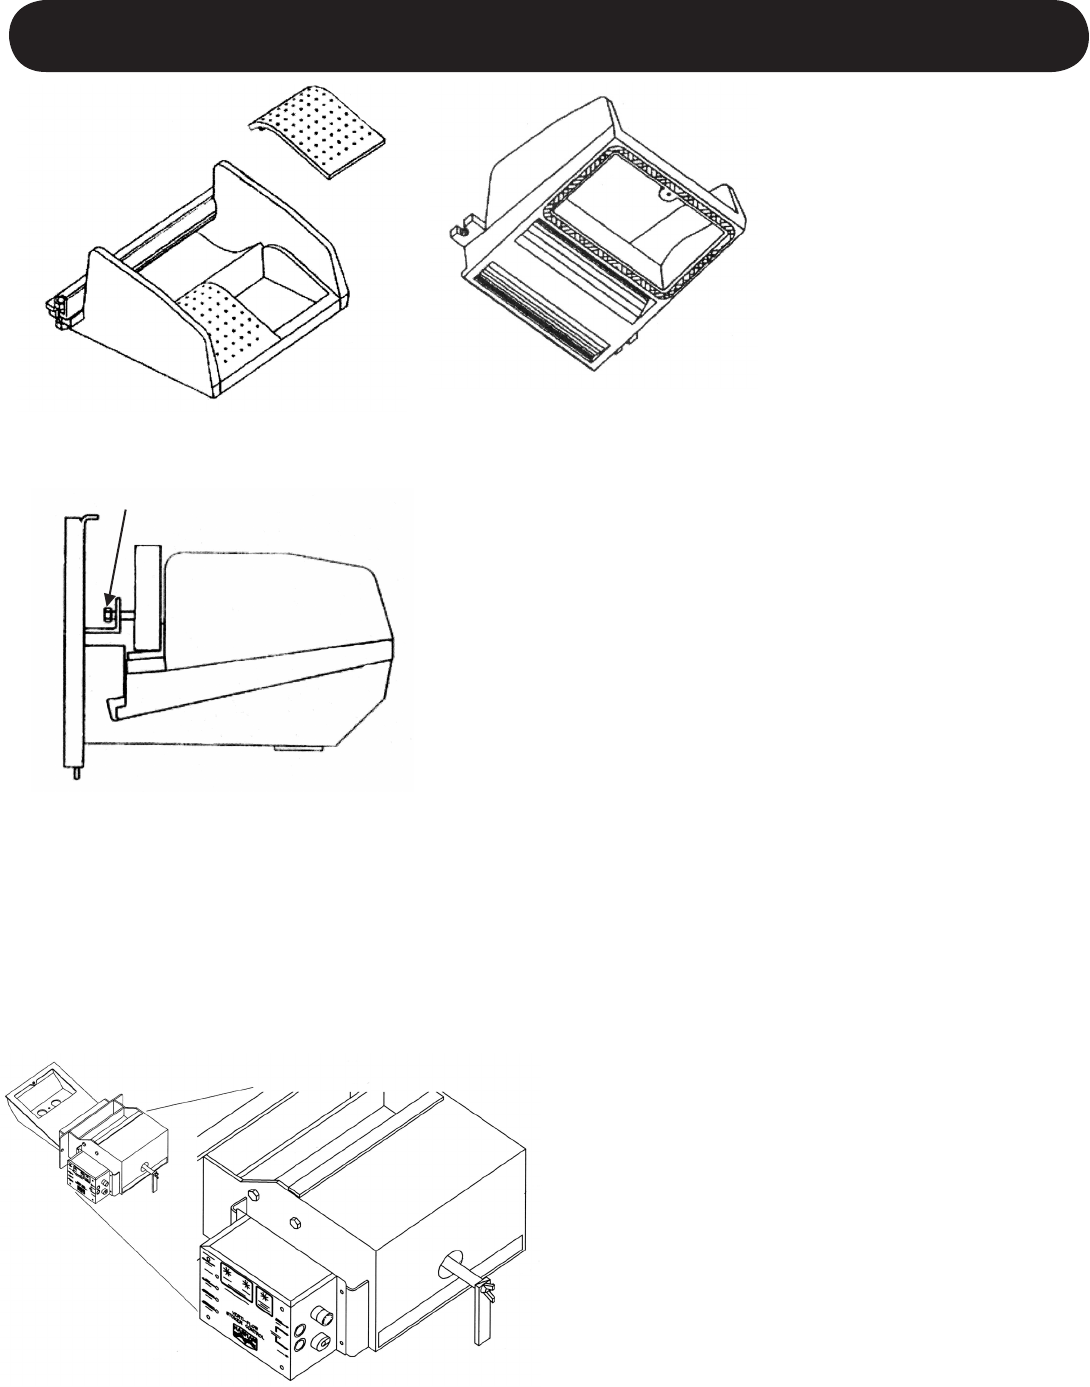
Fig. 3
Fig. 4
Lay the two grate inserts into the grate holder as
shown. Divide the spaces between the grates equally
and be sure they are not tight. The spaces are needed
for expansion. The grate inserts can also be installed or
removed after the feeder is in place.
Place the two rebricks on the grate angle and make
the two bolts snug on the adapter plate as shown.
Apply 1 inch at gasket around the feeder opening
and insert the feeder and adapter plate into the boiler and
tighten. NOTE: You will need a 3/4” socket to do this.
Remove one of the screws on the intake screen, and
install the blower restrictor plate. Install the blower on
the bottom of the feeder by sliding it into the bracket as
far as it will go. NOTE: The bolt holes on the blower
ange are not used.
Install the control box on mounting pad provided on
the side of the stoker with (4) #8-32 bolts and nuts.
Plug the gear motor into the top receptacle, and the
combustion blower into the middle receptacle on the
control box. The bottom receptacle is not used.
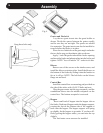
Hopper
Insert small end of hopper into the hopper slot on
the feeder. Push top of hopper under the hopper support,
causing the slot on the bottom side of the support to
hook onto the hopper. The hopper support will spring
up slightly for the hopper to go under. If you have dif-
culty getting the hopper under, you can raise the top
slightly.
The feed motor cover can now be installed.
Snug these bolts only.


