34
221834B
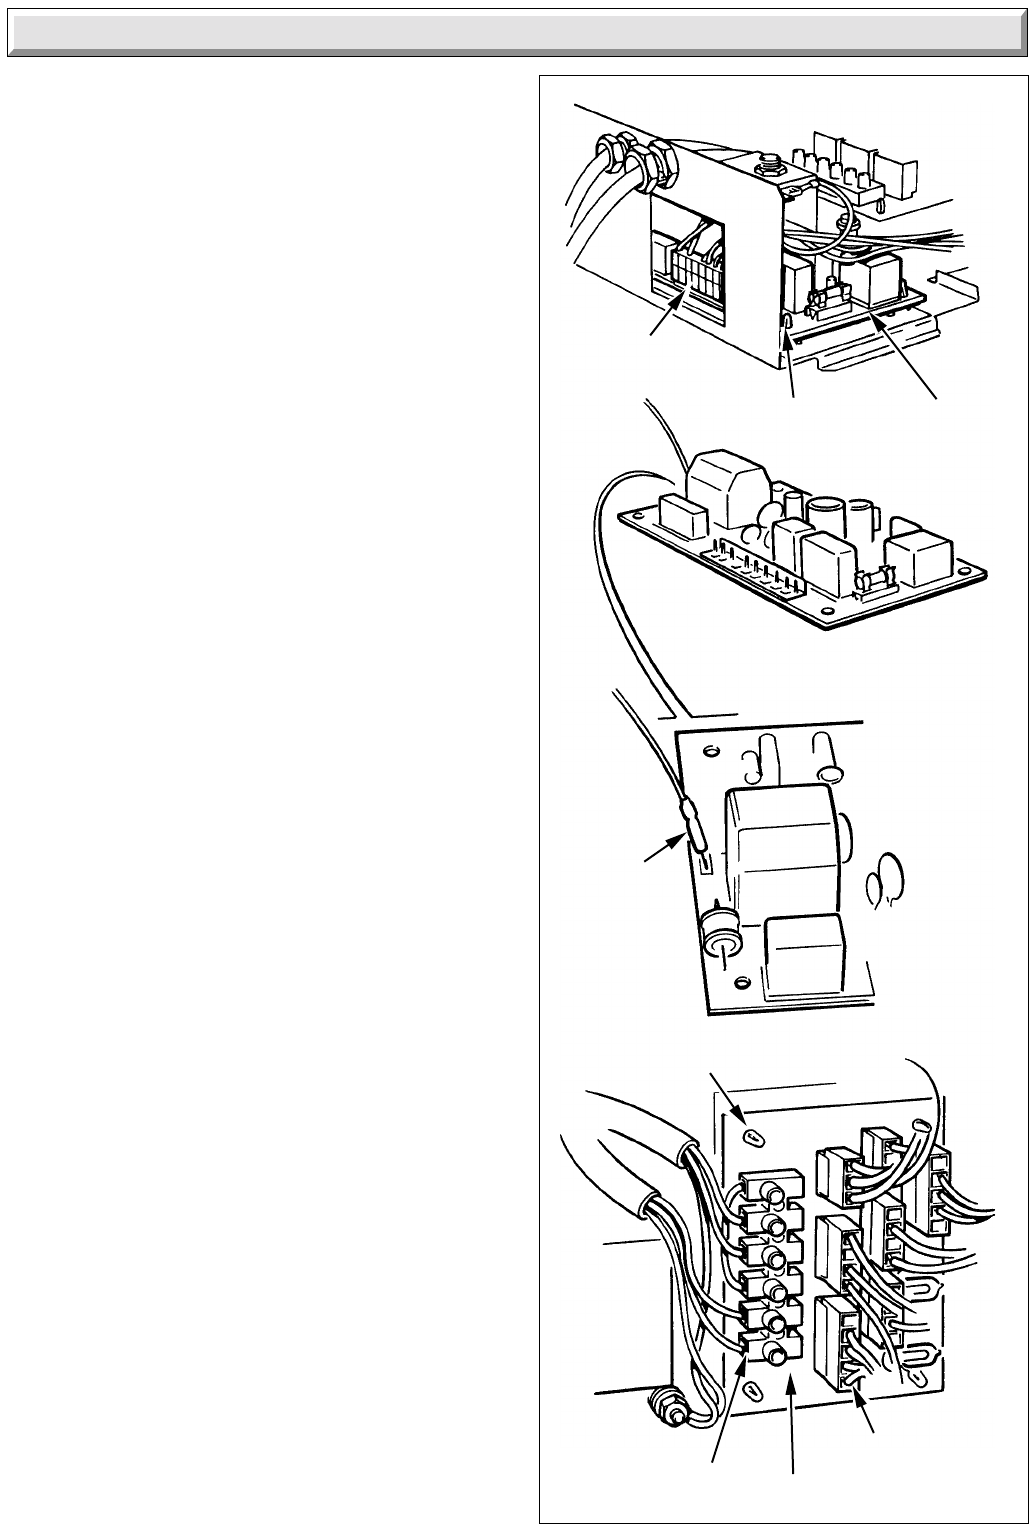
Diagram 14.3
SUPPORT POST (4)
IGNITION
LEAD
ELECTRICAL
PLUG (5)
I.C.B
TERMINAL
STRIP
CONTROL
P.C.B.
SUPPORT
POST (2)
ELECTRICAL
PLUG
4065
14 Replacement of Parts
14.3 Printed Circuit Boards (PCBs): diagram
14.3
Release the control box as Section 9.
Control PCB: diagram 14.3 (top)
Disconnect the electrical plug on the board.
Release from its two support post and carefully pull the board
away noting that the ignition lead is still connected.
It may be necessary to hold some of the wires above the PCB
clear with an electrical screwdriver on removal or refitting.
Release and carefully pull the board away from its supports,
noting that the ignition lead is still connected.
Disconnect the ignition lead.
Interconnecting PCB: (ICB) diagram 14.3
(bottom)
Disconnect the electrical plugs and cables from the terminal
strip.
Release and carefully pull the board away from its supports.
When refitting refer to wiring diagram 13.2.
14.4 Control Thermostat and Overheat Cutoff
Release the control box, see Section 9.
Control Thermostat: diagram 14.4A and 14.4
Pull off the control thermostat and High/Low knobs.
Remove the three fascia securing screws and fascia.
Remove the electrical connections from the control thermostat
body.
Remove the two control thermostat securing screws.
Release the gland plate assembly, see diagram 14.2.
Release and remove the control thermostat phial from the
pocket.
Withdraw the capillary through the gland plate and controls box
grommet.
Slide control thermostat body away from control box.
On replacement smear the phials with the heat sink compound
supplied before replacing in the phial pocket.
When refitting refer to wiring diagram 13.2
Overheat Cutoff: diagram 14.4A and 14.4
Remove the electrical connections.
Remove the locking nut.
Release the gland plate assembly.
Release and remove the overheat cutoff phial from the pocket.
Withdraw the capillary through the gland plate and controls box
grommet.
On replacement smear the phials with the heat sink compound
supplied before replacing in the phial pocket.
When refitting refer to wiring diagram 13.2
Neatly secure any surplus capillary.
Flue Hood Overheat Cutoff: diagram 14.5
Remove electrical connections and unfasten the screws to
release.
Note: the polarity of the connections is not important.


