


www.desatech.com
113110-01A
5
OPTIONAL REMOTE
CONTROL ACCESSORIES
There are four optional remote controls that can
be purchased separately:
• wall switch
• hand-held ON/OFF remote
• wall thermostat
• hand-held thermostat remote
See Accessories, pages 36 and 37.
LOCAL CODES
Install and use fireplace with care. Follow all lo-
cal codes. In the absence of local codes, use the
latest edition of The National Fuel Gas Code ANSI
Z223.1/NFPA 54*.
*Available from:
American National Standards Institute, Inc.
1430 Broadway
New York, NY 10018
National Fire Protection Association, Inc.
Batterymarch Park
Quincy, MA 02269
PRODUCT FEATURES
SAFETY PILOT
This fireplace has a pilot with an Oxygen Deple-
tion Sensing (ODS) safety shutoff system. The
ODS/pilot is a required feature for vent-free room
fireplaces. The ODS/pilot shuts off the fireplace
if there is not enough fresh air.
PIEZO IGNITION SYSTEM
This fireplace has a piezo ignitor. This system re-
quires no matches, batteries, or other sources to
light fireplace.
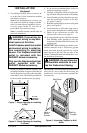
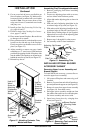
UNPACKING
1. Remove fireplace and hood from carton. Log
is wrapped and inside fireplace. Do not re-
move at this time.
2. Remove all protective packaging applied to
fireplace for shipment.
3. Make sure your fireplace includes one hard-
ware packet.
4. Check fireplace for any shipping damage. If
fireplace is damaged, promptly inform dealer
where you bought fireplace.
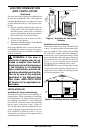
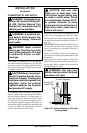
ASSEMBLY
WARNING: Always have
branch support and screen in
place before operating fireplace.
This prevents excessive tem-
peratures on fireplace surfaces.
WARNING: Failure to posi-
tion the parts in accordance
with these diagrams or failure
to use only parts specifically
approved with this fireplace
may result in property damage
or personal injury.
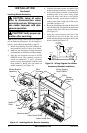
ASSEMBLING FIREPLACE
Tools Required:
• Phillips screwdriver
• 5/16" hex wrench
• slotted screwdriver
• scissors
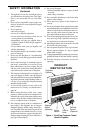
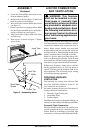
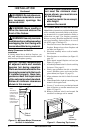
1. Remove two screws that hold fireplace screen
in place for shipping. These screws are located
near top of screen. Discard screws. Lift fireplace
screen up and pull out to remove. Set screen aside
until installation has been completed.
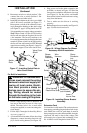
2. Cut two plastic straps to remove the log from
the firebox cavity.
3. An optional blower is available. See Acces-
sories, pages 36 and 37. Install optional blower
now. Follow installation instructions provided
with blower or (see page 14).
Figure 2 - Removing Screen
Screen
Burner Support
With Log
Locator Tabs
Branch
Support
Shoulder
Screw