


www.desatech.com
113110-01H 5
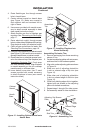
State of Massachusetts: The installation
must be made by a licensed plumber or gas t-
ter in the Commonwealth of Massachusetts.
Sellers of unvented propane or natural
gas-red supplemental room heaters shall
provide to each purchaser a copy of 527
CMR 30 upon sale of the unit.
Vent-free gas products are prohibited for
bedroom and bathroom installation in the
Commonwealth of Massachusetts.
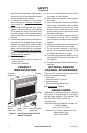
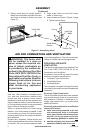
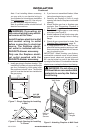
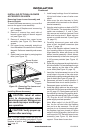
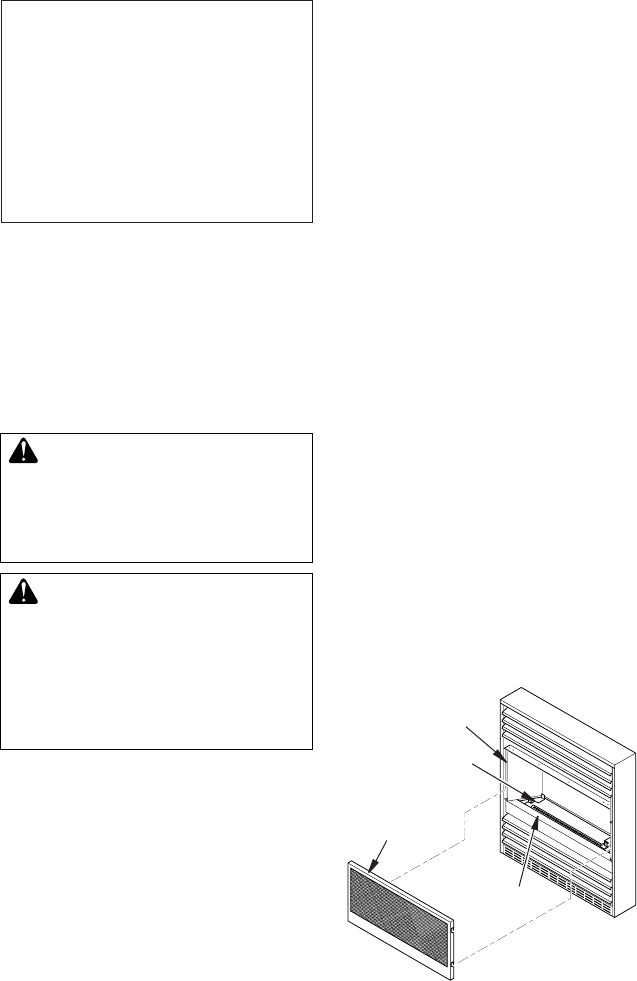
Figure 2 - Removing Screen
Screen
Burner Support
With Log
Locator Tabs
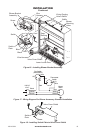
Branch
Support
Shoulder
Screw
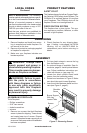
PRODUCT FEATURES
This replace has a pilot with an Oxygen Deple-
tion Sensing (ODS) safety shutoff system. The
ODS/pilot is a required feature for vent-free
room replaces. The ODS/pilot shuts off the
replace if there is not enough fresh air.
This replace has a piezo ignitor. This sys-
tem requires no matches, batteries, or other
sources to light replace.
UNPACkING
1. Remove replace and hood from carton.
Log is wrapped and inside replace. Do
not remove at this time.
2. Remove all protective packaging applied
to replace for shipment.
3. Make sure your replace includes one
hardware packet.
ASSEMBLy
LOCAL CODES
Continued
4. Check replace for any shipping dam-
age. If heater is damaged call DESA
Heating, LLC at 1-866-672-6040 for
replacement parts before returning to
dealer.
WARNING: Always have
-
-
Tools Required:
• Phillips screwdriver
• 5/16" hex wrench
• slotted screwdriver
• scissors
1. Remove two screws that hold replace
screen in place for shipping. These screws
are located near top of screen. Discard
screws. Lift replace screen up and pull out
to remove. Set screen aside until installation
has been completed.
2. Cut two plastic straps to remove the log
from the rebox cavity.
3. An optional blower is available. See Ac-
cessories, page 35. Install optional blower
now. Follow installation instructions pro-
vided with blower or (see page 14).
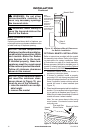
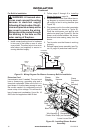
4. Locate four black phillips sheet metal
screws from the hardware packet.
5. Rotate hood as shown in Figure 3. Make
sure hood tabs point toward replace.
6. Insert hood tabs between bafe and lou-
vers (see Figure 3, page 6).