


21
106442
OWNER’S MANUAL
INSTALLATION
INSTRUCTIONS
FOR CONVERSION
NATURAL TO
PROPANE/LP
BEFORE YOU BEGIN
The conversion parts are packaged with the
unit. Please check the contents before be-
ginning this conversion.
Make sure the gas control valve is in the
OFF position and all electrical power to the
appliance of OFF.
Wait five (5) minutes to clear out any gas.
Smell for gas, including near the floor. If you
smell gas, STOP! Follow “B” in the For Your
Safety, Read Before Lighting, page 19.
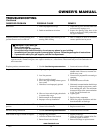
PREPARATION
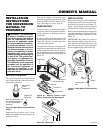
To remove louvers , pull end spring latches
toward the center of the appliance simulta-
neously until they are disengaged from lo-
cating holes.
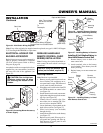
To open glass door, undo the latches located
on the top and bottom of the firebox (see
Figure 56). Carefully swing the glass door
to the fully open position.
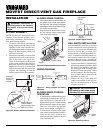
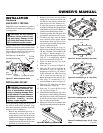
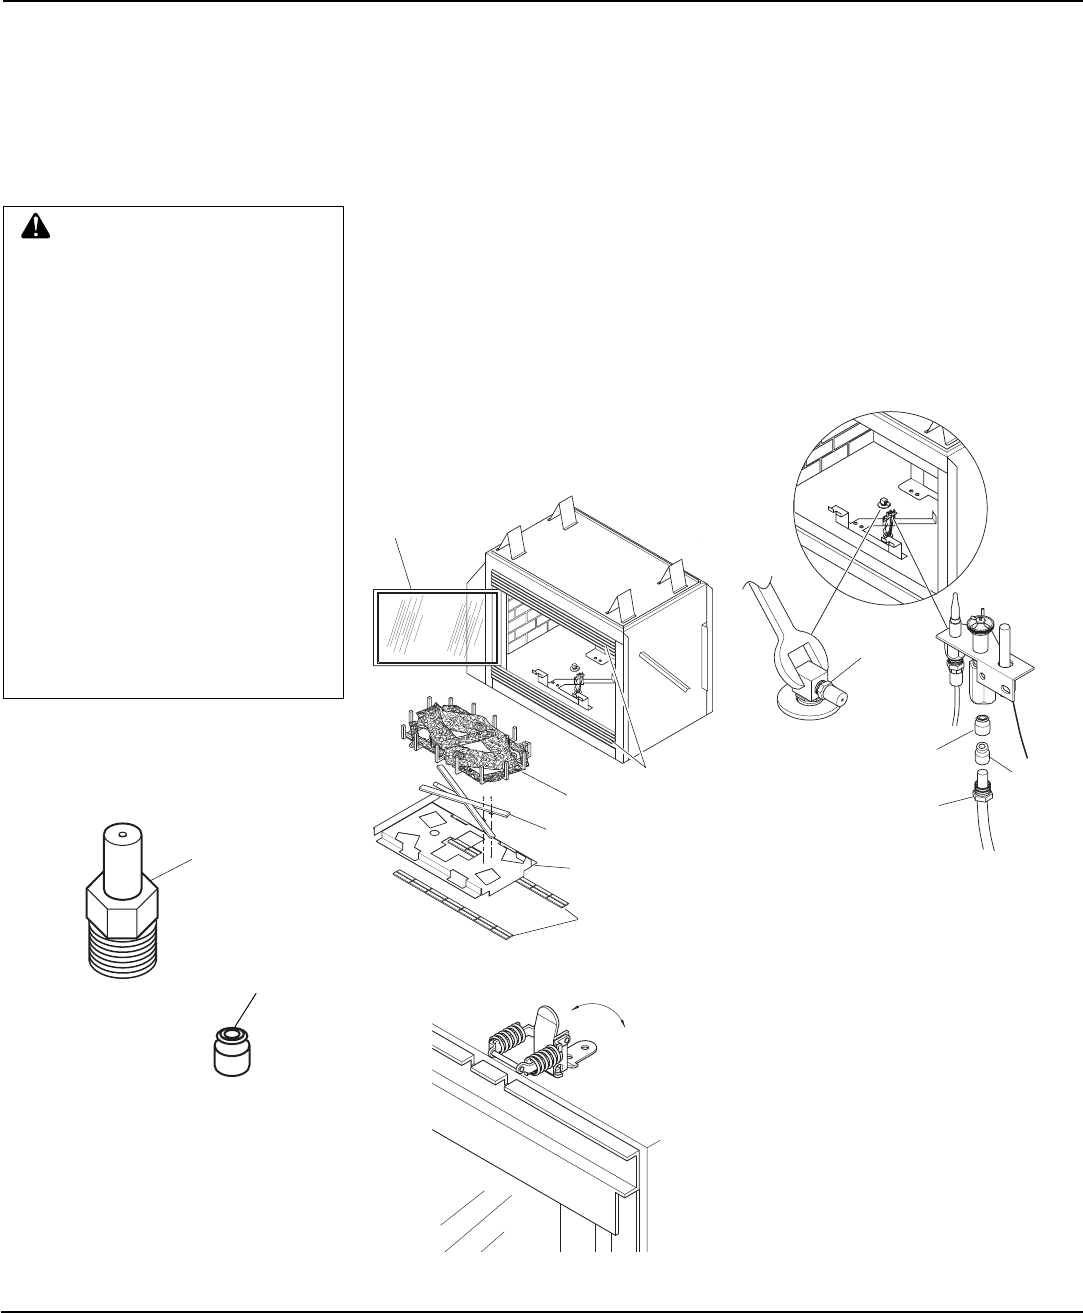
Carefully remove the log set and grate from
the burner and place them outside the com-
bustion chamber. Remove two screws hold-
ing the burner and remove burner. Remove
the two side refractories and hearth pan (see
Figure 55).
INSTALLATION
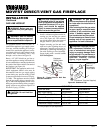
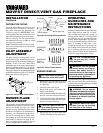
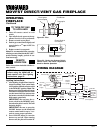
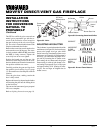
Remove the main burner orifice and replace
with the propane/LP conversion orifice sup-
plied in the conversion kit (see Figure 57).
Apply a small amount of thread sealant to
the main burner orifice before tightening.
Remove the compression nut from the pilot
and replace the propane/LP pilot orifice with
supplied orifice from conversion kit (see
Figure 57).
IMPORTANT:
Be careful not to bend or
kink aluminum tubing during the conver-
sion. Make sure the compression sleeve and
pilot orifice are properly mated and aligned
before retightening the compression nut.
WARNING: This conversion
kit shall be installed by a quali-
fied service agency in accordance
with the manufacturer instruc-
tions and all applicable codes
and requirements of the author-
ity having jurisdiction. If the in-
formation in these instructions is
not followed exactly, a fire, ex-
plosion, or production of carbon
monoxide may result causing
property damage, personal injury,
or loss of life. The qualified ser-
vice agency is responsible for
the proper installation of this kit.
The installation is not proper and
complete until the operation of
the converted appliance is
checked as specified in the
manufacturer’s instructions sup-
plied with the kit.
OPEN
CLOSE
Figure 56 - Open Latch
Figure 55 - Remove Louvers, Logs,
Burner, Hearth Pan, and Refractories
Refractories
Glass Door
Louvers
Grate and Logs
Burner
Main Burner
Orifice
Propane/LP
Propane/LP
Pilot orifice
Note:
The pilot orifice has
the number 30 stamped
on it for identification
purposes.
Figure 54 - Main Burner Orifice and Pilot
Orifice
Hearth Pan
Main
Burner
Orifice
Compression
Nut
Sleeve
Pilot
Orifice
Figure 57 - Main Burner Orifice and Pilot
Orifice
Continued