


111167-01C
10
For more information, visit www.desatech.com
For more information, visit www.desatech.com
(For 200 Model Only)
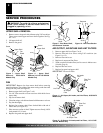
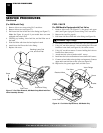
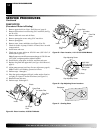
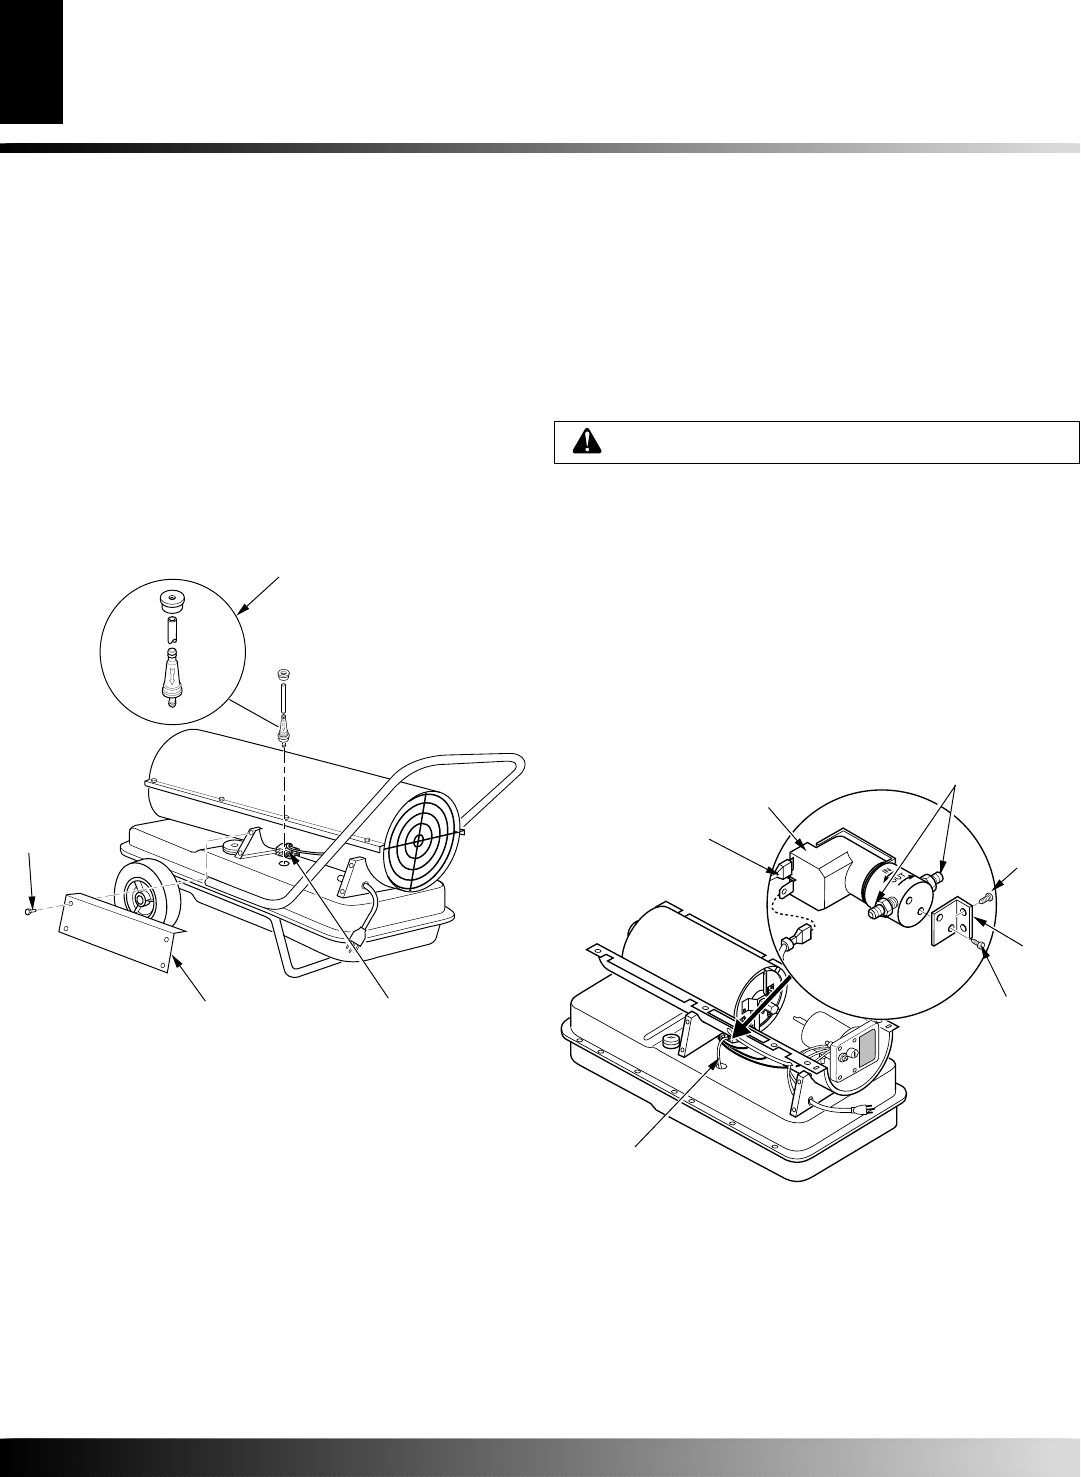
1. Remove side cover screws using 5/16" nut-driver.
2. Remove side cover (see Figure 17).
3. Pull lower fuel line off the fuel valve fitting (see Figure 17).
Note:
See Figure 16, page 9 if your model does not come
equipped with a fuel valve.
4. Carefully pry bushing, lower fuel line, and fuel filter out of
fuel tank.
5. Wash fuel filter with clean fuel and replace in tank.
6. Attach lower fuel line to fuel valve fitting.
7. Replace side cover.
FUEL VALVE
For 200 Models Equipped with Fuel Valve
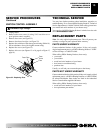
1. Remove side cover (see Figure 17), fan guard, and upper
shell (see Figure 8, page 8) screws using 5/16" nut-driver.
2. Remove fan (see Fan, page 8).
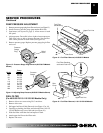
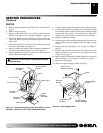
3. Pull lower fuel line off the fuel valve fitting (see Figure 18).
WARNING: High Voltage
4. Disconnect red and white wires from fuel valve (see Figure 18).
5. Using 1/4" nut driver remove 2 screws holding fuel valve and
bracket to lower shell (see Figure 18). Save these screws.
6. Using 1/4" nut driver remove 2 screws holding fuel valve to
bracket. Save these screws.
7. Attach new fuel valve to bracket with 2 screws.
8. Install new fuel valve and bracket on lower shell with 2 screws.
9. Connect red and white wires (polarity not important). Connect
upper and lower fuel lines to fuel valve (see Figure 18).
10. Replace fan, fan guard, upper shell, and side cover.
Side Cover
Figure 17 - Fuel Filter Removal, 200 Model Only (Model with Fuel
Valve Assembly Shown)
Figure 18 - Fuel Valve Replacement, 200 Model Only
Screw
SERVICE PROCEDURES
Continued
Bushing, Lower Fuel
Line, and Fuel Filter
Fuel Valve Fitting
Lower Fuel Line
Electrical Wires
Fuel Valve
Valve Fittings
Screw
Bracket
Screw
SERVICE PROCEDURES