


24
Gas Fireplace Insert
10002964
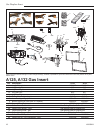
A4 Riser Kits
For use with A125
1. Install the unit according to Homeowner’s Manual.
2. Install the trim according to Installation Instructions.
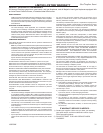
3. Remove the two (2) screws at the bottom of the trim.
4. Install the riser at the bottom of the trim. (Fig. 37)
5. Fasten the trim with the same two (2) screws re-
moved in Step 3.
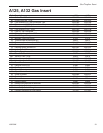
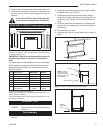
Riser Trim Dimensions
Length - A Height - B Depth - C
RHE25R1-Riser 1" 38.3" (973mm) 1" (25.6mm) 2.86" (72.8mm)
RHE25R-2Riser 2" 38.3" (973mm) 2" (50.9mm) 2.89" (73.6mm)
RHE25R5-Riser 5" 38.3" (973mm) 5" (127.9mm) 2.86" (72.8mm)
B
C
A
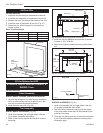
FP1276
Riser Trim
1/24/03 djt
Trim Kit
Riser
Decorative
Trim
FP1276
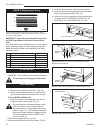
Fig. 37 RHEBSL, RHEBXL trim kit.
B Trim Options for A132
B1 RHESS, RHESL, RHESSD, RHESLD, &
RHESXL Trims
For use with A132
Frame Assembly
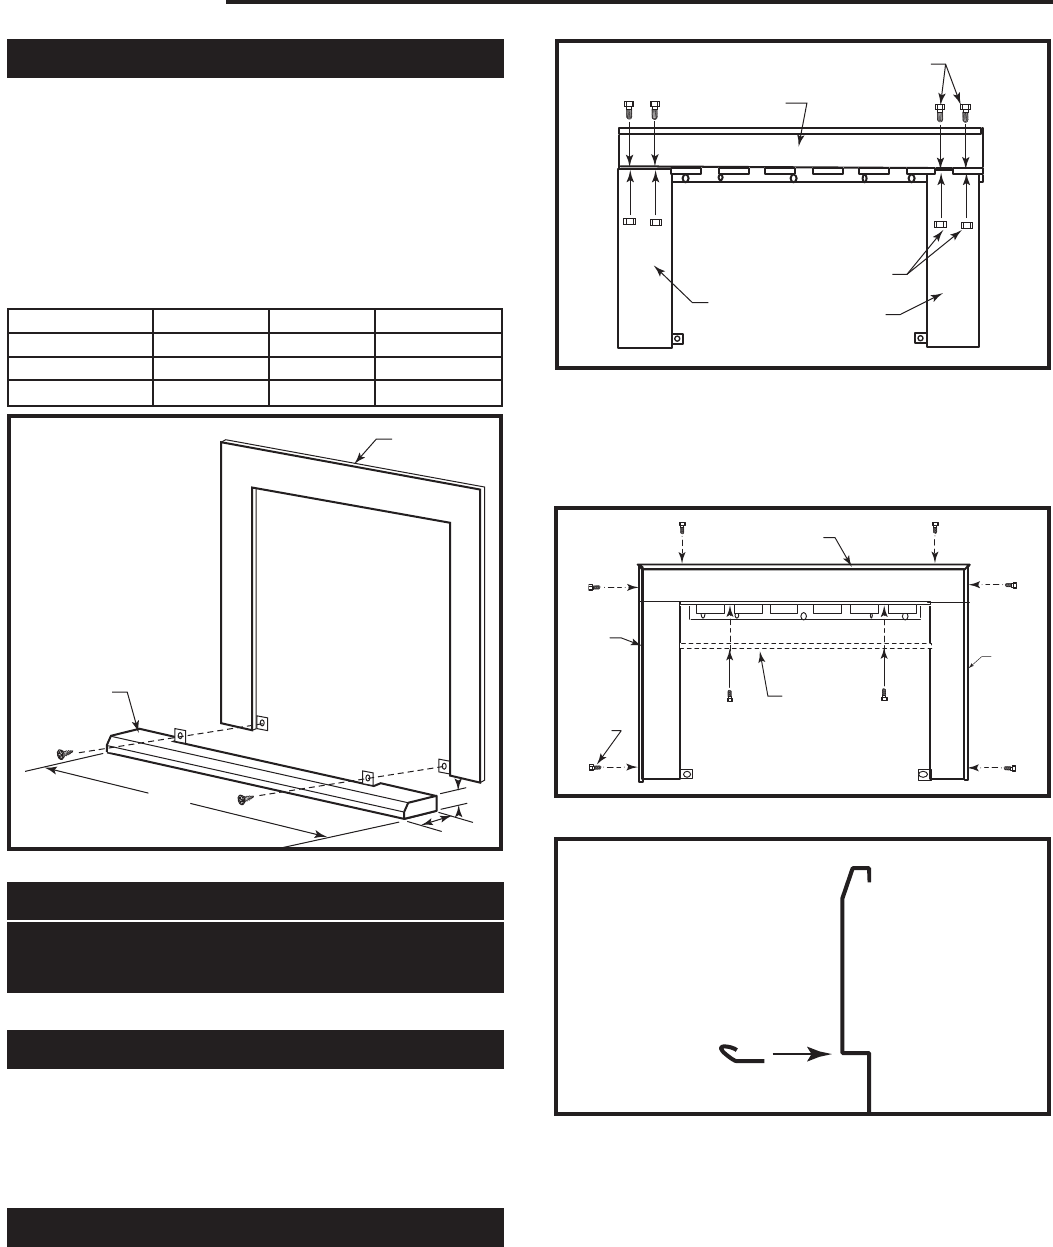
RHESS, RHESL, RHESSD, RHESLD and RHESXL
1. Lay trim top facing and trim side facings, face down
on to an even surface such as a table or floor. Be
sure not to scratch the painted surfaces.
2. Install the nuts and bolts. (Fig. 38)
Trim Assembly
RHESS, RHESL and RHESXL (Fig. 39)
1. Install trim channels (left and right sides). Use two
(2) screws to assemble each piece.
2. Slide on the trim top channel and fasten it from the
back side.
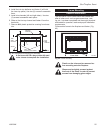
FP1259
RHE32 frame
assy
1/03
FP1259
Frame Top
10/24 Screws
10/24 Nuts
Right Frame
Left
Frame
Fig. 38 Attache left and right frame to frame top.
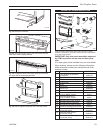
3. Install the trim top deflector and use two (2) screws
to fasten it. (Fig. 39 & 40)
4. Remove ALL plastic protective covering from brass
trim.
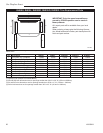
FP1260
Trim kit assy
1/03
Trim Top
Channel
Deflector
Trim Top
Trim
Side
Channel
Screw
Trim
Side
Channel
FP1260
Fig. 39 Install trim channels and trim top deflector.
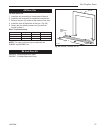
FP1261
deflector
1/03
Side View
Trim Top Deflector
Trim Frame Top
Section
FP1261a
Fig. 40 Trim top deflector.
RHESSD and RHESLD (Fig. 41)
1. Install trim channels (left and right sides). Use two
(2) screws to assemble each piece.
2. Peel off plastic protective covering from top edges
of the inner sides where they will be covered by the
inner top trim facing.
3. Place the trim facing inner top in place (do not fasten
it yet). Peel off the plastic protective covering from
the bottom edge.