5-46 Embroidery
1 —
2 —
3 —
4 —
5 —
6 —
7 —
8 —
?
!
9 —
CONTENTS
Index
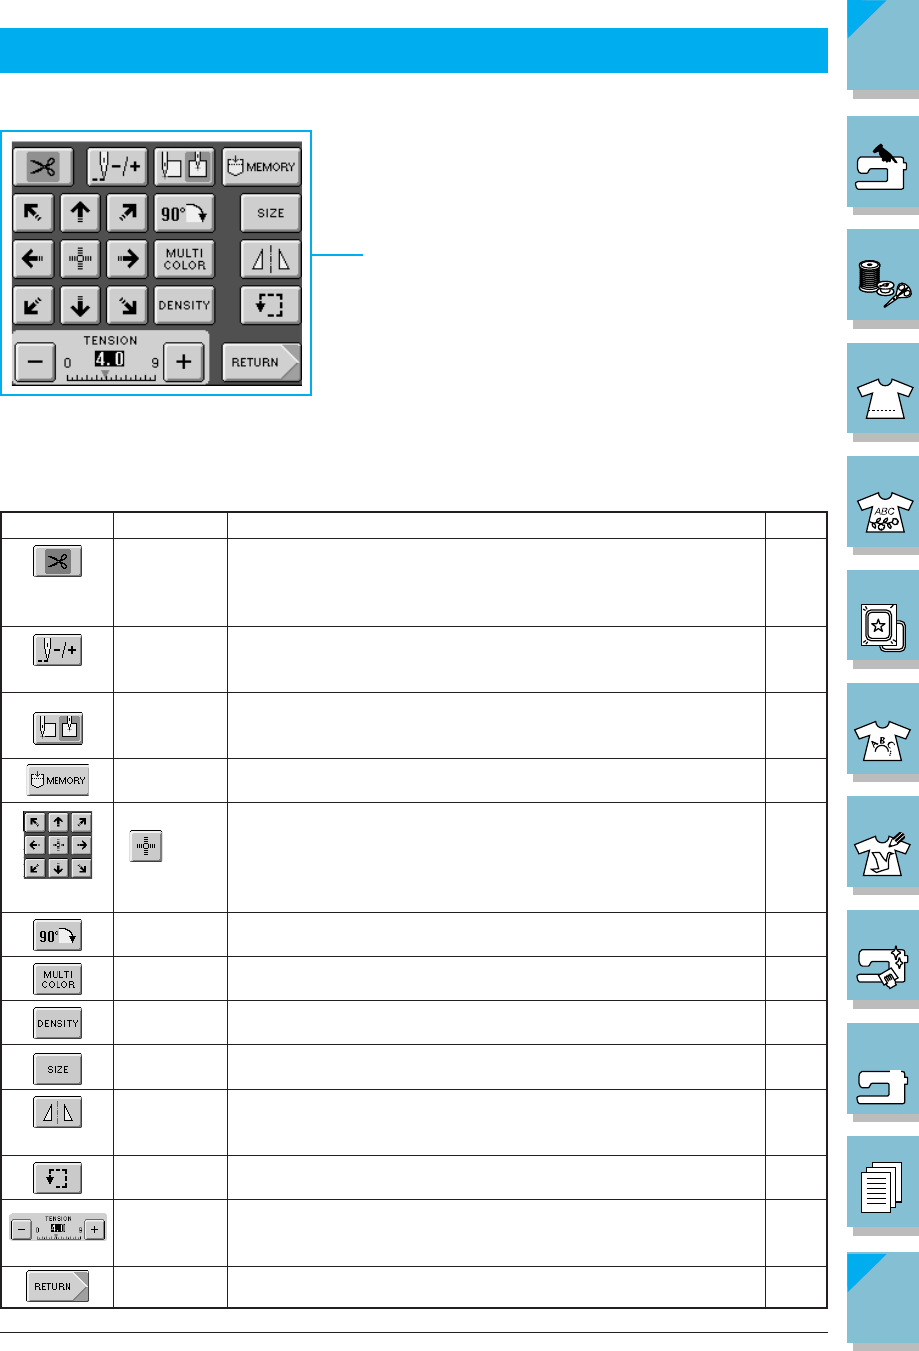
For embroidery , the automatic thread cutting function is set auto-
matically. When sewing is finished, the machine will automatically
sew reinforcement stitches and trim the threads.
Moves the needle forward or back in the pattern; useful if the thread
breaks while sewing or if you want to start again from the begin-
ning.
Moves the needle start position to the bottom left or to the center of
the pattern. Use this key to align the needle with the pattern posi-
tion.
Saves a pattern in the machine’s memory.
Press an arrow key to move the pattern in the direction shown by
the arrow. (Press the Center key to return the pattern to the center of
the embroidery area.)
Press this key to rotate the pattern. The pattern rotates 90 degree
each time you press the key.
Press this key to change the color of each letter when sewing alpha-
betical character patterns.
Press this key to change the density of character or border patterns.
Press this key to change the size of the pattern.
Press this key to create a horizontal mirror image of the pattern.
Press this key to check the position of the pattern. The embroidery
frame moves to check that there is enough space to sew the pattern.
Shows the thread tension for the selected pattern. The tension is
normally set automatically.
Press this key to return to the pattern type selection screen.
Key or display Name
Explanation Page
Automatic
thread
cutting key
Forward/
Back key
Starting
point key
Memory
key
Arrow keys
(
Center key
)
90 degree
rotation key
Multi color
key
Density
key
Size key
Horizontal
mirror
image Key
Trial key
Thread
tension key
Return key
Pattern Revision Keys
2-15
5-36
5-57
5-51
5-26
5-48
5-50
5-49
5-47
5-48
5-27
5-40
—
REVISING THE PATTERN
Using these keys, you can change the size of the pattern, rotate the pattern, etc.
CAUTION
If the key display is light gray, that function or op-
eration can not be used with the selected stitch.
■ Key Functions


