


56
Tips and Techniques
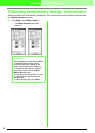
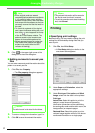
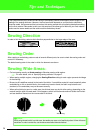
Sewing Direction
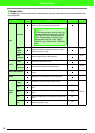
In order to limit shrinking, select a stitch direction perpendicular to the larger edge of the area.
Sewing Order
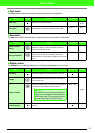
After creating an embroidery pattern made of several different parts, be sure to check the sewing order and
correct it if necessary.
The default sewing order is the order in which the elements are drawn.
Sewing Wide Areas
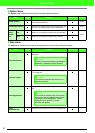
• For best sewing results, set Under sewing to On when sewing wide regions.
c
For more details, refer to “Specifying sewing attributes” on page 41.
• When sewing multiple regions, changing the Sewing Direction setting for each region prevents shrinkage
of the stitching.
• Be sure to affix stabilizer material to the back of the fabric. If no stabilizer material is used, especially when
embroidering on thin or stretch fabrics, the needle may break or bend, the fabric may become over-
stretched, or the embroidery may not be sewn correctly.
• When satin stitching is sewn in a wide area, the stitched area may shrink after sewing, depending on the
material and the type of thread used. If this happens, switch to this alternate method: Select the fill stitch
and use stabilizer material on the reverse side of the fabric.
This system allows you to create a wide variety of embroidery patterns and supports wider ranges for the
setting of the sewing attributes. However, the final result also depends on your particular embroidery
machine model. We recommend that you make a trial sewing sample with your sewing data before sewing
on the final material. Remember to sew your trial sample on the same type of fabric as your final material
and to use the same needle and the same machine embroidery thread.
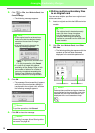
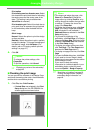
Shrinking more likely to occur Shrinking less likely to occur
Pattern
After sewing
a Note:
When using the satin stitch in a wide area, the needle may move out of position by about 10 mm with some
machines. In order to avoid this, use the above-mentioned alternate method.