


13
Tutorial
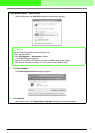
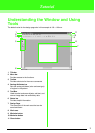
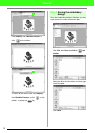
Step 2 Adjusting the text layout
Next, we will change the text arrangement.
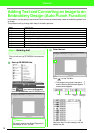
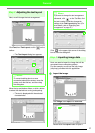
Click Text, then Text Layout, or click on the
toolbar.
→ The Text Layout dialog box appears.
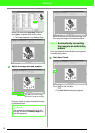
Move the top and bottom sliders, or click a button
to select the desired text curving and spacing.
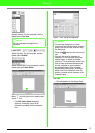
→ The text is displayed with the selected
characteristics.
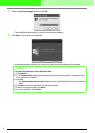
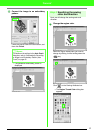
Click in the upper-right corner of the dialog
box to close the dialog box.
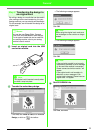
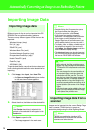
Step 3 Importing image data
Next, we need to import the image that will be
converted into an embroidery pattern.
For this example, we will use the tulip image
(tulip.bmp) provided with this application.
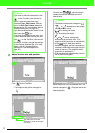
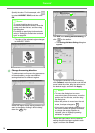
Import the image.
Click Image, then Input, then from File.
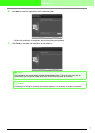
Double-click the ClipArt folder to open it.
b Memo:
• To move the dialog box to a more
convenient place on the screen, move the
pointer over the title bar, and then drag
the dialog box.
b Memo:
If you want to change the text arrangement
afterwards, click on the Tool Box, click
the text to select it, and then change the
settings in the
Text Layout
dialog box. (For
more details, refer to “Specifying text
arrangement” on page 37.)
1