


Carpet cleaning continued
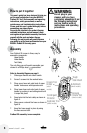
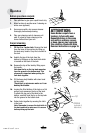
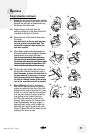
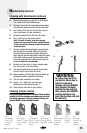
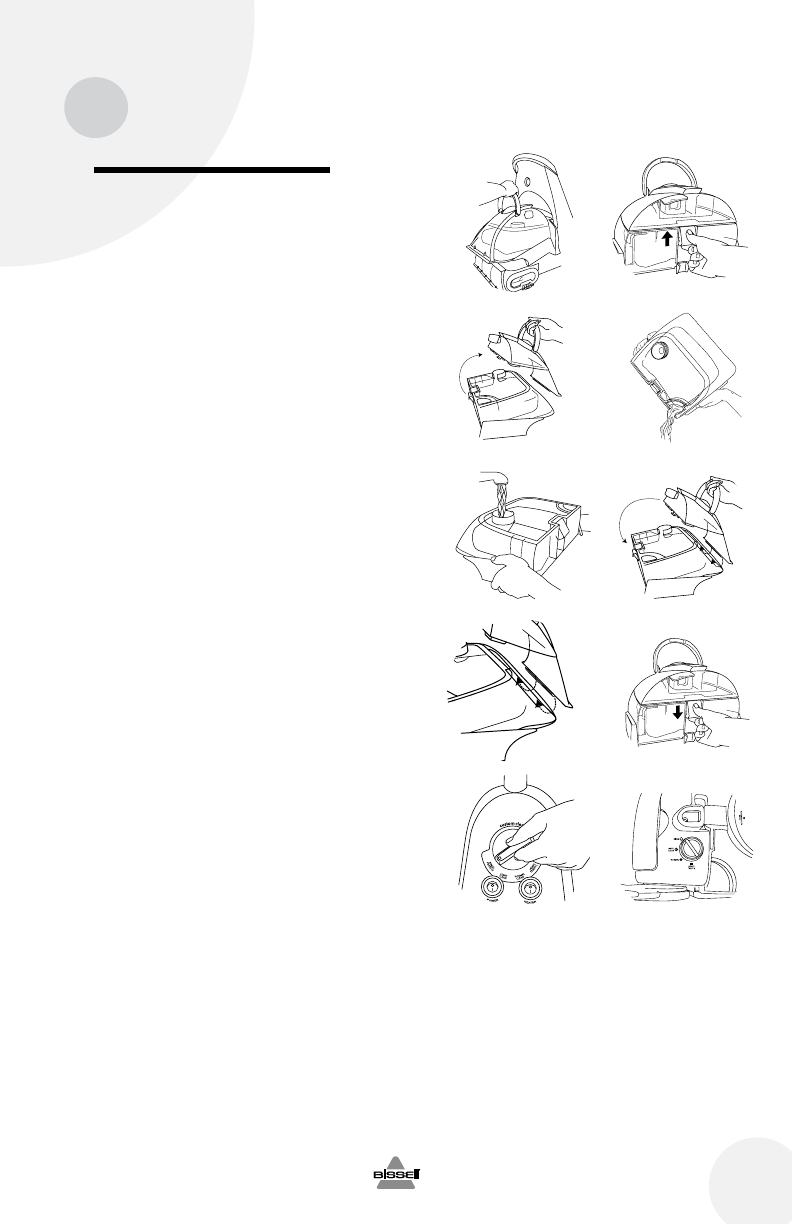
7. Remove the tank from the base of the machine
by lifting up on the tank carry handle. Carry like
a bucket to a utility sink or outside where you
will dispose of the dirty water.
7a. Unlatch the top of the tank from the
bottom by lifting up on the tank latch which
is located on the back of the tank.
7b. Remove the top of the tank by lifting up on
the handle.
Note how the lip on the top tank separates
from the groove in the bottom tank. This
placement is important when putting the
tank back together.
7c. Lift the bottom portion of the tank and pour out
dirty water toward the sink through the triangular
shaped opening in the corner of the tank.
Note: You may notice hair & debris deposits on
the carpet or in the tank that were loosened by
the cleaning action (especially with newer carpets
that have never been deep cleaned before). This
debris should be picked up and thrown away.
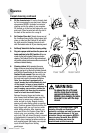
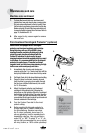
7d. Fill the heavy duty bladder with clean hand
hot tap water, following instructions page 9.
Note: Remember to secure the tank latch in
the back and test to make sure it is secure
before picking up the tank. Always check
the level of cleaning formula in the formula
tank at the same time and refill as needed.
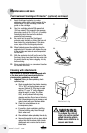
8. Rinse (Optional). Rinsing is an optional
step that can be done during the cleaning
process by switching from one of the clean
settings on the Custom Clean dial to a rinse
setting, or it can be done after the carpeted
area has been cleaned. Simply choose the
rinse setting on the Custom Clean dial,
and follow the same path as you did for
cleaning, taking care to do a forward (wet)
stroke by depressing the spray trigger, a
backward (wet) stroke, and a forward and
backward (dry) stroke, releasing the spray
trigger. Continue this until the water you see
coming up the nozzle is clear.
Operation
or
7. 7a.
7b. 7c.
7d. 7e.
7f. 7g.
8a.
11
w w w . b i s s e l l . c o m