14
Start Up Burner and Set
Combustion
Set the thermostat substantially above room
temperature.
Close the line voltage switch to start the burner.
If the burner does not start immediately you may
have to reset the safety switch of the burner primary
control.
Priming the Pump
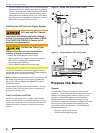
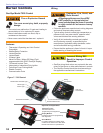
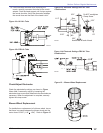
Prepare the burner for priming by attaching a
clear plastic hose over the bleed port fi tting and
fully opening the pump bleed port. Use a suitable
container to collect purged oil.
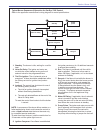
Initiate a call for heat.
After the burner starts, press and hold the reset
button for 15 seconds until the yellow light turns on.
This indicates that the button has been held long
enough.
Release the reset button. The yellow light will turn
off and the burner will start up again.
At burner start up, click the reset button while the
igniter is still on. This will transition the control
to a dedicated Pump Prime mode, during which
the motor, igniter, and valve are powered for four
minutes. The yellow light will be on.
Bleed the pump until all froth and bubbles are
purged. If desired, terminate the call for heat or
hold the reset button for at least one second to exit
Pump Prime mode and return to Standby.
At the end of 4 minutes, the yellow light will turn off
and the control will automatically return to standby
mode.
If prime is not established during the four minute
pump prime mode, return to the previous steps
to re-enter Pump Prime mode. Repeat Step 5
until the pump is fully primed and the oil is free of
bubbles..
For R7184 primary controls, see part number 61351
or 61465, for special pump priming sequence.
Prepare for combustion tests by drilling a 1/4”
sampling hole in the fl ue pipe between the
appliance and the barometric draft regulator.
Initial air adjustment — Using a smoke tester, adjust
the air dial (and change fi ring pin on HLX ATC’s, if
necessary) to obtain a clean fl ame. Now the additional
combustion tests with instruments can be made.
Set combustion with instruments
3.
4.
5.
6.
7.
8.
9.
10.
11.
12.
13.
14.
15.
16.
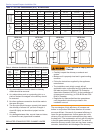
Wire Burner
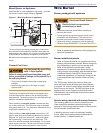
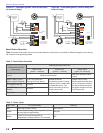
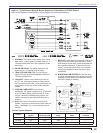
Make connections to the control’s terminals as
shown in Figures 8a and 8b. Refer to the label on
the underside of the control for wiring details.
Note: Motor-off delay on a 7505P will be disabled if
the safety and operating limits as shown in Figures
8a and 8b interrupt power to the control terminal L1.
Connect thermostat leads to the TR and TW
terminals on the control or jumper the TR and TW
terminals on the control, as directed by the appliance
wiring diagram.
- Thermostat anticipator Current: 0.1 amp
- Thermostat voltage: 24 volts AC
Note that if the thermostat short cycles or operates
improperly, it may require an isolation relay for proper
operation. The Beckett A/C Ready Kit (part no. 51950U)
provides this function. Wiring instructions are included
with the A/C Ready Kit.
○
○
○
Some Thermostats Are Polarity
Sensitive. Reversed polarity
could cause erratic cycling of the burner control.
Connect the wire from the R
H
or R terminal on the
thermostat to the TR terminal on the control. Connect
the wire from the W terminal on the thermostat to the TW
terminal on the control.
Open the shutoff valves in the oil supply line to the
burner.
Open the air dial. This is an initial air setting for
the pump bleeding procedure only. Additional
adjustments must be made with instruments.
1.
2.
Section: Start Up Burner and Set Combustion
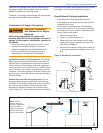
Oil-Burning Equipment
shall be connected to fl ues
having suitable pressure (draft) at all times
to assure safe and proper operation of the
burner.
Allow the burner to run for approximately 5 to 10
minutes.
Set the stack or over-fi re draft to the level specifi ed
by the appliance manufacturer.
1.
2.
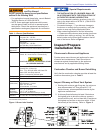
Hot Gas Puff-Back and
Heavy Smoke Hazard
Failure to prime the pump properly could result in
unstable combustion, hot gas puff-back and heavy
smoke.
Do not allow oil to spray into a hot combustion
chamber while bleeding air from the pump.
Install a gauge in the nozzle discharge port tubing
or fully open the pump bleed valve to prevent oil
spray from accumulating in the combustion chamber
during the air bleed procedure.
Ensure that all bubbles and froth are purged from the oil
supply system before tightening the pump bleed valve.
Ensure that the appliance is free of oil and oil vapor
before starting or resetting the burner.
y
y
y
y


