


• Installation • Start-Up • Maintenance • Parts
5Part No. 550-141-935/0602
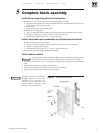
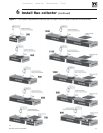
Set boiler in place2
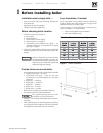
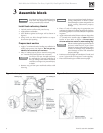
For packaged boiler:
1. Remove top jacket panels. Set aside until after boiler is
piped.
The boiler contains ceramic fiber and
fiberglass materials. Use care when
handling these materials per instructions
on page 38 of this manual. Failure to
comply could result in severe personal
injury.
2. Remove lag screws (2 in front, 2 in rear) from shipping
rails.
3. Remove boiler from skid. Cables are already attached
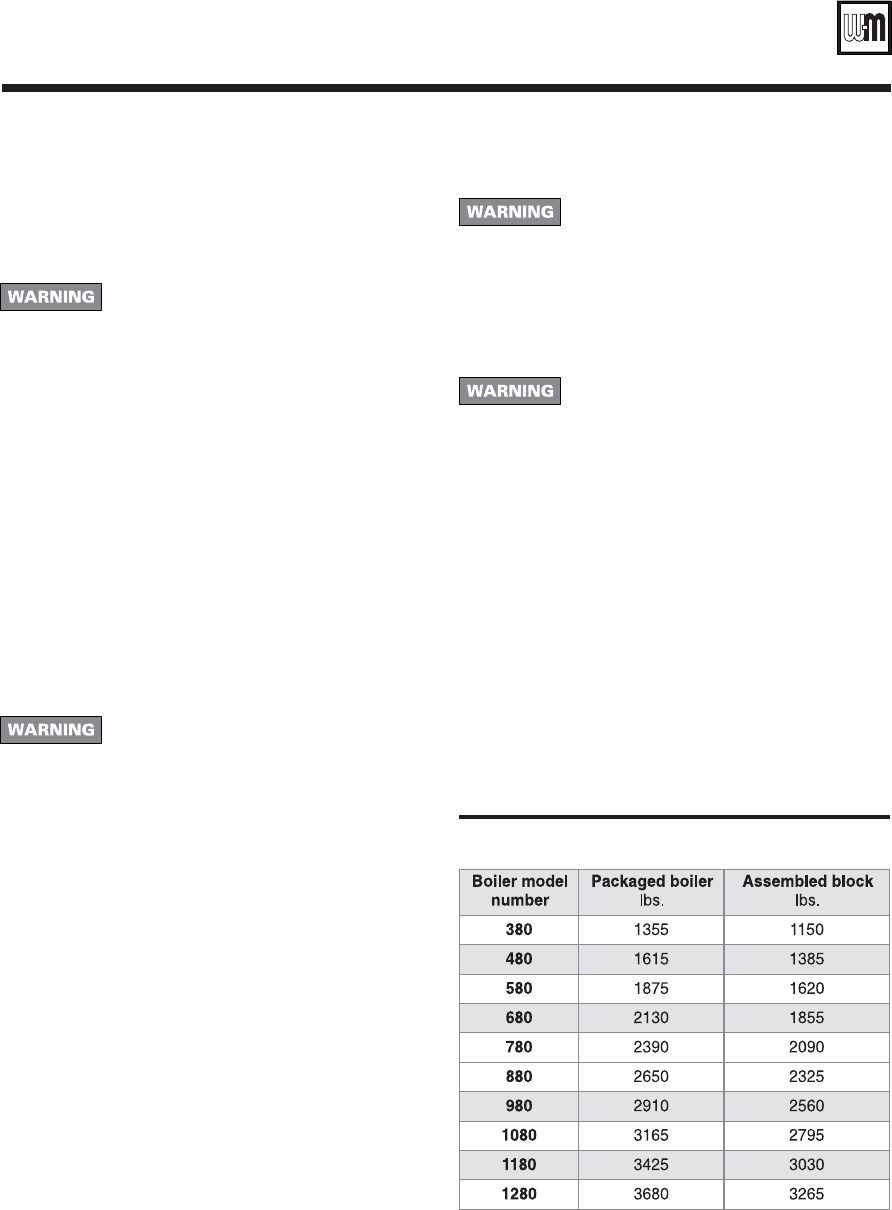
to block assembly. See Table 2 for lifting weight.
• Using crane — hook middle of each cable to eye of
crane.
• Using hoist — hook middle of each cable to hoist.
Raise boiler off skid. Use pipe rollers under skid
angles to roll boiler.
4. Place boiler in final position. Center boiler on
foundation, if used.
5. Level boiler. Shim under skid angles, if necessary.
6. Cut off cables.
Cables are not intended for long-term
usage. Cables may corrode inside boiler,
weakening their lifting strength. Failure to
remove cables can result in severe personal
injury, death or substantial property
damage.
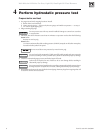
7. Proceed to "Perform hydrostatic pressure test," page 8.
For block assembly:
1. Remove lag screws (2 in front, 2 in rear) from shipping
rails.
2. Remove boiler from skid. Cables are already attached
to block assembly. See Table 2 for lifting weight.
• Using crane – attach free end of cables to eye of
crane.
• Using hoist – attach free end of cables to hoist. Raise
boiler off skid. Use pipe rollers under steel skid
angles to roll boiler.
3. Place boiler in final position. Center boiler on
foundation, if used.
4. Level boiler. Shim under skid angles, if necessary.
5. Cut off cables.
Cables are not intended for long-term
usage. Cables may corrode inside boiler,
weakening their lifting strength. Failure to
remove cables can result in severe personal
injury, death or substantial property
damage.
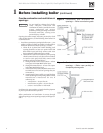
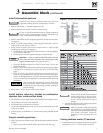
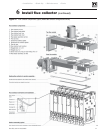
6. Inspect block assembly for disjointed sections. Check
gas-tight seal of flue collector hood and cleanout plates.
Gas tight seal must be maintained to
prevent possible flue gas leakage and
carbon monoxide emissions, resulting in
severe personal injury or death.
a. Check inside section assembly for any light passing
through unsealed areas.
b. Mark all unsealed areas.
c. At unsealed areas, check for:
• damaged gaskets.
• sealing rope not in place.
• loose bolts or nuts.
d. Correct all conditions and repeat step b. If unsealed
areas still exist, contact your Weil-McLain
distributor or sales office before continuing
installation.
7. Proceed to "Perform hydrostatic pressure test," page 8.
Table 2 Lifting weights