Weil-McLain 80 Boiler For Gas, Light Oil, Gas/Light Oil Fired Burners
20 Part No. 550-141-935/0602
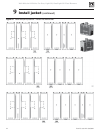
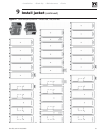
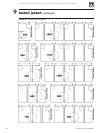
Install jacket9
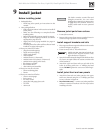
Before installing jacket
1. Packaged boilers
• Install top jacket panels per instructions in this
manual.
2. Non-packaged boilers
• Follow the instructions in this section to install all
jacket panels.
• Make sure the following are completed before
installing jacket:
• Boiler hydrostatically pressure-tested. See page 8.
• Plugs for unused tappings installed. See control
tapping table, page 28 or 29.
• Supply and return piping installed. See pages 14
through 19.
• Cleanout plates, flue collar and flue collector hood
installed. See pages 9 through 13.
3. These parts must be on boiler:
• plugs for unused tappings
• supply and return piping
• steam supply header
• cleanout plates
• tankless heater(s) (when used)
• tankless heater cover plate(s) (when used)
• tankless heater piping (when used)
• flue damper assembly
• flue collector hood
• observation port assemblies
4. These parts may be on boiler:
• burner mounting plate
•burner
5. These parts must be off boiler:
• water or steam gauge
• limit control
• low water cutoff
• gauge glass and gauge glass cocks
• tri-cocks
• drain cock
The boiler contains ceramic fiber and
fiberglass materials. Use care when
handling these materials per instructions
on page 38 of this manual. Failure to
comply could result in severe personal
injury.
Remove jacket parts from cartons
1. Locate jacket cartons.
2. Remove jacket parts from cartons as needed. Leave in
cartons as long as possible to avoid damage.
Install support brackets and rails
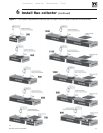
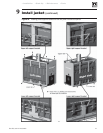
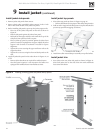
1. Place upper and lower support brackets over draw rods
as shown in Figure 20, page 21.
2. Fasten securely with
5
/8" nuts where shown.
Models 380, 480, 580, 680 and 780 do not
require lower support brackets. Only
upper brackets are required.
3. Space the brackets along the length of the boiler so there
are close to an equal number of sections on either side
of the bracket(s).
4. Attach the upper and lower rails on each side of the
boiler by securing with #10 x ½" Phillips pan head
screws.
DO NOT tighten the screws more than finger-
tight.
Install jacket front and rear panels
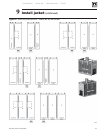
1. Attach the front and rear jacket panels to the upper
and lower channels using #10 x ½" Phillips pan head
screws, as shown in Figure 20.
2.
Rear flue boilers only — remove rear jacket panel flue
collector transition knockout with tin snips before
installing on boiler.


