– 136 –
No.
S
Part name
Adjust corner
cap
Procedure
1. Detachment
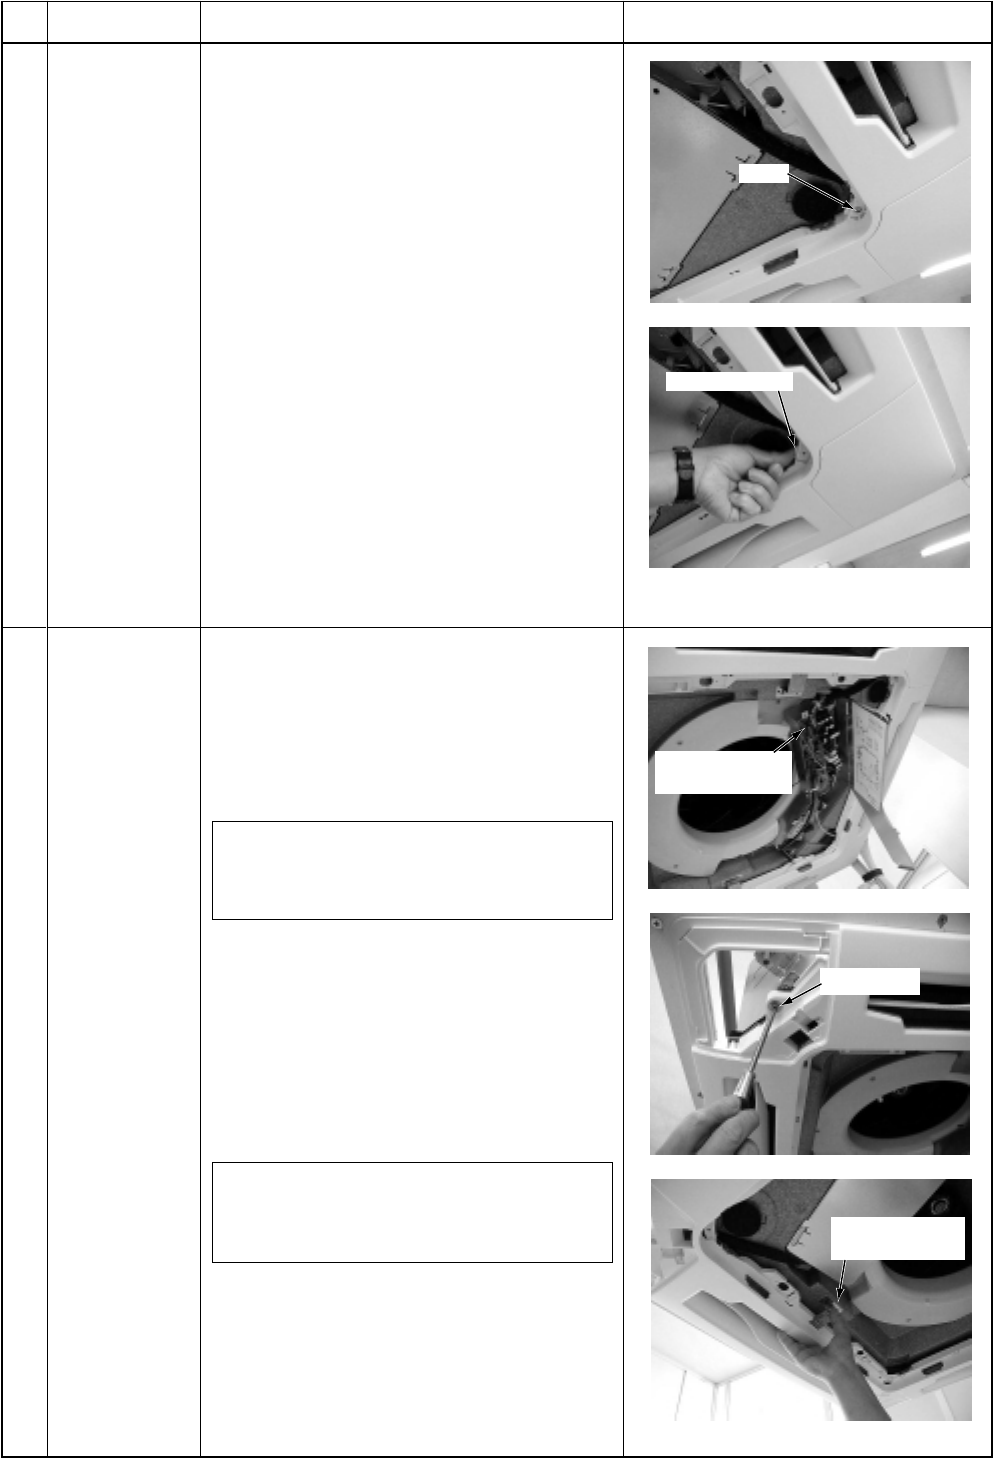
1) Perform work of item 1. of Q.
2) Remove screws at 4 corners of the
suction port. (Ø4 x 10, 4 pcs.)
3) Push the knob outward and remove the
adjust corner cap by sliding it.
2. Attachment
1) Mount the adjust corner cap by sliding
it inward.
2) Tighten screws at 4 corners of the
suction port. (Ø4 x 10, 4 pcs.)
Remarks
Screw
Push outward
Remove the flap
connector
Fixing screw
Push the tentative
hook outward
1. Detachment
1) Perform works of items 1 of Q, 1 of R
and 1 of S.
2) Remove the flap connector (CN33,
White, 5P) connected to the control P.C.
board, and then remove the lead wire
from the clamp.
NOTE :
Remove the connector by releasing
locking of the housing.
3) Remove screws fixing the ceiling panel.
(M5, 4 pcs.)
4) Push the tentative hook outward to
remove the ceiling panel.
2. Attachment
1) Hang the tentative hook of the main
body drain pan to the tentative hook of
the ceiling panel.
NOTE :
A panel has directional property, so mount
a panel with attention to the marks.
2) Tighten fixing screws. (M5, 4 pcs.)
3) Connect flap connector of the ceiling
panel to connector (CN33, White, 5P)
on the control P.C. board.
T Ceiling panel


