


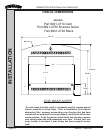

Page 15
REMINGTON QFP40 Direct Vent FIREPLACE
250-4721 JUNE 2001
Burner Orifice Replacement
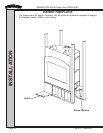
5. If logset is installed, remove logs and embers at this time.
6. Use a Phillips screwdriver to remove pilot lighting channel and front log rack.
7. Remove the two Phillips head screws that secure the front and rear burner pans in place.
8. Remove the burner pans by sliding to the right and lifting out. (Shutters may need to be
adjusted ‘closed’ to make this easier).
9. Slide shutters out of the way. Using a 3/8" wrench or socket, remove the orifice inserts and
replace with proper orifices for the specified gas. See below.
10. Reinstall burner pans and adjust shutters to ‘open’ position.
NOTE: THe right phillips screw holding front and rear burners in place should be left
slightly loose to allow for expansion.
CAUTION: The correct orifice placement is critical for proper appliance performance .
Natural Gas Propane
Main Burner Orifice Front (DMS) #47 #56
Main Burner Orifice Rear (DMS) #42 #53
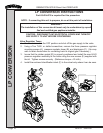
CONVERSION INSTRUCTIONS, (CONT.)
LP CONVERSION
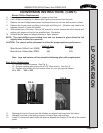
Note: Logs and burners will be reinstalled following pilot orifice replacement.
Pilot Orifice Replacement:
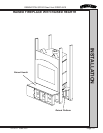
13. Lift pilot hood and remove. See Fig. A
14. Remove existing pilot orifice with a 5/32” allen wrench. See Fig. B
15. Replace pilot orifice with the correct orifice for your gas type as follows:
LP = .016 NG = .025
11. Replace pilot hood: Ensure that the notches are aligned and snap hood into place.
12. Reinstall Log Rack, pilot lighting channel, burners, lava rock and logs.
13. Install LP conversion label inside the apliance beneath the firebox, to the left of the control
panel.
FIG. A
FIG. B