


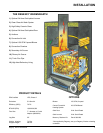
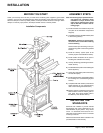
Regency Z2510 WarmHearth12
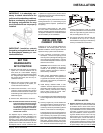
be closed during regular operation because
the unit uses outside air for combustion, not
room air.
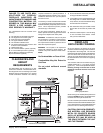
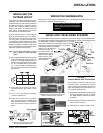
2) Multiple Terminations. When you install
more than one chimney in the same chase
or within the same general area, we suggest
that their terminations be separated by at
least 16 in. (410 mm) horizontally and 18 in.
(460 mm) vertically. This separation is to
prevent smoke migrating from one chimney
to another.
INSTALLATION
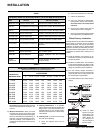
TABLE 2
MINIMUM RECOMMENDED FLUE HEIGHTS IN FEET
(Measured from the top of the solid fuel appliance)
# OF ELBOWS
ELEVATION (FT)
ABOVE SEA LEVEL 0 2 x 15
o
4 x 15
o
2 x 30
o
4 x 30
o
2 x 45
o
4 x 45
o
0-1000 12.00 13.00 14.00 15.0 18.00 16.00 20.0
1000-2000 12.48 13.52 14.56 15.6 18.72 16.64 20.0
2000-3000 12.96 14.04 15.12 16.2 19.44 17.28 21.6
3000-4000 13.44 14.56 15.68 16.8 20.16 17.92 22.4
4000-5000 13.92 15.08 16.24 17.4 20.88 18.56 23.2
5000-6000 14.40 15.60 16.80 18.0 21.60 19.20 24.0
6000-7000 14.88 16.12 17.36 18.6 22.32 19.84 24.8
7000-8000 15.36 16.64 17.92 19.2 23.04 20.48 25.6
8000-9000 15.84 17.16 18.48 19.8 23.76 21.12 26.4
9000-10000 16.32 17.68 19.04 20.4 24.48 21.76 27.2
TABLE 1
REQUIRED FIRESTOP, RADIATION SHIELD, OR ATTIC INSULATION SHIELD
Model 1st Floor 2nd Floor into Attic
AMERI-TEC 3103 Firestop Assembly (FSA) FSA with Attic Insulation Shield (AIS)
GSW JFC Firestop/Radiation Shield (FRS) Firestop Attic Insulation Shield (JSC-FAIS)
GSW FC Firestop Radiation Shield (FRS) Firestop Attic Insulation Shield(JSC-FAIS)
ICC Excel 103HT Radiation Shield (RS) Radiation shield (RS) with Storm Collar (SC)
ICC Excel 2100 Radiation Shield (RS) Radiation shield (RS) with Storm Collar (SC)
O.M. PRO-JET Firestop Radiation Shield Joist Shield with Attic Insulation Shield
Security ASHT Firestop Radiation Shield (RS) Radiation Shield with Attic Insulation Shield
(RS,RSA)
Security 2100 Radiation Shield (XRSA) Radiation Shield (XRSA)
Selkirk SS Radiation Dustshield Attic Insulation Shield
Selkirk SSII Firestop Wallspacer Firestop Wallspacer with Attic Insulation
Shield
Simpson Firestop Radiation Shield Firestop Radiation Shield with Attic
DURA-PLUS Insulation Shield
3) Chimney Maintenance. It is important
that you inspect your chimney regularly and
keep it clean. If you note more than 1/8 in.
creosote build up in your chimney have it
cleaned as per instructions of the chimney
manufacturer.
4) Chimney Fires. If you do have a chimney
fi re, refer to the following:
a. Close the fireplace doors and air
damper.
b. Clear family members out of the area.
c. Call the fi re department.
d. Use a dry chemical fi re extinguisher,
baking soda or sand to control the fi re.
Do not use water, it will create a steam
explosion.
e. Check for hot embers around the unit
and outside your home; extinguish.
f. Do not use your fi replace again until it has
been inspected by a qualifi ed person.
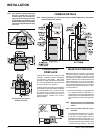
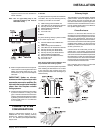
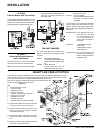
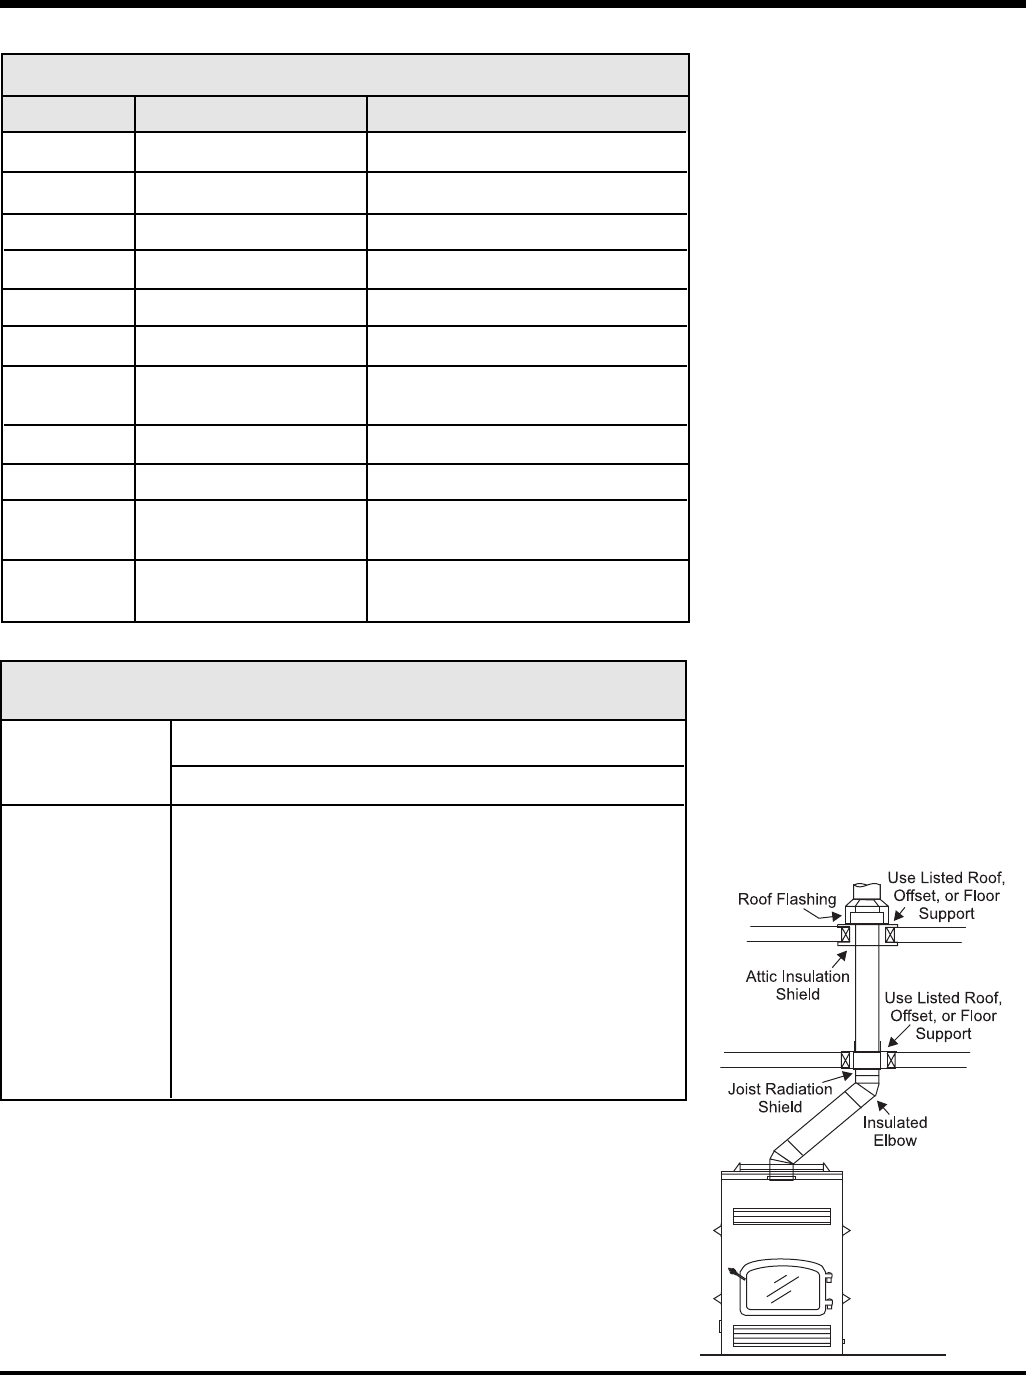
Offset Chimney Installation
Chimney elbows may be used in the installation
of the system. A maximum of four 45 degree
elbows are allowed. This may be achieved by
combining 30 degree and 15 degree elbows
together if necessary and allowed by the chim-
ney manufacturer. Offset angles of 45, 30 and
15 degrees are allowed with a maximum of 2
offsets.
1) Install the fi replace and chimney as de-
scribed above. When you require an elbow,
proceed as follows:
2) Install the insulated elbow. Turn the elbow
to the required direction and fasten it with
screws or locking bands depending on fl ue
design as specifi ed by the manufacturer.
3) Turn the chimney lengths clockwise to
lock them together, then secure them with
screws at each joint or locking bands; see
the manufacturers requirements.
4) Use another elbow to return the chimney to
vertical.
5) Install an offset
support in the joist
at the ceiling. Re-
support above each
offset; elbows are
not designed to
carry the weight of
the fl ue system.