


Regency Z2510 WarmHearth 11
or platform for support and to prevent cold air
from entering the room from under the fi replace,
if against an outside wall.
The fi replace may be positioned and then the
framing built around it, or the framing may be
constructed and the fi replace positioned into
the opening.
The minimum ceiling height is 7 feet. When
the unit is raised 4 inches above the fl oor the
Regency Hearth Extension (Part# 000-910) is
not required. A suitable non-combustible hearth
pad is mandatory in all installations.
INSTALLING THE
CHIMNEY SYSTEM
Following are a set of general guidelines for
installation of the chimney system. The more
detailed installation manual supplied with the
specifi c chimney system must be followed.
1) Using standard construction framing
techniques, construct the opening for the
chimney route up through the ceiling(s) and
roof or through an outside chase. Framing
must maintain adequate minimum air space
clearance at all times.
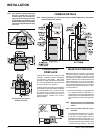
CAUTION: Allow a minimum 2 in. chimney
air space or as specifi ed by the owner's
manual for the chimney, to combustible
framing members throughout vertical or
offset chimney installation.
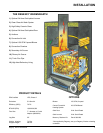
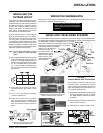
2) Attach anchor plate/fi replace adaptor to
the top of the fi replace. It is important that
a tight seal be made with this part and the
unit’s collar. This must be purchased with
the chimney system.
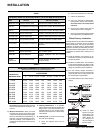
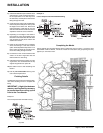
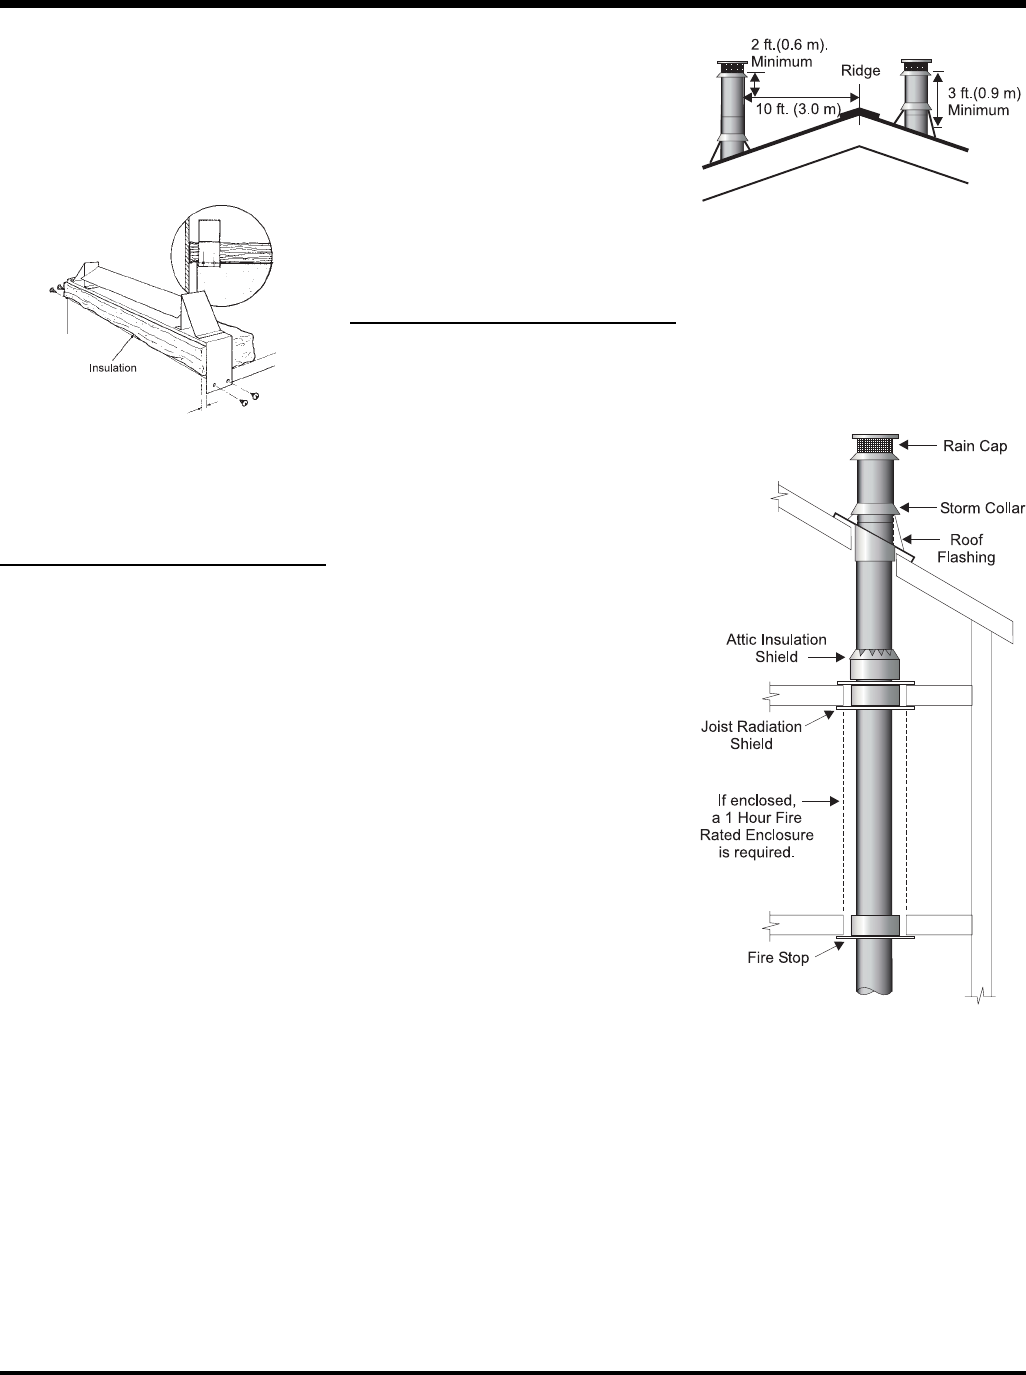
3) Install fi restop, radiation shield, or attic
insulation shield as required at each fl oor
penetration (refer to Table 1 in this section).
Check chimney manufacturer's framing
opening sizes to allow for correct clear-
ances. All parts must be listed.
4) The roof fl ashing should be installed making
sure that alignment is correct with openings
below.
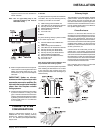
5) Chimney lengths may now be added until
the required height is reached. A minimum
fl ue height of 16 ft. from the fl oor (or 12 ft.
from the top of the unit) is mandatory (refer to
Table 2, in this section for Flue Heights).
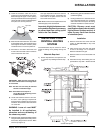
The performance of your unit is governed to a
very large extent by the chimney system. Too
short a chimney can produce poor drafting
which in turn can cause diffi cult start-up, dirty
glass, smoking out door and even reduced
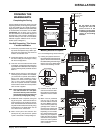
heat output. Too tall a chimney may prompt
excessive draft which can result in very short
burn times and excessive heat output. The
chimney must extend at least 3 ft. above
its point of penetration of the roof and be at
least 2 ft. higher than any point on the roof,
wall, or building within 10 ft. of it.
6) The raincap and storm collar should now
be fastened to the top of the chimney.
Install additional support(s) as indicated by
chimney manufacturer's instructions.
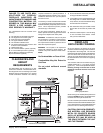
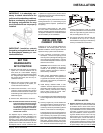
IMPORTANT: It is absolutely nec-
essary to attach stand-offs to the
unit to avoid combustion problems.
Serious overheating of combusti-
ble framing and possible fi re may
result if stand-offs are not properly
installed.
INSTALLATION
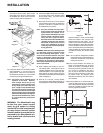
IMPORTANT: Insulation extends
forward to seal against the back of
the WarmHearth masonry or non-
combustible face.
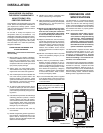
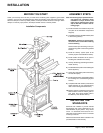
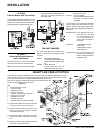
SET THE
WARMHEARTH
INTO POSITION
1) Estimate the total weight of the fi replace
system and surround materials such as
brick, stone, etc., to be installed. Shipping
weight is 715 lbs. and stripped weight is 460
lbs. Stripped weight refers to the weight of
the product with bricks, door and any ac-
cessories removed.
2) Measure the square footage of the fl oor
space to be occupied by the system, sur-
rounds and hearth extensions.
3) Note the fl oor construction, i.e. 2 x 10’s, (51
x 250 mm), single or double joists, type and
thickness of fl oor boards and consult your
local building code to determine if you need
additional support.
4) Remove door, fi rebox bricks, louvers etc.
Note: Set aside Gold doors and louvers away
from harsh chemicals and away from
abrasive materials to avoid damage,
e.g. muriatic acid for masonry wash
will strip the gold plate on the door.
Firebricks are fragile and should be
handled with caution.
The fi replace may be installed directly on a
combustible fl oor or raised on a platform of an
appropriate height. Do not place fi replace on
carpeting, vinyl or other soft fl oor coverings. It
may, however, be placed on fl at wood, plywood,
particle board or other hard surfaces. Be sure
the fi replace rests on a solid continuous fl oor
SPECIAL NOTES:
1) Negative Pressure In The House. When
there is no fi re in your unit there still should
be suffi cient draft to draw smoke from a
burning piece of paper held under the baffl e.
If your installation is correct, smoke will go
up the fl ue. If however, there is a problem
with your installation, cold air may be com-
ing down the fl ue into the room. This may
be the case if your unit smokes on start-up
with the door open, until the unit heats up.
To overcome this problem, try closing an
upstairs window and open a nearby window
to pressurize the house. Note: the door can
be open briefl y to start your fi re but must