


Regency Insert & Hearth Heater12
Pull Open Push Closed
INSTALLATION
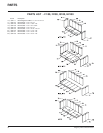
A tighter fit will ensure the tube will not move
when the unit is burning. See the diagram
for the large air tube installation (page 11),
though there are only three air tubes in the
medium units.
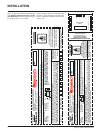
2) Slide the left baffle brick over the air tubes
from the front and then push it to the back.
4) Important: push both baffle bricks so
they are tight against the side walls.
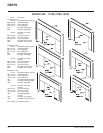
Side View
Front View
Front View
Side View
Front View
Front View
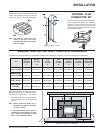
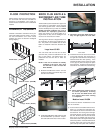
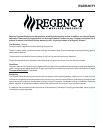
Hearth Heater (H2100M) -
Steel Baffle
Place the insulation batt on top of the baffle.
Make sure that this batt is laying flat and does
not obstruct the smoke from getting up the flue
opening. This insulating batt may be wrapped
in paper for handling purposes and does not
require removal. Batt hold down weights are
supplied with the unit and are to be placed on
the insulation to either side of the flame spread-
er as shown in the diagram and at the rear,
directly in front of the flue opening.
Lift the front end of the baffle up and over the
rear of the air
tube. On
Hearth Heater
(H2100M) re-
move center
tube by sliding
it sideways
first and then
down.
3) Tilt the left baffle brick up on top of the side
channel and it will leave enough room to
position the right baffle brick in the same
manner as Step 1) above. Then reposition
the left baffle brick flat on the air tubes.
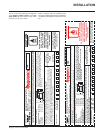
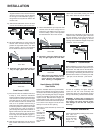
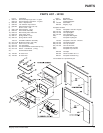
Small Insert I1100S
1) If the two air tubes are installed continue on
to Step 2), if not, follow the instructions
below. Install the air tube into the holes in the
side channels. The notch goes on the right
hand side with the air holes facing toward
the door. Slide the tube into the left hand
side, as far as possible and then bring it
back into the hole on the right hand side until
it locks into position. If the tube will not slide
in easily simply use a pair of vise grips or
pliers and tap it into place with a hammer. A
tighter fit will ensure the tube will not move
when the unit is burning. See the diagram
for the large air tube installation (page 11),
though there are only two air tubes in the
small units.
2) Slide the left baffle brick over the front air
tube and then slide it back over the rear air
tube.
3) Tilt the left baffle brick up on top of the side
channel and it will leave enough room to
position the right baffle brick in the same
manner as Step 1) above. Then reposition
the left baffle brick flat on the air tube.
4) Important: push both baffle bricks so
they are tight against the side walls.
Note: When getting the chimney cleaned,
remove the baffle bricks for ac-
cess to the flue, then replace them
when cleaning is completed.
Lift the rear of the baffle, pivoting it on the air
tube, until it clears the rear air channel.
Slide the rear of the baffle on top of the rear air
channel in front of the locating tabs. Make sure
that the insulation is lying flat and does not
obstruct the smoke from getting up the flue
opening. Place hold down weights on top of the
insulation - one on each side.
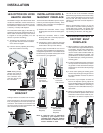
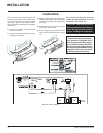
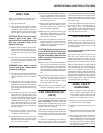
DRAFT CONTROL
Before establishing your first fire, it is important
that your fully understand the operation of you
draft control. The draft rod is on the left side of
the Inserts and it controls the intensity of the fire
by increasing or decreasing the amount of air
allowed into the firebox. To increase your draft
- pull open, and to decrease - push closed.
As well as a primary and glass wash air
system, the unit has a full secondary draft
system that allows air to the induction ports at
the top of the firebox, just below the flue baffle.
WARNING: To build a fire in ignorance or
to disregard the information contained in
this section can cause serious perma-
nent damage to the unit and void your
warranty.
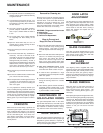
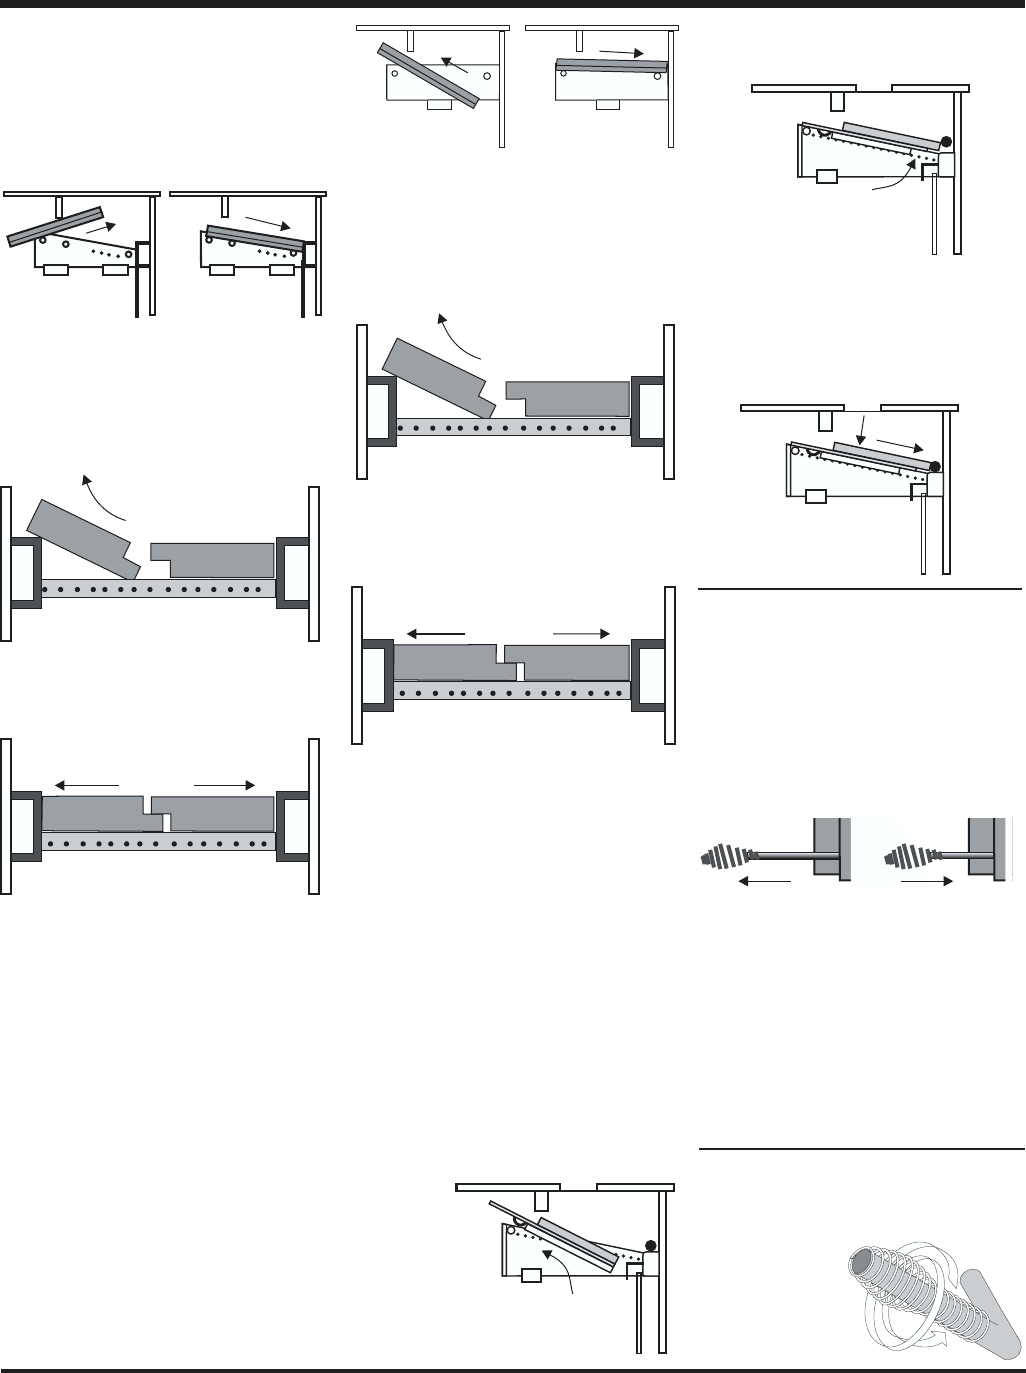
DOOR HANDLE
Attach spring handle by rotating counter clock-
wise onto rod.
Ensure that the rod
fits into the entire
length of the
spring handle.