


4 C3433M (3/07)
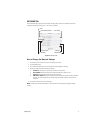
Welcome
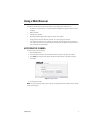
This manual explains how to interface with the IP110 Camclosure
®
using a standard Web browser (example
Microsoft
®
Internet Explorer).
The IP110 can also be used with an Endura
®
system as an Endura Enabled
™
device or a third party system
with Pelco’s API interface. If you are using one of these systems refer to the following:
•
Endura Enabled Device:
If the camera is part of an Endura system the Endura GUI will
automatically discover the device and display it as a camera within the system manager. Refer to the
documentation for the Endura System Manager.
•
Pelco’s API Interface:
For a list of compatible API interfaces
go to www.pelco.com/ipcam.
IMPORTANT:
To secure access to the IP110 Camclosure, place the camera behind a firewall when it is
connected to a network.
NOTES:
•
For optimum image quality and bandwidth efficiency use the IP110 Camclosure as an Endura Enabled
device or with Pelco’s API interface.
•
Network and processor bandwidth limitations may cause the video stream to pause or appear
pixilated when an increased number of web-interface users connect to the camera. Decrease the
images per second (IPS) of the web-interface video streams to compensate for network/processor
limitations.
GETTING STARTED
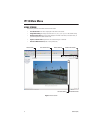
You will need to install your IP110 Camclosure before using this manual (refer to the installation manual).
Once installed, apply power to the network mini dome system. The system will start a configuration
sequence.
The following is the configuration process for the IP110 Camclosure:
•
The green LED inside the back box flashes 5 times per second for approximately two minutes, or until
the server recognizes the mini dome.
•
If the camera is not connected to a DHCP server, the green LED will flash for about four minutes
before the camera switches to Automated Private IP Addressing mode.
IP ADDRESS SETTINGS
The network automatically assigns an IP address to the IP110 camera. The following scenarios are how a
DHCP or static network assigns IP settings:
•
DHCP Network:
If the IP110 is connected to a DHCP network, the server will automatically assign
an IP address to the camera.
NOTE:
DHCP is the default setting for the camera.
•
Static IP Network:
The camera will automatically cycle through the IP address range of
169.254.200.0 through 169.254.200.255, on netmask 255.255.0.0. The first available address located
will be assigned to the IP110.
If the network cannot find an open address in the default range, manually set the IP address.
To manually set the IP address refer to
How to Change the Network Settings
on page 9.
IMPORTANT:
Contact your network administrator to avoid any network conflicts before setting/
changing the IP address of the camera.
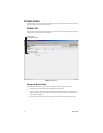
NOTE:
If you do not know the IP address of the IP110, install the Pelco Device Utility software
available on the CD shipped with the product. The utility will locate the assigned name, IP address,
and MAC
®
address for the device (refer to
How to Use the Device Utility
on page 15).
The Device Utility software is also available at http://www.pelco.com/software/downloads/.