Page 12
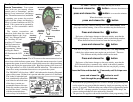
Automatic Rearming:
Automatic Rearming is a programmable feature which ensures that your
system is never inadvertently disarmed. It is possible to accidentally or unknowingly
operate the transmitter from a pocket or purse. You may not even be aware of an
accidental disarming due to the enhanced operating distance offered by the
Extended Range Transmitter.
How It Works:
Whenever the system is disarmed by the transmitter, this feature starts a 90
second countdown, which is indicated by a rapidly flashing Red Status Light.
During this 90 second period, if no protected entry points are opened and the
vehicle’s ignition is NOT turned on, the system will automatically arm itself at the
end of the countdown. If desired, the system can also be programmed to
automatically relock the doors when this occurs.
of the normal one chirp and one light flash. Additionally, the Status Light will
be flashing a “Zone Violation Code”. When the alarm condition activation
occurred, the Status Light changes from flashing slowly to flashing two to four
times between pausing to indicate which protected zone was violated.
• The Zone Violation Code will continue to be displayed until the vehicle’s
ignition is turned on.
• The Status Light will display the Zone Violation Code in place of fast
flashes indicating Automatic Rearming.
• Should the system be rearmed before the ignition clears the Zone Violation
Code memory, the Status Light shows the normal slow flashing.
• The system can store up to two consecutive Zone Violation Codes. If more
activations occurred, the two most recent codes are displayed.
Echo Transceiver Activation Alert:
If the Echo transceiver has been used to Disarm the system, it will show a
flashing icon for the zone which caused the system to activate into the alarm
condition. As long as the system is disarmed, the Echo will display this icon, until
the ignition is turned on. The Echo will store one Zone Violation Code.
Automatic Rearming Notes:
• Turning on the vehicle’s ignition cancels Automatic Rearming.
• Opening a door will suspend the 90 second countdown.
• All protected zones must remain non-violated during the 90 second Auto-
Page 37
Feature #20 Remote Start Preactivation
(Factory Default Off)
This feature requires that the user press the Valet Switch once before exiting
the vehicle in order for the remote starting operation to be available for later use.
With Preactivation is turned off, remote starting can be performed at any time,
and repeatedly if desired. If this feature is turned on, the system will not attempt
to start the engine unless the Valet Switch was pressed some time prior to the
starting attempt, as when leaving the vehicle.
Programming Preactivation:
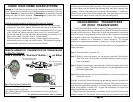
Follow Steps 1 to 4 on page 28; at Step 4 the Valet Switch will be pressed and
released twenty times. The system’s response will be twenty siren chirps, and the
Status Light flashing twenty times, pausing, then repeating. Within 10 seconds,
press and release the transmitter/transceiver’s "Arm/Lock" button to configure
the system Preactivation operable (the siren will chirp once) or the "Disarm/
Unlock" button to configure the system to turn off the Preactivation operation
(the siren will chirp twice).
Feature #21 Steady Siren or Pulsed Horn Output
(Factory Default Setting Steady Siren)
This feature allows the choice using of the vehicle's horn for the audible
output of the security system instead of the electronic siren. When programmed
configure the system for 20 minute remote start engine run time (the siren will
chirp once) or the "Disarm/Unlock" button to configure the system for 10 minute
run time (the siren will chirp twice).
Feature #19 Steady/Flashing Lights During Remote Start
(Factory Default Setting Steady)
This Feature configures the system's operation of the vehicle’s parking lights
when the engine is running after it has been remotely started. The factory default
setting has the parking lights illuminating steady during the engine run time; the
other option flashes the parking lights on and off during the engine run time.
Programming Steady or Flashing Parking Lights:
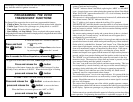
Follow Steps 1 to 4 on page 28; at Step 4 the Valet Switch will be pressed and
released nineteen times. The system’s response will be nineteen siren chirps, and
the Status Light flashing nineteen times, pausing, then repeating. Within 10
seconds, press and release the transmitter/transceiver’s "Arm/Lock" button to
configure the system for steady parking lights (the siren will chirp once) or the
"Disarm/Unlock" button to configure the system for flashing parking lights (the
siren will chirp twice).


