


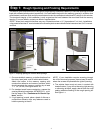
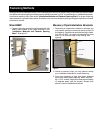
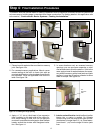
Step 2: Unit Preparation
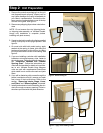
1. Remove the protective packaging from the unit
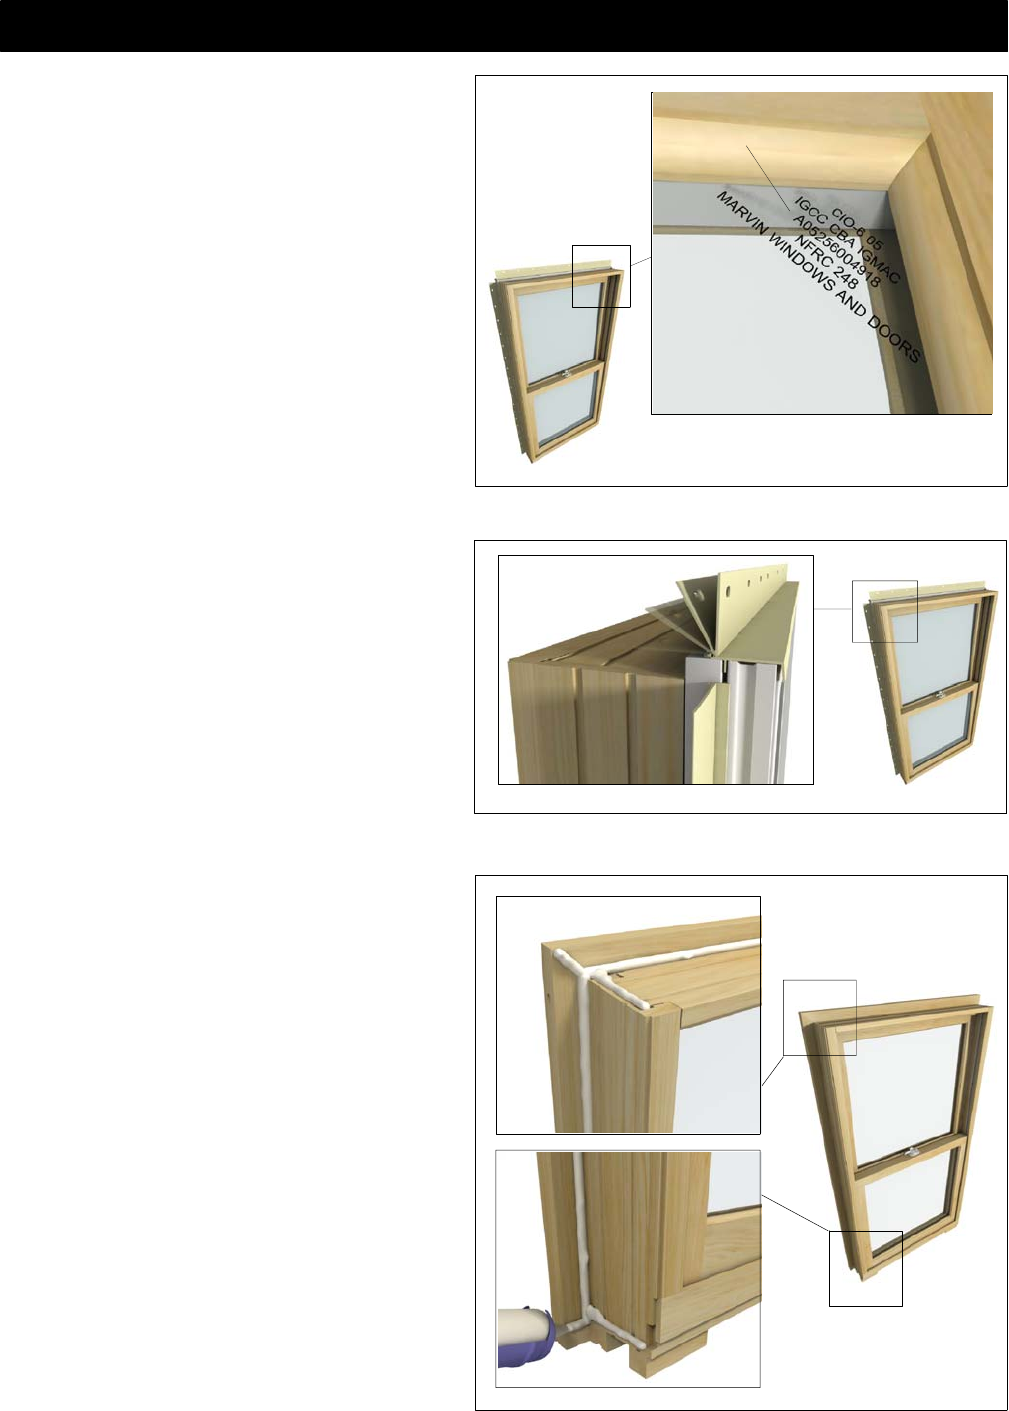
and dispose/recycle properly. Inspect unit for
any hidden damage and report immediately to
your Marvin representative. Provide the cus-
tomer service number etched on one of the top
corners of the glass. See figure 3.
2. Remove any shipping clips unless noted other-
wise.
NOTE: Do not remove the vinyl shipping blocks
or shipping tube assembly on Ultimate Double
Hungs until installation is complete (unless
installing with jamb screws).
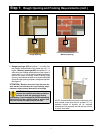
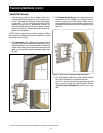
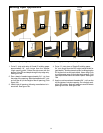
Figure 4: Extend nailing fin.
Figure 5: Apply back--caulking to BMC.
Figure 3:
3. If used onclad units, position the factory applied
nailing fin/drip cap in the upright position. See
figure 4.
4. On wood units with brick mould casing, apply
sealant at the casing to frame joint along the
jambs and head jamb, at the sill horn to casing
joint, and at the miter corners of the casing. See
figure 5.
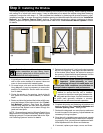
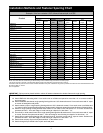
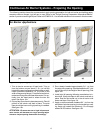
5. If you are installing a window with installation
brackets or structural masonry clips, fasten to
the window now. Follow the fastener spacing in
the “Installation Methods and Fastener
Spacing Chart”. Follow the instructions pro-
vided with the brackets for details on how to fas-
ten to unit. Ultimate Double Hung Magnum
units are sent with supplemental instructions
which detail how to remove the sash and jamb
fillers.
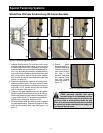
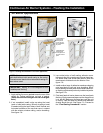
6. If you will be fastening with screws through the
jambs, head jambs, and sill, remove your sash
and covers or liners at this time. Refer to the
section, “Removing Interior Stops, Liners,
and Fillers” and“Removing Sash” fordetails.
7. Install jamb extension before installing the win-
dow in therough or masonryopening. Follow in-
structions provided with the jamb extension.
Customer service number
6