


Removing Interior Stops, Liners and Fillers
Removing Casemaster Stops and Covers
Some structural installationsthat use the “jambpinning” method require the removal of interior stops beforeinstalling
the window. This section details the removal of Ultimate Double Hung (UDH) jamb liners and Casemaster operator
and stationary stops. More detailed information can be found in the Marvin Service Manual.
Details for UDHM windows can be found in the supplemental instruction sent with the unit.
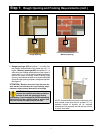
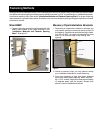
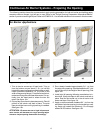
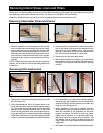
1. Sill and head jamb covers and stops areheld in place
with avinyl barb andcan be easilyremoved by simply
and carefully prying up on the stop with a sharp putty
knife. Becareful not todamage the stop or frame. Oc-
casionally the barb will stay in the frame when you re-
move the stop. Remove the barb with a pair of pliers
and reinsert into the kerf on the stop/cover. See fig-
ure 20a.
NOTE: Stationary jamb stops are removed in the same
fashion. You will need to remove the head jamb and sill
covers first.
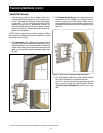
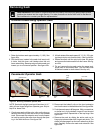
2. Operator jamb covers are held in place by two barbs:
one on the interior side and one on the exterior side
shared by the frame weather strip. With the sash
opened or removed, first pull the frame weather strip
out of the kerf and set aside for reuse later.
3. Remove the sill and head jamb stops.
4. With a sharp putty knife, carefully pry on the interior
side between thestop and theframe. Start atone end
and work your way down until stop loosens. See fig-
ure 20b.
Figure 20: Removing Casemaster stops and covers.
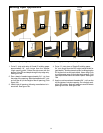
Figure 21
(b)(a)
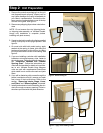
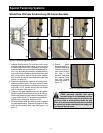
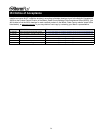
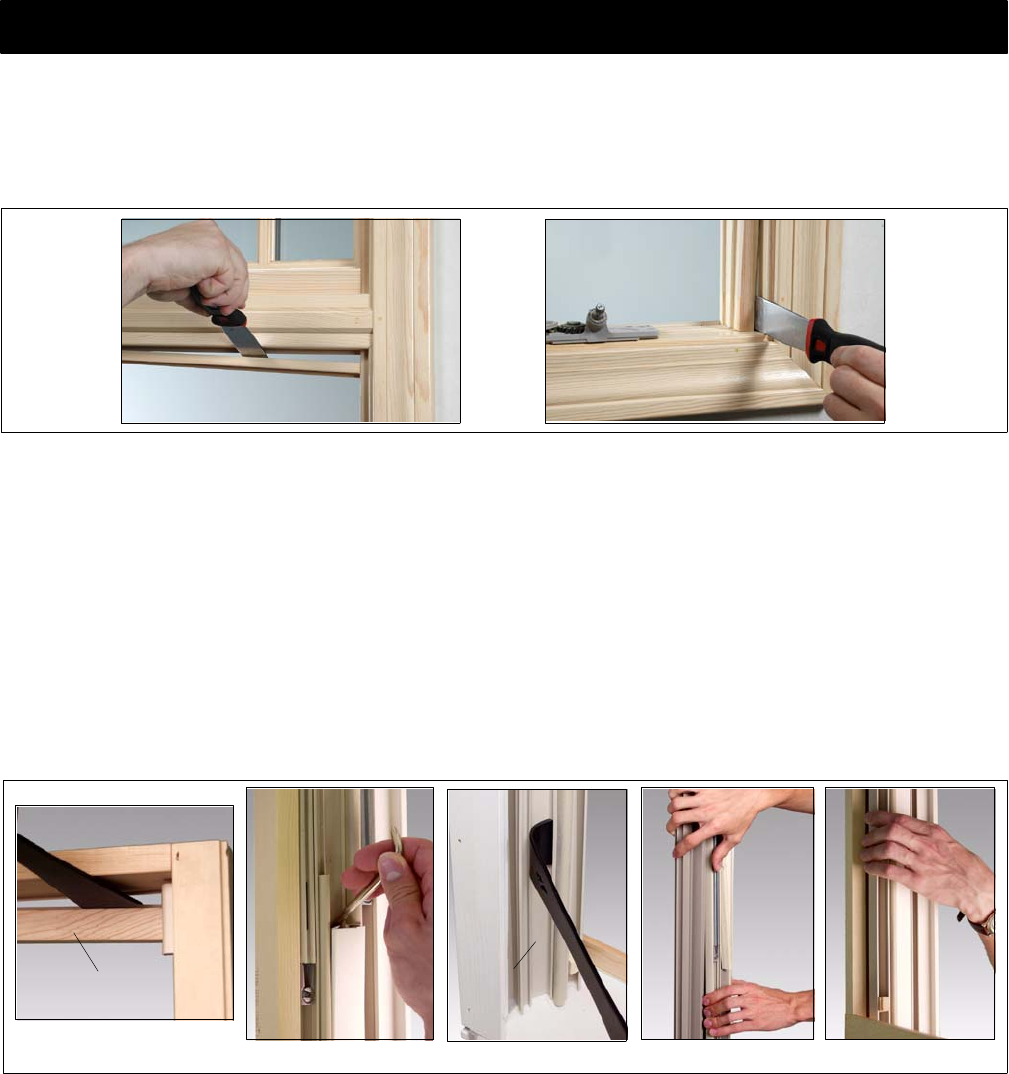
Removing UDH Jamb Liners
1. Remove the head jamb parting stop with use of a pry
bar. See figure 21a.
2. Use a flatheaded tool with a 90 degree elbow to re-
move the lower fillers from the jamb hardware assem-
bly. This is best done by placing the tool into the space
opened by the removed checkrail pad. Loosen both
corners of the jamb fillers from the notches before try-
ing to remove t hem, t o r educe t he possibility o f damage
to the fillers. See figure 21b. Be sure to take care when
doing so, as there is a possibility of the fillers breaking.
3. From the exterior, pry out the jamb hardware assem-
bly u sing a pry bar by placing it into t he bottom f iller
channel, hooking it into the notches on the side, and
levering it out. S ee figure 21c.
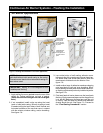
4. When installation of the unit is complete, seat the
jamb assembly facing towards the exterior first, and
ease the remainder of the assembly into the jamb
pocket. See figures 21d and 21e. Use of a rubber
mallet may be required. If so, take the mallet and,
starting at one end, work your way up the filler, until
fully seated. (Use of a cloth to protect the wood and
keep it clear from direct impact while hammering is
suggested.)
5. Reinstall the checkrail pads and head jamb part stop.
Head jamb
parting stop
Bottom
filler
channel
SHOWN FROM
EXTERIOR
(b)(a) (d)(c) (e)
18