


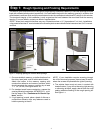
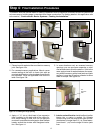

Step 4: Final Installation Procedures
This section does not include details on sealing installations that incorporate a continuous air barrier system such
as house wrap or building paper in standard wood frame construction. For flashing details in this application refer
to the section, “Continuous Air Barrier Systems -- Flashing the Installation”.
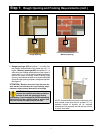
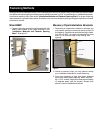
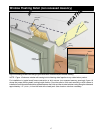
1. Place a bead of sealant at the wood buck to masonry
joint. See figure 13a.
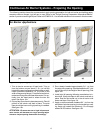
2. For recessed masonry applications, Marvin recom-
mends sealing at the buck to frame joint with ap-
propriate widthbacker rod andsealant aroundthe en-
tire perimeter. Finish as applicable local code dic-
tates. See figure 13b.
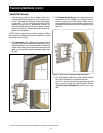
Figure 13: Sealing recessed masonry openings
3. In some situations such as recessed masonry
openings, you can use frame expander or other
clad accessories to finish the exterior. If this is the
case, apply a bead of sealant between the acces-
sory and the masonry at the head jamb and jamb
sections. Leave the sill portion unsealed to allow
water to escape. See figure 13c.
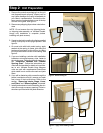
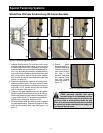
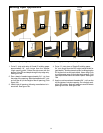
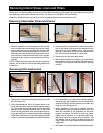
4. Apply a 1″-- 2 ″
(25--51) thick bead of low expansion
foam insulation on the back side of the nailing fin,
brick mould casing or other trim. Do not apply too
much as itis possible to bow thejambs. Now insulate
loosely around the window with fiberglass insula-
tion. See figure 14.
Backer
rod
Sealant
Sealant
(c)(b)(a)
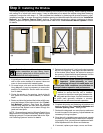
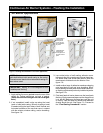
5. Interior and mullion trim: Install mullion trim after
interior trim or casing is applied. On Ultimate
Double H ung units, be sure to use nails and sta-
ples that are no longer than 3/4″
(19). Place fasten-
ers at least 1″
(25) from the edge of interior jamb
liner.
Figure 14: Insulating the rough opening
Low
expansion
foam
Fiberglass
insulation
12