


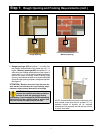
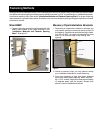
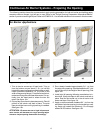


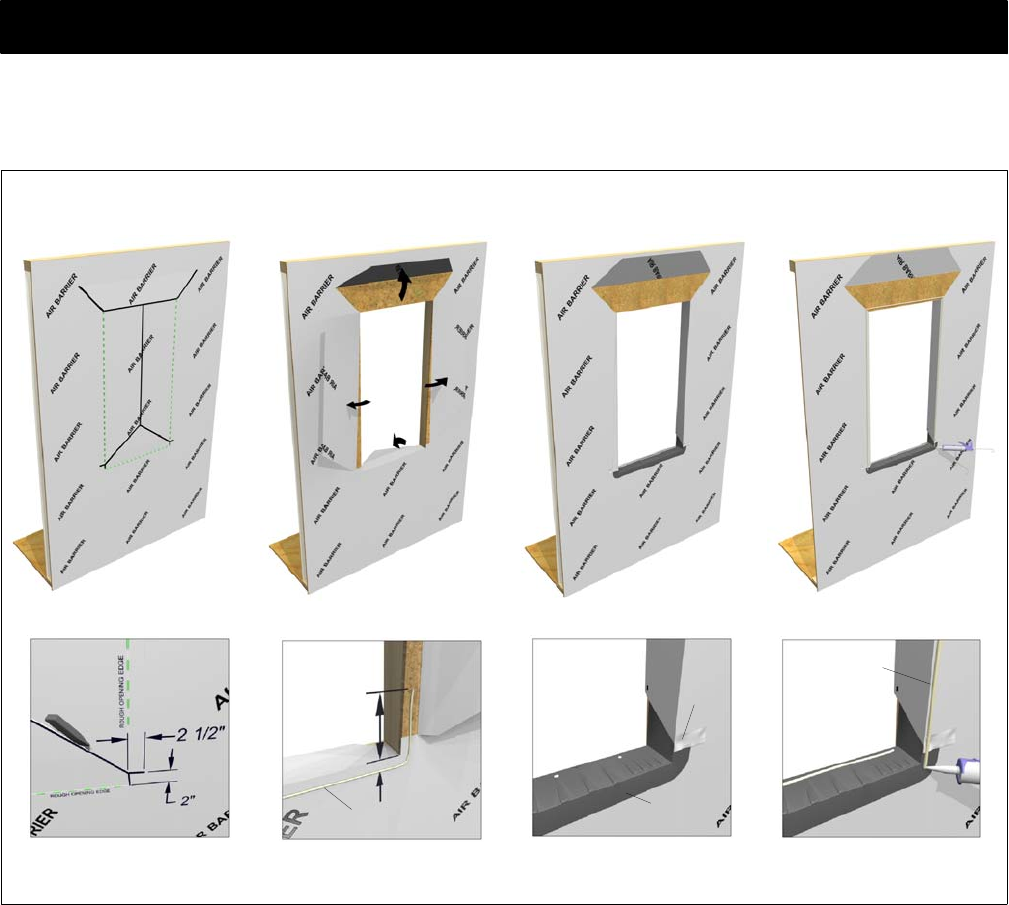
1. Trim air barrier across top of head jamb. Trim up
from the bottom corners about 2″
(51) (or half the
height ofthe panning flange)and then makean addi-
tional horizontal cut about 2 1/2″
(64) wide (or the
width ofthe panning flange).From the horizontalcut,
make two 45 degree cuts toward the center. Cut ver-
tically from the head jamb to where the two 45s
meet. See figure 15a.
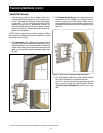
2. Flip top flap up and tack in place temporarily. Fold sill
portion to the interior and tack in place. The side
flaps should be loose until rigid panning is installed.
See figure 15b.
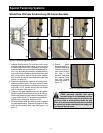
Continuous Air Barrier Systems -- Preparing the Opening
Air Barrier Applications
Figure 15: Rough opening preparation for construction methods using a continuous air barrier system and rigid sill panning.
(a) (b) (c)
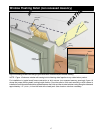
The following section shows the recommended rough opening preparation for both air barrier and building paper
scenarios where a flanged, rigid sill pan is used. Refer to the “Rough Opening Preparation--Alternative Method”
section if you do notuse a rigid sill pan.Refer to ASTM E2112--1 for theother situations not covered in this document.
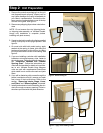
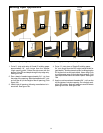
3. Run a bead of sealant approximately 3/4″
(19) from
the edge of the opening. Start the bead about 6″
(152)
up from the sill (or the height of the sill panning). See
figure 15b.
4. Install rigid sill panning following manufacturer’s in-
structions. Wrap side flaps to the interior and tack in
place. Seal the horizontal cut in the air barrier with
seam seal tape. See figure 15c.
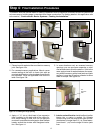
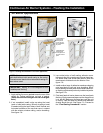
5. Apply a continuous bead of sealant 3/4″
(19) from top
and sides ofwindow opening (orwhere casing or cas-
ing flange will contact the structure). Do not apply
sealant to RO bottom. See figure 15d.
(d)
6″
3/4″
Seam
seal
tape
Rigid
panning
Sealant
Sealant
ATTENTION: Be aware that use of rigid sill pans and
other barriers will decrease the rough opening height
clearance. Adjust opening dimensions accordingly.
13