


Continuous Air Barrier Systems -- Flashing the Installation
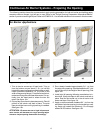
Air Barrier Applications
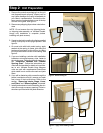
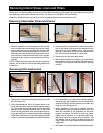
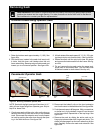
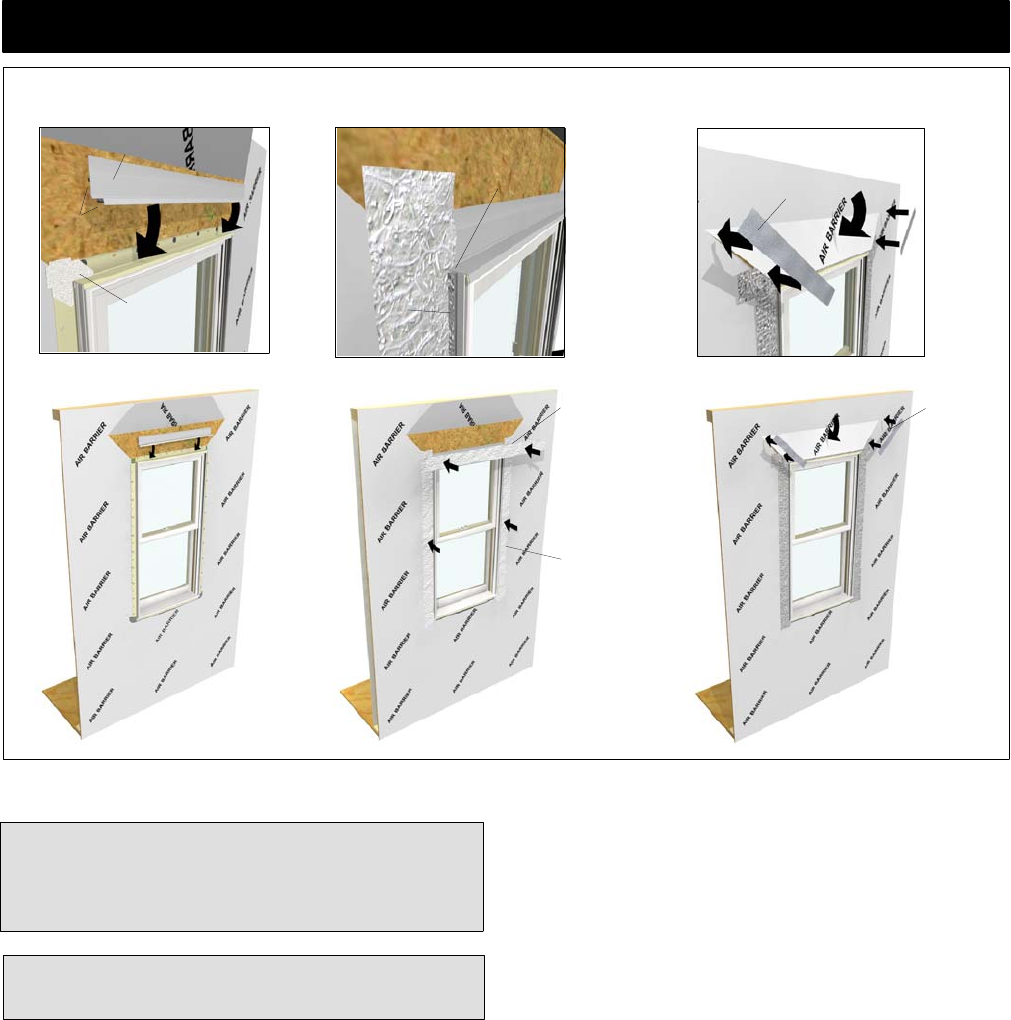
Figure 17: Sealing the installation in air barrier applications.
(b) (c)
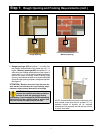
IMPORTANT: Nailing fin is not designed to be a
weatherproof flashing.
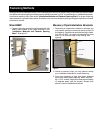
1. Apply nailing fin corner gaskets to each corner of the
nailing fin. Follow instructions on back of gasket.
(Units with clad flat casing do not use corner gas-
kets.)
(a)
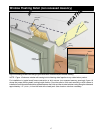
Sealant
Drip cap
Cut membrane
at head jamb
and fold back
Fold and
adhere
membrane
to jamb
Install adhesive
membrane at
head jamb to
cover drip cap
and membrane
at jambs.
Install adhesive
membrane to
cover paper and
lap onto window
jamb.
Fold air
barrier
down over
membrane.
Seam
seal tape
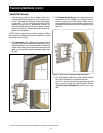
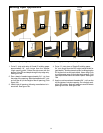
2. If not completed, install a drip cap along the head
jamb or head jamb casing. Be sure to apply a bead
of sealant along the back sides of both vertical and
horizontal surfaces of the cap that come in contact
with the window, window casing, and/or sheathing.
See figure 17a.
3. Lap vertical strips of self sealing adhesive mem-
brane onto the unit or casing and out overthe air bar-
rier. Make small cuts at the head jamb to allow the
membrane to fold back onto the exterior. See
figure 17b.
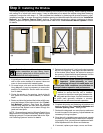
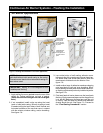
4. Install another layer of adhesive membrane lapping
onto head jamb of unit and over sheathing. Mem-
brane flashing at head jamb should extend and cov-
er flashing membrane previously installed at jambs.
See figure 17b.
5. Fold head jamb air barrier down over the head jamb
flashing. Apply seam seal tape over the diagonal cut
in air barrier. Make sure the tape laps onto the unit
or casing. Tape and seal any seams and fasteners
directly above the unit. See figure 17c. Proceed to
the “Final Sealing Procedures” section.
Corner
gasket
NOTE: Illustrations and text in this section refer to
units built without brick mould casing or flat casing.
Procedures are identical for windows with casing un-
less where noted.
15