


- 7 -
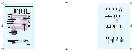
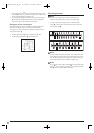
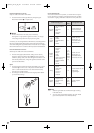
4. Insert the bobbin case in the carrier, holding the case by the catch
and then releasing the catch. The driver
o
on the outside of the
bobbin case must catch in the notch
z
on the top of the case carrier.
Notice
If the bobbin case has not been correctly inserted in the carrier,
it will fall out as soon as you commence sewing.
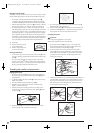
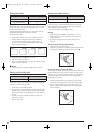
Threading the upper thread
1. Raise the sewing foot
s
by activating the lifter lever
g
as illustrated.
2. By turning the handwheel
0
(in an anti-clockwise direction) bring the
needle into the highest possible position.
3. Slide a spool with thread onto the horizontally located thread spool
carrier
5
, then press one of the two supplied thread spool carriers
x
/
c
onto the pin so that the thread spool is held in place.
Notice
Select spools of thread complying with the thread spool carrier
x
/
c
in shape and size. The external diameter of the selected thread spool
carrier
x
/
c
should be slightly greater than the external diameter of
the winding on the spool of thread.
4. Feed the thread you have unwound from the spool through the thread
guide, as is illustrated in the diagram and on the machine.
Notice
Ensure that the thread is threaded from right to left through the eye of
the feeding lever
j
. When you thread the needle with the upper thread
make sure that the needle is threaded from the front to the back and
that the loose end of the thread has a length of at least 15 cm (6“)
from the needle eye. Use the threading aid
G
to thread the needle.
Insert the loop of the threading aid
G
through the needle eye from
the rear. Pass the tread through the loop then carefully pull the threa-
ding aid
G
back. The thread will be automatically drawn through
the eye of the needle.
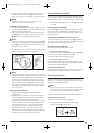
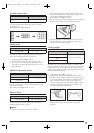
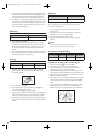
Retrieving the lower thread
1. Bring both the sewing foot
s
and the needle into the higest
possible position.
2. Grasp the end of the upper thread with your left hand and then turn
the handwheel
0
(in an anti-clockwise direction), until the needle
has moved down and then up into the highest position.
3. Normally the upper thread will then „catch“ the lower thread in a loop
and bring it to the top. Pull the end of the upper thread towards you
and the spool will be released in a large loop of the lower thread.
4. Draw approximately 15 cm (6“) of both threads from the spool
respectively from the bobbin. Lay the upper thread upside down
between the toes of the sewing foot
s
, then draw it in the direction
of the appliance rear. Lay the lower thread, just like the upper thread,
but slanting rear right in the direction of the appliance rear.
Sewing with the twin needle
Your machine is also designed for sewing with twin needles
C
, meaning,
you can sew with two upper threads simultaneously. These two upper thre-
ads can be the same colour or – for decorative purposes – different colours.
• Adjust the setting wheel single needle – twin needle
4
to the symbol
„twin needle”.
Inserting the twin needles
C
The twin needles
C
are inserted principally in the same manner as single
needles. Also in this case the flattened side of the needle shaft must be
pointing to the rear and the rounded side of the shaft cross section must
be pointing to the front.
Positioning the additional thread spool carrier
Insert the vertical thread spool carrier into the opening
7
on the machine
upper side close to the horizontal thread spool carrier
5
. Place the second
spool of thread onto the vertical thread spool carrier.
Threading the twin needles
C
Each of the two needles must be threaded separately.
1. Threading the needle on the right
Proceed in the same manner as threading single needles using the thread
from the spool on the additional thread spool carrier
b
.
Draw the thread through the thread guide on the right.
2. Threading the needle on the left
Thread the needle on the left in the same way as the needle on the right,
however, draw the thread through the guide on the left before you draw
it through the eye of the left-hand needle.
Inserting the lower thread
The spool of the lower thread is inserted in the same way as with a single
needle (see Chapter „Threading the sewing silk and preparation”).
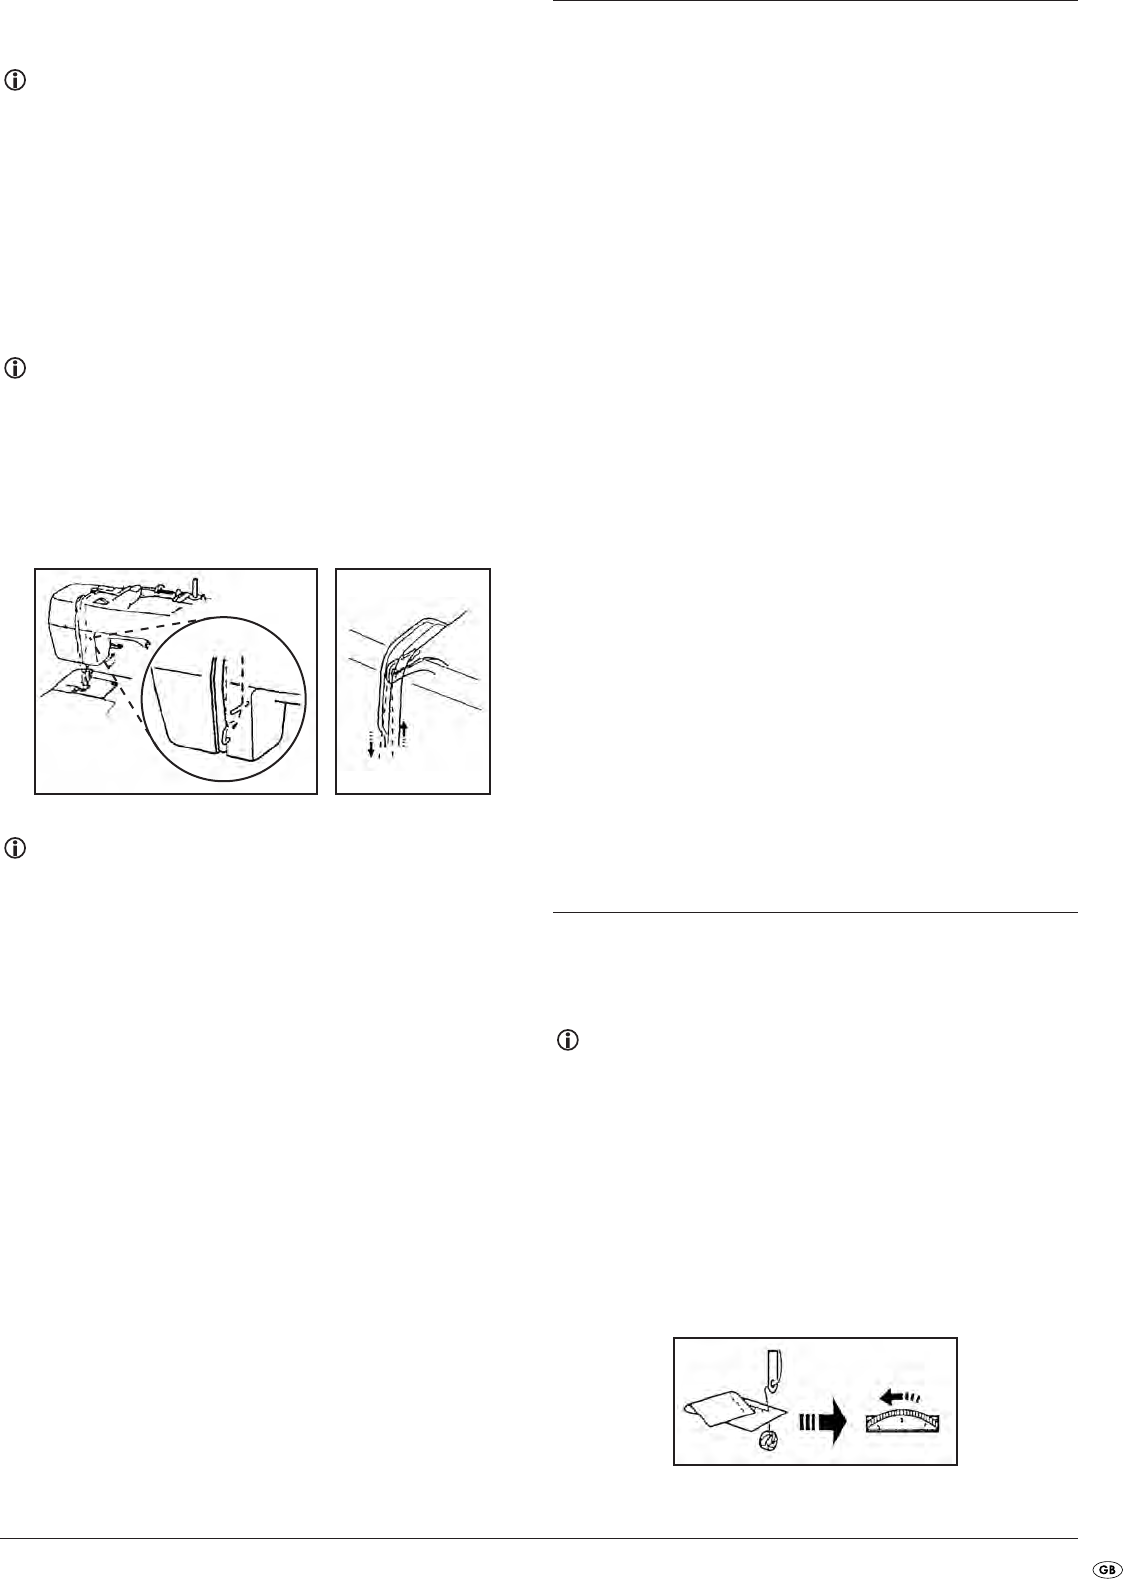
Tensioning the thread
The tension of the thread has a fundamental influence on the quality of
the stitches. It may be necessary to adjust the thread tension if you change
the thread or sew a different kind of fabric.
Notice
Before you actually commence sewing the fabric you should carry out
a sewing test using a remnant of the same fabric, adjusting the thread
tension if necessary until a satisfactory test result is achieved.
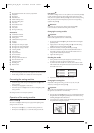
Possible fine adjustments of the thread tension and their consequences:
Upper thread tension is too high:
Small loops are visible on the top surface of the fabric.
➩ Reduce the tension of the upper thread by turning the upper
thread tension selector
2
to a lower value.
IB_KH4001_E2719_GB_LB4 23.04.2008 9:28 Uhr Seite 7