


- 11 -
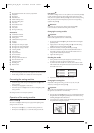
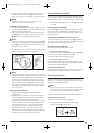
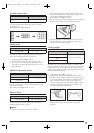
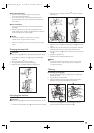
Two-fold rampart stitch
This type of stitch is used to sew two pieces of material together if there
are no special requirements in relation to the elasticity of the seams,
e.g. for patchwork.
Set the stitch type selector
w
at number 11.
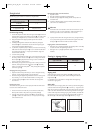
Scallop stitch
The machine can create a scallop stitch automatically, which may be
used to decorate the edges of the items you have sewn.
1. Set the stitch type selector
w
at number 12.
2. Sew the scallop stich closely along the edge of the material.
3. If you wish, you can trim the outer curve of the pattern you have
sewn after you have finished the edge. Make sure you do not cut
through the stitches.
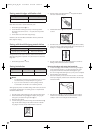
Additional decorative stitches
Both types of stitch may be used for the creation of (edge) decorative
seams as well as smocking.
Set the stitch type selector
w
at number 13 or 14.
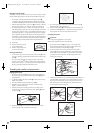
Fishbone stitch
This stitch is used to join two pieces of fabric when a certain space
between the edges or borders is required.
Notice
Use thicker upper and lower threads than is customary.
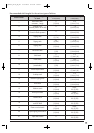
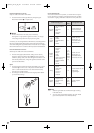
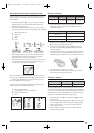
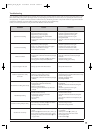
Type of stitch No. Stitch length
15 (Fishbone stitch) fixed at 2.5 in the factory
Type of stitch No. Stitch length
13 (Random zigzag stitch)
F-1
14 (Pearl stitch)
Type of stitch No. Stitch length
12 (Scallop stitch) F-1.5
Type of stitch No. Stitch length
11 (2-fold rampart stitch) F-3
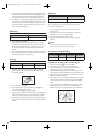
1. Fold together the edges of the two pieces of fabric to form a narrow
hem, then tack the pieces onto a thin piece of paper, leaving a space
of a few millmeters between the two borders.
2. Set the stitch type selector
w
at number 15.
3. Sew along the gap, at the same time pulling the upper and lower threads
slightly in order to enable a correct formation of the initial stitches.
4. Remove the attached paper after finishing the sewing and close the
seam by knotting the two threads at the beginning and the end of
the seam on the underside of the material.
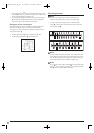
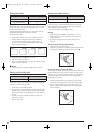
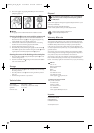
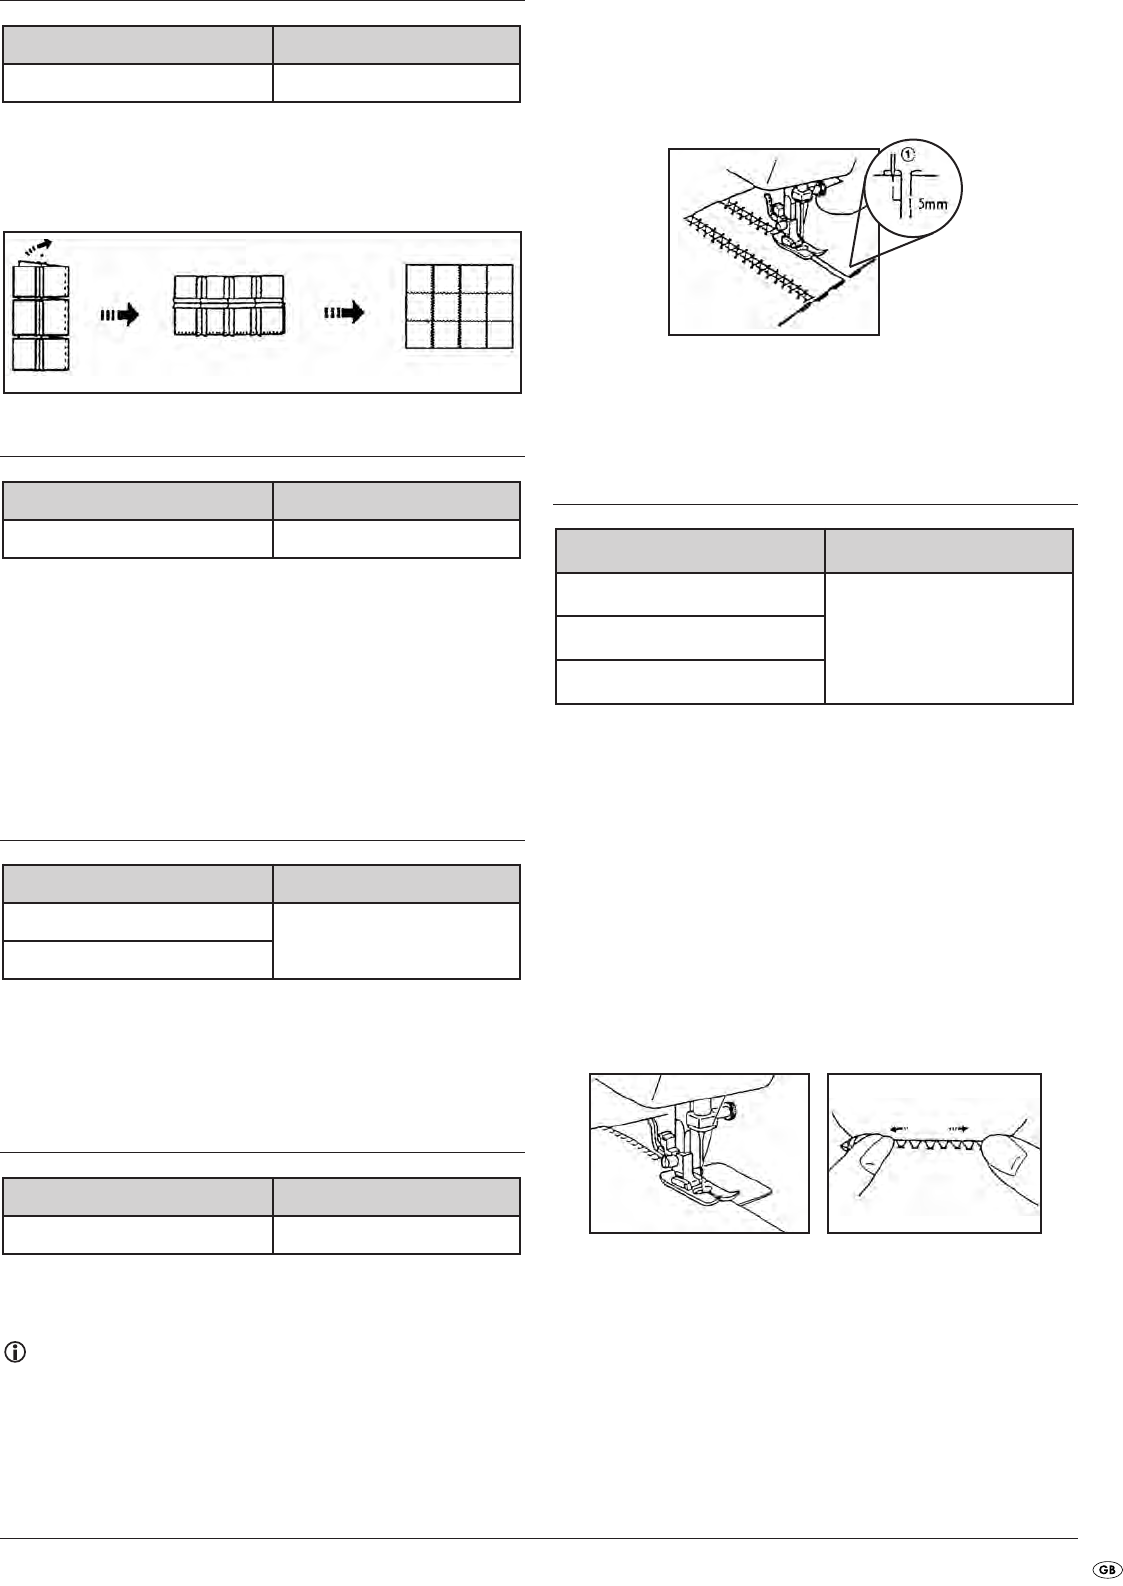
Finishing edges
These stitches are used to finish off pieces of fabric to prevent them from
fraying and to hem them in one process. The arrow point stitch is ideal for
finishing off a bed cover or table cloth, for example, whereas the elastic
overlock stitch and the slanted overedge stitch is especially suitable for the
finishing off of stretchable materials.
1. Set the stitch type selector
w
at 16, 18 or 19.
2. Position the fabric under the sewing foot
s
so that the line of the
seam (the arrow points of the seam pattern formation) are positioned
ca. 3mm (1/8”) left of the centre of the sewing foot
s
. This type of
stitch is most effective when the seam line is approximately 6 mm
(1/4”) from the edge of the material, because the stitching movement
extending to the right (right zigzag points) grasps the fabric edge
accurately and thus protects it from fraying.
3. If the distance between the sewing line (arrow points) and edge
should become larger, you can trim the border to the right side
of the seam.
Type of stitch No. Stitch length
16 (Arrow point stitch)
fixed at 2.5 in the factory
18 (Blind hem (open) overlock
stitch)
19 (Elastic overlock stitch)
IB_KH4001_E2719_GB_LB4 23.04.2008 9:28 Uhr Seite 11