


11
Fuel Conversion Procedure
1. Turn off gas supply to stove.
2. Remove the stove Top Plate.
3. Disengage the two Glass Frame Latches at the top of
the firebox. See illustration on page 5. Carefully lift
the glass panel up and out of the stove.
4. If installed, remove the Embers and Log Set using
care not to damage the fragile log parts.
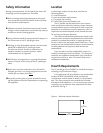
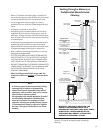
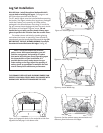
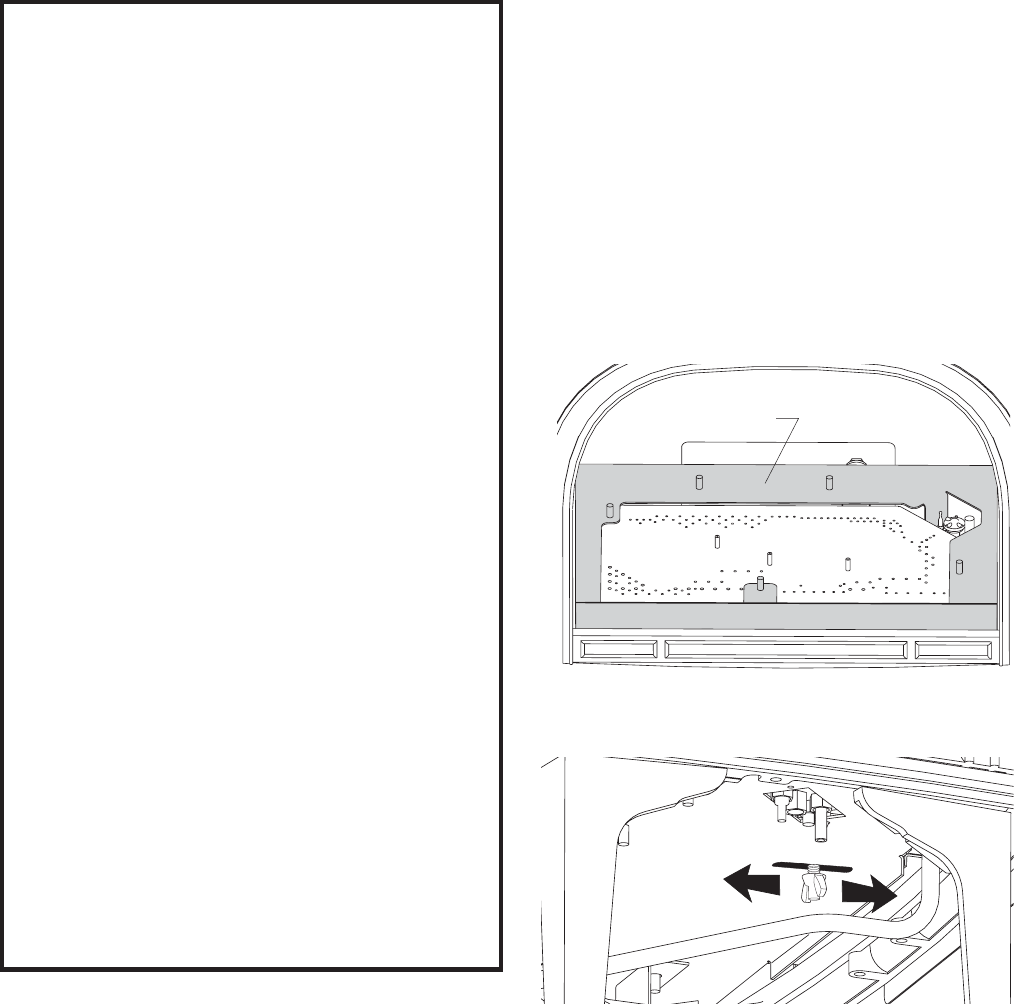
5. Lift out the Burner Skirt shown in fig.11.
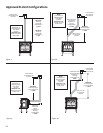
6. Reach under the stove and remove the Air Shutter
wingnut from its stud. As you face the right side, it is
the one closest to you. See fig. 12.
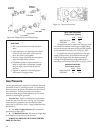
Conversion Kit Contents:
• 1, regulator tower labeled for propane
• 3, regulator tower screws
• 1, burner orifice (#39 for NG, #53 for LPG)
• 1, pilot orifice (#51 for NG, #30 for LPG)
• Label A - to be completed and applied to
the back of the stove
• Label B - apply to the stove’s Rating Plate
• Small valve label - apply to valve body
Conversion instructions are also shipped in the stove with
the conversion kit.
Fuel Conversion
The GF 300 BV gas stove is shipped from the factory
equipped to burn NATURAL GAS only. If PROPANE gas is
to be used as fuel, the appliance must first be converted
for use with propane. Use Propane Conversion Kit
155592, supplied with the appliance.
Order and install NG Conversion Kit 155593 to
change back to use with natural gas.
WARNING:
THE CONVERSION KIT IS TO BE
INSTALLED BY AN AUTHORIZED JØTUL
SERVICE TECHNICIAN IN ACCORDANCE
WITH THE MANUFACTURER’S
INSTRUCTION AND ALL CODES AND
REQUIREMENTS OF THE AUTHORITY
HAVING JURISDICTION. FAILURE TO
FOLLOW THESE INSTRUCTIONS COULD
RESULT IN SERIOUS INJURY OR
PROPERTY DAMAGE. THE QUALIFIED
AGENCY PERFORMING THIS WORK
ASSUMES RESPONSIBILITY FOR THIS
CONVERSION.
IN CANADA:
THE CONVERSION SHALL BE CARRIED
OUT IN ACCORDANCE WITH THE RE-
QUIREMENTS OF THE PROVINCIAL AU-
THORITIES HAVING JURISDICTION AND
IN ACCORDANCE WITH THE REQUIRE-
MENTS OF THE CAN1-B149.1 AND .2
INSTALLATION CODE.
AVERTISEMENT:
Cet equipement de conversion sera installe par
une agence qualkfiee de service conformenment
aux instructions du fabricant et toutes exigences
et codes applecables de l’autorises avoir la
juridiction. Si l’informaiton dans cette Instruc-
tion n’est pas suivie exactement, un feu, explo-
sion ou production de protoxyde de carbone peut
resulter le dommages causer de propriete, perte
ou blessure personnelle de vie. L’agence
qualifiee’ de service est esponsable de
l’installation propre de cet equipement.
L’installation n’est pas propre et complete jusqu’a
l’operation de l’appareil converti est cheque
suivant les criteres etablis dans les instructions
de proprietaire provisionnees avec l’equipement.
Figure 11. Lift and remove the Burner Skirt from within
the firebox.
Burner Skirt
Close
Open
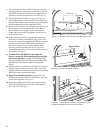
Figure 12. Locate and remove the Air Shutter wingnut
from under the right side of the stove.
Tools required:
• 1/2” open ended wrench or deep-well socket, Torx
T20 or slotted screwdriver, 4 mm allen wrench.