


© 2001 Directed Electronics, Inc. Vista, CA 3
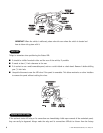
what is included
■ One control module with on-board shock sensor
■ One plug-in status LED
■ One plug-in Valet/program switch
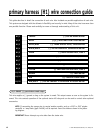
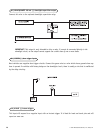
■ One 12-pin primary harness (H1)
■ One 5-pin auxiliary harness (H2)
■ One Revenger Soft-Chirp siren
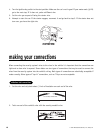
installation points to remember
■ Check with the customer on Status LED location.
■ Use seat and fender covers to protect the vehicle.
■ Remove the domelight fuse. This prevents accidentally draining the battery.
■ Roll down a window to avoid being locked out of the car.
■ Do not disconnect the battery if the vehicle has an anti-theft coded radio. If equipped with an air bag, avoid
disconnecting the battery if possible.
■ Remove necessary under-dash trim panels to provide access for mounting the system’s components.
IMPORTANT! Please read this entire installation guide before beginning the installation. The instal-
lation of this security system requires interfacing with many of the vehicle’s systems. Many new
vehicles use low-voltage or multiplexed systems which can be damaged by low resistance testing
devices, such as test lights or logic probes. Test all circuits with a high-quality digital multi-meter
before making the connections.
IMPORTANT! Many airbag systems display a diagnostic code through their warning light after they lose
power. Disconnecting the battery requires this code to be erased, which can require a trip to the dealer.
■ Test all functions. The “Using Your System” section of the Owner’s Guide is very helpful when testing.
■ When testing, don’t forget that this system is equipped with Nuisance Prevention Circuitry (NPC). This cir-
cuitry can bypass both instant trigger zones, making them appear not to work.
■ Carefully reassemble the under-dash trim panels.
■ Inspect the engine compartment for tools that may have been left behind.
after the installation
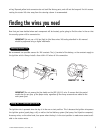
before beginning the installation