


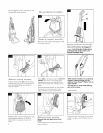
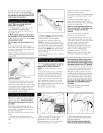
4. Return d_;ep cleaner to upright posi-
tion, Lower handle and replace recovery
tank.
5, Raise handle to upright position and
reposition clean solution tank,
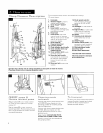
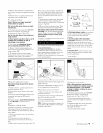
To clean floor
Read "Before you begin cleaning"
instructions on page 9.
Do not use the deep cleaner on hard-
wood floors.
1, Fill clean solution tank with HOOVER
Barc-_ Floor Cl{:aner _ according to
instructions for Figs, 2-8 to 2-14,
Do not use any type of wax with your
deep cleaner.
2. Move speed selector to the Lo or HI
position for scrubbing or OFF if
scrubbing is not desired.
3. Dry hands and plug deep cleaner
into a properly grounded outlet.
4. Step on handle release pedal and
lower handle to operating position; turn
deep cleaner ON,
5. To release solution, press trigger,
Slowly move d(;ep cleaner forward and
backward over area to be cleaned,
6, To pick up dirty solution, release trig-
ger and slowly move deep cloaner ovc;r
area where solution has just been dis-
persed. Use both forward and reverse
strokes,
7, Empty recovery tank when the motor
sound becomes higher pitched and
there is a loss in suction (see "Automatic
shut-off", Fig.2-6)
8, When finished cleaning, follow "After
cleaning '_ instructions on pages 9-10.
Disconnect deep cleaner from electri-
cal outlet and remove attachment from
nozzle, Rinse i[ in clear water. Do not
remove plastic screen or foam from
attachment.
*awlilabtE_ at additional cost if riot includ-
ed with your model
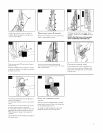
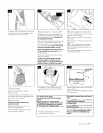
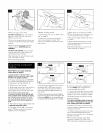
Your model includes some combination
Of the following tools.
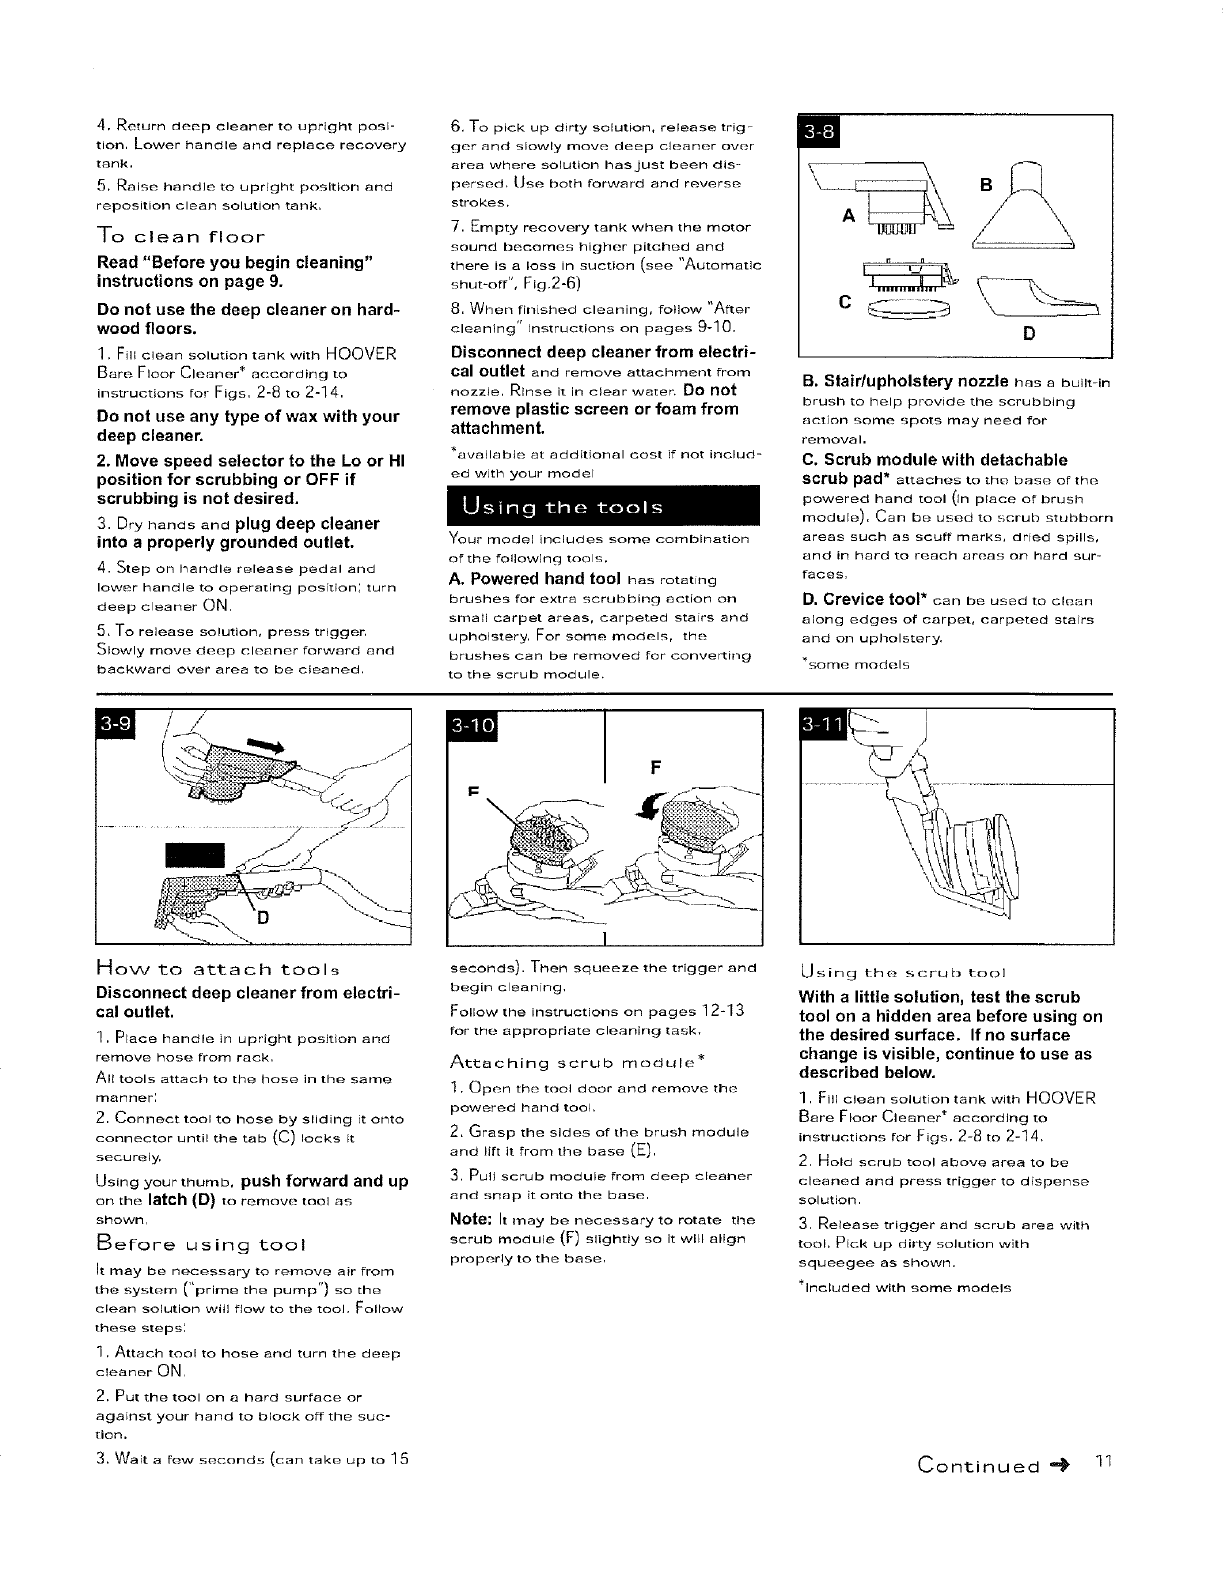
A. Powered hand tool has rotating
brushes for extra scrubbing []ction on
small carpet areas, carpeted stairs and
upholstery, For some models, the
brushes can be removed for converting
to the scrub module.
c
D
B. Stair/upholstery nozzle has a built-in
brush to help provide the scrubbing
action some spots may need for
removal.
C. Scrub module with detachable
scrub pad* attaches to the base of the
powered hand tool (in place of brush
module), Can b[; used to scrub stubborn
areas such as scuff marks, dried spills,
and in hard to rr_-ach arc;as on hard sur-
faces,
D. Crevice t0ol* can be used to clean
along edges of carpet, carpeted stairs
and on upholstery.
_some models
:: , D "_LT_
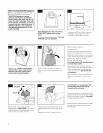
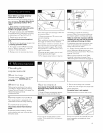
Mow to attach tools
Disconnect deep cleaner from electri-
cal outlet.
1. Place handle in upright position and
remove hose from rack,
All tools attach to the {hose in the same
manner:
2. Connect tool to hose by sliding it onto
connector until the tab (C) locks it
securely,
Using yOUr thumb, push forward and up
on the latch (D) to remow; tool as
shown,
Before using tool
It may be necessary to remove air from
the system ("prime the pump") so the
clean solution wiil flow to the tool, Follow
these steps',
1 . Attach tool to hose and turn the de_'p
cleaner ON,
2. Put the tool on a hard surface or
against your hand to block off the suc-
tion.
3. Walt a low seconds (carl tako up to 15
M
F
......
I
seconds). Then squeeze the trigger and
begin cleaning,
Follow the instructions on pages 12-13
for the appropriate cleaning ta._Jk.
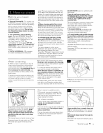
Attaching scrub module*
1. Open the; tool door and remove the
powered hand tool.
2. Grasp the sides of the brush module
and lift it frorr_ the base (E),
3, Pull scrub module from deep cleaner
and snap it onto the base,
Note; It rnay be necessary to rotate the
scrub module (F)slightly so it will align
prop_'rly to the base,
Using the; scrub tool
With a little solution, test the scrub
tool on a hidden area before using on
the desired surface. If no surface
change is visible, continue to use as
described below.
1, Fill clean solution tarlk witb HOOVER
Bare Floor Cleaner* according to
instructions for Figs. 2-8 to 2-14.
2, Hold scrub tool above area to be
cleaned and press trigger to dispense
solution,
3, Release trigger and scrub area with
tool, Pick up dirty solution with
squeegee as shown.
*Included with some models
Continued "_ 11