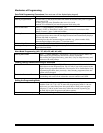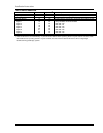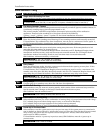
Dialer Programming
FIELD
TITLE and EXPLANATION
*40
PABX Access Code
Enter the PABX code, if used. To clear entries from field, press ∗40∗. If fewer than 6 digits need to be
entered, exit by pressing [∗], which advances to the next field.
Call Waiting: If the subscriber’s phone service has “call waiting” (and is not using PABX), enter “*70”
(“# + 11”) plus “# + 13” (pause) as the PABX entry to disable “call waiting” during control panel calls. If
the subscriber does not have “call waiting” and is not using PABX, make no entry in this field.
Important: 1. The call waiting disable feature cannot be used on a PABX line. 2. Using Call Waiting
Disable on a non-call waiting line will prevent successful communication to the central station.
VISTA-10PSIA: If call waiting is used, enter call waiting disable digits as described above, and also set
Call Waiting Disable option in field *91.
*41
Primary Phone No.
Enter the primary phone number. If you enter fewer than 20 digits, exit by pressing [∗]. To clear
entries from field, press ∗41∗.
NOTE: Backup reporting (8 calls are made to the secondary phone number if no kissoff is received
after 8 attempts to the primary number) is automatic only if there is a secondary number (field ∗42).
*42
Secondary Phone No.
Enter the secondary phone number. If you enter fewer than 20 digits, exit by pressing [∗]. To clear
entries from field, press ∗42∗. See backup reporting note for field ∗41. Don’t fill unused spaces.
*43
Primary Subs. Acct. No.
Enter the primary subscriber account number. To clear entries from field, press ∗43∗.
*44
Secondary Subs. Acct. No.
Enter the secondary subscriber account number. To clear entries from field, press ∗44∗.
*47
Phone System Select
Select whether the system will be using pulse or tone dialing, and whether it is on a WATS line.
*48
Report Format (Primary/Secondary)
Select the report format for primary/secondary phone lines from the list on the Programming Guide.
*49
Split/Dual Reporting
Select the desired type of reports to be sent to the primary/secondary numbers. Make selection from the
table in the Programming Guide
. If “0” selected, all reports go only to the primary number unless
unsuccessful, then control will attempt to dial secondary number.
*50
Burglary Dialer Delay
Enter the desired delay time (none, 15, 30, or 45 seconds) before a “BURGLARY ALARM” report is sent
to the central station. This delay allows time for the subscriber to avoid sending a false alarm if the
alarm was inadvertently caused. This delay does not apply to zone type 24 alarms (silent burglary) or
to 24-hour zone types 6, 7, and 8 (silent panic, audible alarm, auxiliary alarm), which are always sent
as soon as they occur. UL: must be “0”; SIA Guidelines: delay must be minimum of 30 seconds
VISTA-10PSIA: Delay Time: 1 = 15 secs; 2 = 30 secs; 3 = 45 secs
Delay Disable: 0 = use delay set in entry 1
1 = dial delay disabled for zones listed in zone list 6 (use zone list 6 to enter those zones that
require dial delay to be disabled; these zones ignore the setting in entry 1)
UL: Dial delay plus entry delay must not exceed one minute; use zone list 6 to disable dial delay
from appropriate zones, if necessary.
*53
SESCOA/Radionics Select
Select whether SESCOA format is used.
*54
Dynamic Signaling Delay (Intended for use with Long Range Radio reporting)
Enter the desired time (0-255 seconds in 15-second increments) the panel should wait, per message, for
acknowledgment from the first reporting destination (see ∗55) before it attempts to send a message to
the second destination. Entering ”0” sends redundant reports to both Primary Dialer and LRR.
UL Installations: For Fire Alarm and UL Burglar Alarm installations without Line Security (Grade A),
the maximum Dynamic Signaling Delay must be no more than 15 seconds.
For UL Burglar Alarm installations with Line Security (Grade AA), Dynamic Signaling Delay must be
“0”. The reports will be sent to both the dialer and the LRR.
4-3


