


26678 Rev H 8 02-02
GBI25 SERIES B-VENT GAS FIRED FIREPLACE INSERT
b. Installation of Appliance
1) The appliance should be set on a level
surface. Located on the bottom pan of the
appliance are two 5/16-18 nuts. Bolts
(provided) may be used for leveling purposes.
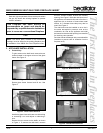
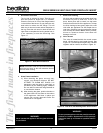
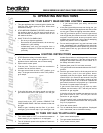
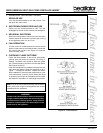
2) Place appliance on hearth and slide the
appliance into the fireplace. Position the draft
tube in the hold located on the back. Reach
through the exhaust hole and grab the draft
hood. See Figure 7. Continue to slide
appliance back until draft hood is in position.
Reinstall four screws around the exhaust
hole.
Figure 7
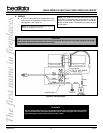
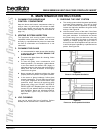
3) Place the flex line through the gas line access
hole on the right side and connect it to the
manual shutoff valve. Turn on the gas and
check for leaks with a soap and water
solution or a gas leak detector. If a leak is
detected, tighten the fitting and recheck all
joints.
Reinstall the baffle with two screws.
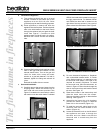
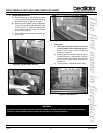
c. Surround Installation
1) Carefully remove the surround parts from the
shipping carton. Attach the surround top to
each side with two screws provided. See
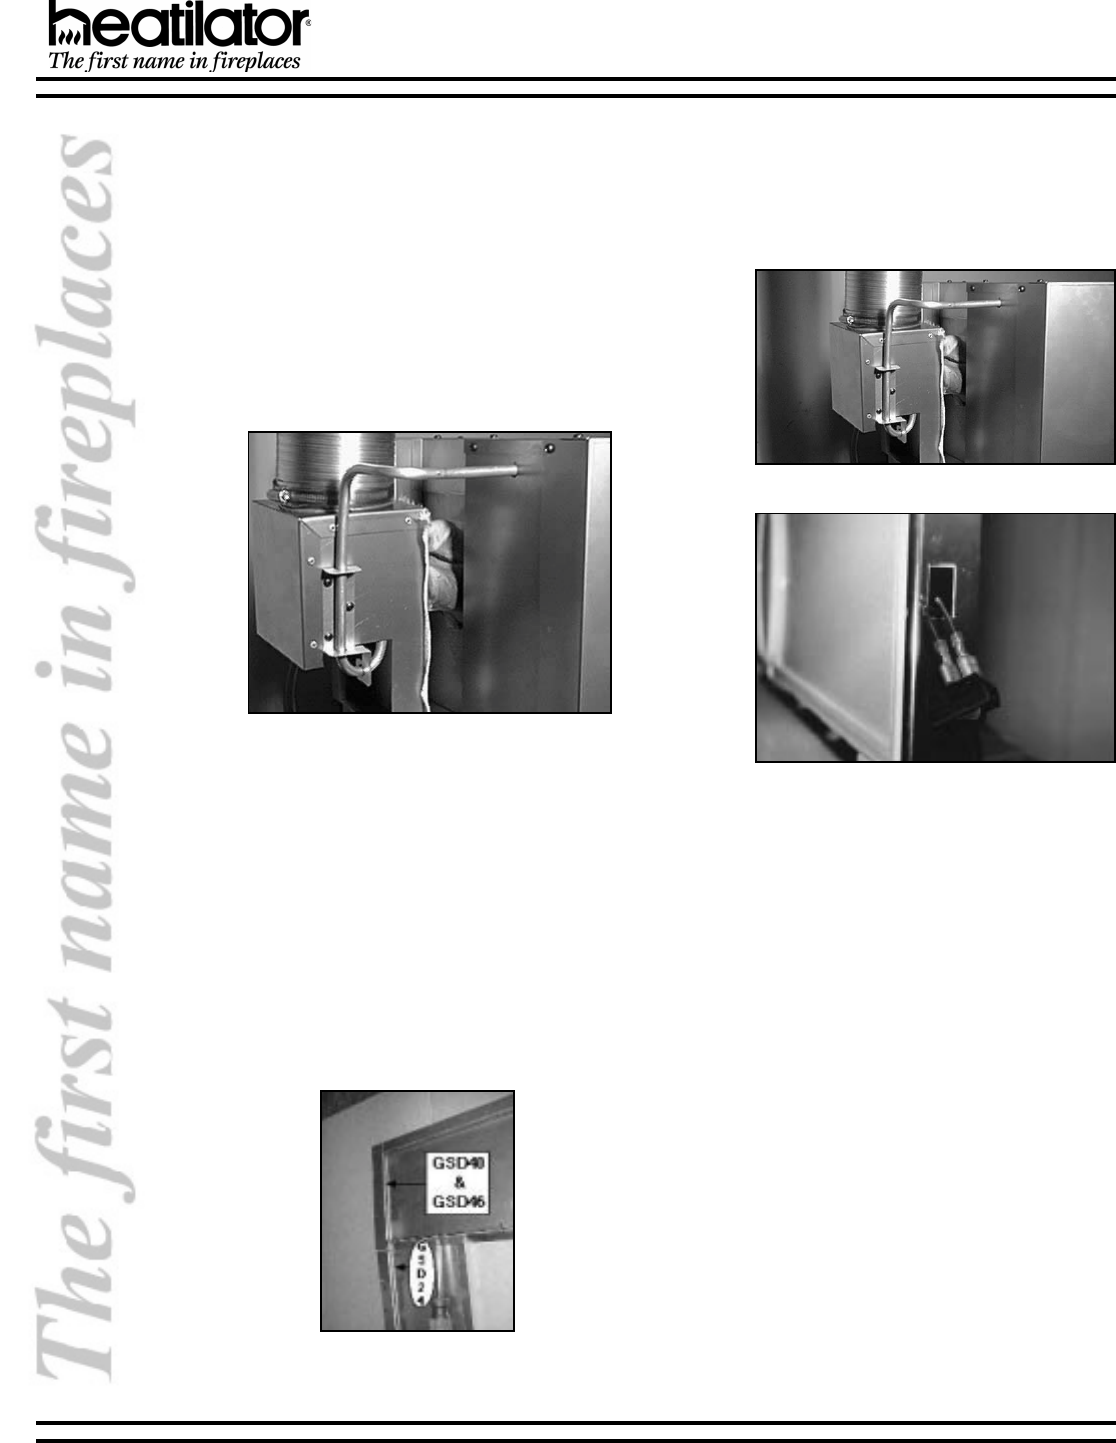
Figure 8. Located on the surrounds is a bend
tab used to cover the switch leads. For Model
GSD24, the bend tab is located on the top of
the right surround side. For Models GSD40
and GSD46 the bend tab is located on the
right side of the top surround. Use a pair of
pliers to bend the tab forward. See Figure 8.
Figure 9 - Installation of Surround Hood
Figure 10 - Installation of Surround Hood
Figure 8 - Attach Surround Top
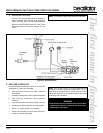
2) For zero clearance fireplaces or fireplaces
with combustible material within 12 inches
of the firebox opening, it is required to use
the surround hood (black). This hood is not
required for masonry fireplaces. To install
the surround hood, bend the tabs down, as
shown in Figure 9. Place the tab through the
slots in the surround top and bend the small
tab over. See Figure 10.
3) Place three screws in the surround top and
slide the brass hood over the screws.
Remove the plastic coating on brass before
securing. See Figure 11.
4) Assemble the brass trim with brackets
provided, as shown in Figure 12. Slide the
brass trim on the surround (Figure 13).
5) To install the surround, place hooks on the
surround side into slots located on the
column (Figure 14).
6) Locate the electrical cord on the left side of
the appliance and route it through the
surround and trim. Make sure that the
electircal cord is routed away from the
appliance.