DVR Settings
Model 4800 User's Manual
34
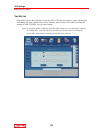
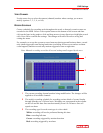
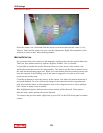
Yellow: recording triggered by an alarm or motion detection.
Select a color option button before highlighting time cells. Click on the hour in the graph
or click and drag an area in any direction to highlight several cells. Press OK to confirm
the settings. The changes will take effect after saving and exiting the menu.
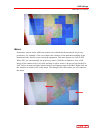
Note: For motion detection recording, set both the motion detection sensitivity and
zone. See the Motion Detection Settings section below for details. For alarm
recording and alarm triggering settings, see the Event Handling section.
RECORD QUALITY
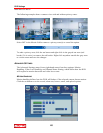
Select the quality level for recording audio/video. The options are:
Best (768 kbps)
High (640 kbps)
Mid (512 kbps)
Low (384 kbps)
Custom (user defined)
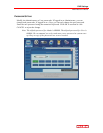
For the user defined option, click the >> button to access a numeric keypad. Enter the
record quality value (kBit/s). Click OK to accept the changes or click CLEAR to reset the
values.
RECORD FRAME RATE
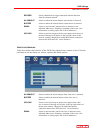
Choose the recording frame rate (fps – frames per second). The lower the value, the less
life-like and more jerky the recorded movements will be. However, a lower frame rate uses
less HDD space. Make your choice depending on the precision with which you want to
follow the events being recorded.
The options are: Full (30/25 fps depending on whether it is NTSC/PAL), 15 fps, 7 fps,
3 fps, 1 fps, or custom (user defined).
To enter a specific record frame rate, click the >> button to access a dialog box and enter
the desired value using the numeric keypad. Click OK to accept the change or click
CLEAR to reset the entered values.
Note: Since the maximum value for the frame rate is either 30 or 25 fps depending
on the encoding system, your choice must be within the limits of 1 to 30/25 fps.
If you enter a higher value, the resulting frame rate will reset automatically to
the maximum allowed value.


